















7MMGDC300DW1 Maytag Dryer - Instructions
Keep searches simple. Use keywords, e.g. "leaking", "pump", "broken" or "fit".
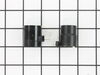
Dryer would start and heat, but after 1st cycle the burner would not fire and a buzzing sound was coming from the gas valve solenoid area. Igniter and other functions worked fine.
Removed front of dryer, unplugged each coil to determine where buzzing was coming from.....determined it was the boosting coil....ordered part and replaced. Dryer works great....we think it had be going bad over time because drying times have noticeable decreased.
Parts Used:
-
David from Bedford, IN
-
Difficulty Level:Easy
-
Total Repair Time:15 - 30 mins
-
Tools:Screw drivers, Wrench (Adjustable)
32 of 38 people
found this instruction helpful.
Was this instruction helpful to you?
Thank you for voting!
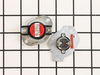
Dryer motor runs,drum turns but no heat.
Removed the back of the dryer. Used a multimeter set to read Ohms to check each Thermal cut-off switch. Each one read with continuity and some resistance. The one that was bad read open. So i replaced this one and the other one that came in the kit since i already paid for both.Then i replaced the back ran the dryer and it worked great.
Parts Used:
-
Arron from El Reno, OK
-
Difficulty Level:Easy
-
Total Repair Time:15 - 30 mins
-
Tools:Pliers, Screw drivers
30 of 33 people
found this instruction helpful.
Was this instruction helpful to you?
Thank you for voting!
dryer would not continuously heat, and took several cycles to dry clothes. The flame would ignite and heat the dryer at first, but then would ignite and go out quickly for the rest of the cycle. I tried the thermostats first with no luck.
I first ordered the coils from a different web site and they sent the wrong ones. The job would have been much eaiser if i had just returned and ordered from here. Instead i cut wires and tried the others but since they were worng, it did not work. I didn't label the wires so it was a puzzle to put it back together. Once i had the wires connected properly it was a simple fix. You just open the top and take the front pannel off, remove the drum and it is right there at the bottom. Two screws take the cover off of the coils and they slide off the gas valve. Slide the new ones on and replace the cover. Put the front pannel back on, close the top and its good to go. I first tried the highlimit thermostat, and termostat with no luck. The flame would light when it was cold, but once warmed up, the flame would ignite and immediatly go out. The coils did the trick.
Parts Used:
-
Ryan from Livonia, MI
-
Difficulty Level:A Bit Difficult
-
Total Repair Time:15 - 30 mins
-
Tools:Nutdriver, Pliers, Screw drivers
31 of 36 people
found this instruction helpful.
Was this instruction helpful to you?
Thank you for voting!
My dryer only heats up at the beginning of cycle so my clothes will not dry.
I remove the front control panel and to get to the bottom front dryer door off. Using my volt meter i checked all the sensors and thermal. I surf the internet for hint and some one mention to replace the coil since some time you could have one goes out and the other working still. After i replaced the coil kit it works like a champ.
Parts Used:
-
Monique from Mission Viejo, CA
-
Difficulty Level:A Bit Difficult
-
Total Repair Time:30 - 60 mins
-
Tools:Nutdriver, Screw drivers, Socket set
31 of 39 people
found this instruction helpful.
Was this instruction helpful to you?
Thank you for voting!
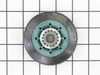
A high pitched squeal when drum was rolling.
First my son and I moved the dryer to the garage as we believed there would be a lot of lint possible during disassembly. Used a flat head screwdriver to pop the top from dryer housing. Then removing 2 nuts to facilitate the removal of the front of the dryer. The drum was able to be removed to diagnose the offending drum roller wheel. The drum roller wheel has experienced a failure as it had melted off of the metal spacer. Removing it and replacing with the new one was pretty easy. We then used a shop vac and an air hose to clean out all the lint, coins, paper clips and lost jewelry. Surprisingly there was not a single sock in there. Put it all back together in reverse order and plugged it in and now spins like a dream.
Parts Used:
-
Robert from GOODRICH, TX
-
Difficulty Level:Easy
-
Total Repair Time:30 - 60 mins
-
Tools:Nutdriver, Pliers, Screw drivers, Socket set
28 of 30 people
found this instruction helpful.
Was this instruction helpful to you?
Thank you for voting!
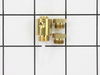
cocverting natural gas to propane gas
removed burner installed propane orfice and kit as per instruction sheet.
Parts Used:
-
Billy from Maryville, TN
-
Difficulty Level:Really Easy
-
Total Repair Time:30 - 60 mins
-
Tools:Nutdriver, Screw drivers, Wrench set
43 of 76 people
found this instruction helpful.
Was this instruction helpful to you?
Thank you for voting!
old lint screen -torn at wire mesh
Local stores did not have any in supply. Went to Partselect and located lint screen, ordered, received in 3 days. replaced screen, Wife now happy again...
Parts Used:
-
Chris from Morgan City, LA
-
Difficulty Level:Really Easy
-
Total Repair Time:Less than 15 mins
27 of 28 people
found this instruction helpful.
Was this instruction helpful to you?
Thank you for voting!
no heat
the ignitor did not glow red checked thermal fuse by exhaust duct. fuse open replaced thermal fuse
Parts Used:
-
rex from streator, IL
-
Difficulty Level:Really Easy
-
Total Repair Time:15 - 30 mins
-
Tools:Nutdriver, Wrench (Adjustable)
31 of 40 people
found this instruction helpful.
Was this instruction helpful to you?
Thank you for voting!
Dyer drum doesnt turn
It was really quite esy remove the screws from the back and pop the top off . then remove 2 top inside screws from the front , lift the front off the sides , support the drum and lift out , you will then see the idler wheels, replace them with the new ones ,replce the tensioner , wrap the belt around the drum, need help putting the drum back in the case, have someone hold the drum in place while you lay on the ground and put the belt around the motor pulley and the tensioner on the bottom.you then put the front panel back into place and secure with the 2 inside screws, then put the rest back together in reverse oder. ... hope this helps someone
Parts Used:
-
Shawn from Akron, OH
-
Difficulty Level:Really Easy
-
Total Repair Time:15 - 30 mins
-
Tools:Nutdriver, Pliers, Screw drivers
27 of 29 people
found this instruction helpful.
Was this instruction helpful to you?
Thank you for voting!
Dryer would dry for 5-10 minuets then no heat
I tested the dryer coils and found that they were getting a voltage but would not open the gas valve. Coils were not bad but weak. After they warmed up they would not open the gas valve. It took 10 min to repace both coils and the heat sensor.
Parts Used:
-
Richard from Jerome, MI
-
Difficulty Level:Easy
-
Total Repair Time:Less than 15 mins
-
Tools:Screw drivers, Socket set
35 of 55 people
found this instruction helpful.
Was this instruction helpful to you?
Thank you for voting!
had to replace the motor
Follow the advice given in the partsselect website. However, while removing the blower, my hand slipped into the housing and cut my thumb. Connected the wires to the junction box on the motor but didn't realize that the contacts would hit the drum when reinstalled. The original junction box was at a 90 degree rotation relative to the new box. When trying to test the breaker tripped. Using the multitester I found out that I burned out the thermal fuse, and froze the door switch. I replace both those parts and started the dryer and could hear a grinding sound. Inspection revealed that the housing of the motor was rubbing against the drum. Removing the drum yet again, I rotated the housing and replaced the drum. The dryer was finally working well.
Parts Used:
-
charles from parker, CO
-
Difficulty Level:A Bit Difficult
-
Total Repair Time:More than 2 hours
-
Tools:Nutdriver, Screw drivers
31 of 43 people
found this instruction helpful.
Was this instruction helpful to you?
Thank you for voting!
Dryer would not heat up.
I unplugged the dryer,removed the two small screws on the front of the dryer and pulled the bottom forward. The two wires connected to the door do not have to be removed. With an electrical tester using the Ohm setting I tested the Radiant sensor and the Gas Valve coils. The two terminal coil was DOA. The dryer can be operated with the front open as long as the door wires are connected. Symptons: The igniter would heat up and not release gas. My repair was successfull due to this awesome website and the super fast shipping service. AAAA++++
Parts Used:
-
Roger from Bonners Ferry, ID
-
Difficulty Level:Really Easy
-
Total Repair Time:Less than 15 mins
-
Tools:Nutdriver, Screw drivers
26 of 30 people
found this instruction helpful.
Was this instruction helpful to you?
Thank you for voting!
Drayer Was Making Squeaking Sound
Took off the top and front panel. Found that the belt tensioner was worn out. Decided to pull drum out,and replace the belt and drum rollers also. Put it back together, and it works fine.
Parts Used:
-
Charles from Gray, TN
-
Difficulty Level:Easy
-
Total Repair Time:1- 2 hours
-
Tools:Nutdriver, Pliers, Screw drivers
26 of 30 people
found this instruction helpful.
Was this instruction helpful to you?
Thank you for voting!
noisy drum
the job would have gone faster if the right parts had been sent in the first place. I would have never paid for two day shipping. In the repair, I removed the rear panel, clipped the plastic triangle holding the bearing, installed the new bearing and new clip.
Parts Used:
-
Jeff from Mesa, AZ
-
Difficulty Level:A Bit Difficult
-
Total Repair Time:30 - 60 mins
-
Tools:Nutdriver, Screw drivers, Wrench (Adjustable), Wrench set
29 of 40 people
found this instruction helpful.
Was this instruction helpful to you?
Thank you for voting!
Convert gas dryer to Propane
Received conversion kit. Removed front dryer panel,2 screws. Removed burner tube, 2 screws then removed natural gas orfice.
Installed propane orfice and repalced burner tube.
Removed regulater plug and replaced with new plug from kit using 90 degree ratchet screw driver. Approximately 20 minutes. Dryer working great.
Installed propane orfice and repalced burner tube.
Removed regulater plug and replaced with new plug from kit using 90 degree ratchet screw driver. Approximately 20 minutes. Dryer working great.
Parts Used:
-
Leonard from Lemitar, NM
-
Difficulty Level:Easy
-
Total Repair Time:15 - 30 mins
-
Tools:Nutdriver, Socket set
25 of 30 people
found this instruction helpful.
Was this instruction helpful to you?
Thank you for voting!