















79074139314 Kenmore Range - Instructions
Keep searches simple. Use keywords, e.g. "leaking", "pump", "broken" or "fit".
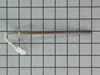
Oven would not reach temperature or it would finally reach temp but would not stay warm.
Pulled oven away from cabinet area
Unplugged oven from wall outlet
Removed screws to free top panel from back of oven
Removed screws to free lower panel from back of oven
Probe backing was now exposed
Unplugged probe from connector
Removed one screw from probe housing
Twisted probe housing counterclockwise then pulled probe out
Reversed the process to install probe
Plugged probe into connector
Reversed the panel removal process
Plugged oven back in to wall outlet
Turned on oven and tested with no further issue
Unplugged oven from wall outlet
Removed screws to free top panel from back of oven
Removed screws to free lower panel from back of oven
Probe backing was now exposed
Unplugged probe from connector
Removed one screw from probe housing
Twisted probe housing counterclockwise then pulled probe out
Reversed the process to install probe
Plugged probe into connector
Reversed the panel removal process
Plugged oven back in to wall outlet
Turned on oven and tested with no further issue
Parts Used:
-
Craig from FAYETTEVILLE, NY
-
Difficulty Level:Really Easy
-
Total Repair Time:Less than 15 mins
-
Tools:Screw drivers
1 of 2 people
found this instruction helpful.
Was this instruction helpful to you?
Thank you for voting!
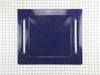
Oven bottom panel
Unscrewed old panel/removed and inserting new panel and used same 2 screws to secure in place.
Parts Used:
-
Maria from NEW ORLEANS, LA
-
Difficulty Level:Very Easy
-
Total Repair Time:Less than 15 mins
-
Tools:Screw drivers
1 of 2 people
found this instruction helpful.
Was this instruction helpful to you?
Thank you for voting!
I had a F31 code which means oven isn't working
Called fridgidaire and they told me the a F31 code means my temperature sensor is not working.
So I ordered one online. I installed it and I still have F31 code and still won't work. So what now? Do I trust them to tell me another part?
So I ordered one online. I installed it and I still have F31 code and still won't work. So what now? Do I trust them to tell me another part?
Parts Used:
-
Terry from CHELSEA, OK
-
Difficulty Level:Really Easy
-
Total Repair Time:Less than 15 mins
-
Tools:Nutdriver
1 of 3 people
found this instruction helpful.
Was this instruction helpful to you?
Thank you for voting!
light bilb went out

-
Denise from Landover, MD
-
Difficulty Level:Really Easy
-
Total Repair Time:Less than 15 mins
2 of 6 people
found this instruction helpful.
Was this instruction helpful to you?
Thank you for voting!
BAD LIGHT SOCKET
-
James from KENSINGTON, OH
-
Difficulty Level:Very Easy
-
Total Repair Time:Less than 15 mins
-
Tools:Nutdriver
1 of 5 people
found this instruction helpful.
Was this instruction helpful to you?
Thank you for voting!
replace lower oven floor
removded 2 screws at rear of panel, moved panel toward rear of oven, lifted up and out. Slid in new panel in front groove then lowered onto oven floor and secured it with the 2 screws at rear of oven.
Parts Used:
-
ed from petaluma, CA
-
Difficulty Level:Really Easy
-
Total Repair Time:Less than 15 mins
-
Tools:Screw drivers
Was this instruction helpful to you?
Thank you for voting!
Men Should Not Use The Oven
Delivery was fast. Two screws to remove the old oven panel. Slipped in the new panel and tightened the screws with my fingers. Job completed. It was as easy as that.
Parts Used:
-
David from Suttons Bay, MI
-
Difficulty Level:Really Easy
-
Total Repair Time:Less than 15 mins
Was this instruction helpful to you?
Thank you for voting!
Broken oven door glass
I followed directions for replacement of the glass from the web. Replacement was simple and easy.
Parts Used:

-
Joseph from Cranberry township, PA
-
Difficulty Level:Easy
-
Total Repair Time:30 - 60 mins
-
Tools:Nutdriver, Screw drivers
Was this instruction helpful to you?
Thank you for voting!
inner glass uncleanable
Took door apart, went online to partselect, ordered new glass, and put it back together. Oven looks like new. Makes sense to order the isolation as well when you do the repair
Parts Used:
-
Krista from Newtown, CT
-
Difficulty Level:Easy
-
Total Repair Time:15 - 30 mins
-
Tools:Screw drivers
Was this instruction helpful to you?
Thank you for voting!
Aluminium foil fused to the panel
I removed the two back screws, slid out the old panel, then fitted in the new panel (it fit perfectly) and replaced the screws. Five minutes, tops.
Parts Used:
-
James from Durham, NC
-
Difficulty Level:Really Easy
-
Total Repair Time:Less than 15 mins
-
Tools:Screw drivers
Was this instruction helpful to you?
Thank you for voting!
Sliced Outlet Cord
I was replacing a range oven hood, so I pulled the oven away from the wall but left it plugged in. I removed the old oven hood, which had an exhaust pipe that was still mounted through the cupboard. While I was preparing the new oven hood the exhaust pipe fell out of the cupboard and cut the oven wire in half. I was able to find the part number on the existing cord and looked up on line. I ordered the part using 3-5 business days and it showed up in 2 days. I was able to attach the new cord, which had an easy clip plug, and secure back to the stove. Very easy and very inexpensive to do.
Parts Used:

-
William from Saint Clair Shores, MI
-
Difficulty Level:Really Easy
-
Total Repair Time:Less than 15 mins
-
Tools:Screw drivers
Was this instruction helpful to you?
Thank you for voting!
inner oven door glass broken
I was unable to loosen the screws myself so I called my friends husband to help me. We watched the video together and followed the instructions. The door in the video was a bit different than mine but this repair was easy.
Parts Used:
-
Cheryl from Derby, NY
-
Difficulty Level:Really Easy
-
Total Repair Time:30 - 60 mins
-
Tools:Screw drivers
Was this instruction helpful to you?
Thank you for voting!
Cracked inner oven door
-
Steve from Hollypond, AL
-
Difficulty Level:Easy
-
Total Repair Time:More than 2 hours
-
Tools:Pliers, Screw drivers
Was this instruction helpful to you?
Thank you for voting!
Cracked inside glass
I actually watched Youtube while I was changing it. This video was not actually the same make up of my oven, even though the I typed in the model number. I manage to figure it any with the steps anyway. It was harder then I expected but not horrible. I think I did pretty well for a women. Patti
Parts Used:
-
patti from Greer, SC
-
Difficulty Level:A Bit Difficult
-
Total Repair Time:1- 2 hours
-
Tools:Screw drivers
Was this instruction helpful to you?
Thank you for voting!
Oven not heating up properly
I removed back cover and replaced the probe. The troubleshooting info indicated this is the problem 99% of the time. Guess what, it did not help! Further checks indicate that broil element may be out. Am going to resistance check and order if that is the problem.
Parts Used:
-
Larry from Jordan, AR
-
Difficulty Level:Really Easy
-
Total Repair Time:Less than 15 mins
-
Tools:Nutdriver
Was this instruction helpful to you?
Thank you for voting!