


7540 - Overview
Models starting with 7540
Click on the best match to narrow your results.
- 7540 (Type 4) Porter Cable Electric Drill (Screwdriver)
- 7540 (Type 2) Porter Cable Electric Drill (Screwdriver)
- 7540 (5492) Braun Shaver Razor (() Syncro)
- 7540 (Type 1) Porter Cable Electric Drill (Screwdriver)
- 7540 (Type 3) Porter Cable Electric Drill (Screwdriver)
- 7540 Pflueger Spinning Reels (Contender Spinning Reel)
- 754016 Jet Brake & Press (Hn-16n Bench Hand Notcher)
- 754017 Jet Tool Stand & Cart (Stand For Hn-16n Hand Notcher)
- 754022 Jet Workbench (Rm-22n Bench Rotary Machine)
- 754024 Jet Tool Stand & Cart (Floor Stand For Bench Model Metal Forming Machines)
- 754026 Jet Workbench (22 Gauge, 36 Inch Capacity Slip Roll Bech (Metalworking))
- 754028 Jet Workbench (50 Inch Electrical Power Slip Roll)
- 754028-ESR-1650 Jet Metal Work & Weld (754028esr-1650 Rotary Machine Parts)
- 754029 Jet Workbench (J-1650esr 50 Inch Single Phase Electric Slip Roll)
- 754030 Jet Tool Stand & Cart (Stand For 30" Shear, Brake, Roll)
- 754031-SBR-30N Jet Miscellaneous (754031sbr-30n Slip Roll Machine Parts)
- 754036 Jet Tool Stand & Cart (Stand For 36" Slip Roll)
- 754040 Jet Tool Stand & Cart (Stand For 40" Shear, Brake Roll)
- 754041-SBR-40N Jet Miscellaneous (754041sbr-40n Shear Brake And Roll Parts)
- 754050 Jet Workbench (16 Gauge, 50 Inch Capacity Bench Slip Roll (Metalworking))
- 7540A (REV C) Norge Dryer (ELECTRIC DRYER)
- 7540A Norge Dryer (ELECTRIC DRYER)
- 7540A (REV B) Norge Dryer (ELECTRIC DRYER)
- 7540A (REV A) Norge Dryer (ELECTRIC DRYER)
- 7540A (REV D) Norge Dryer (ELECTRIC DRYER)
- 7540A REV A Norge Dryer (Norge Dryer Model 7540A REV A (7540AREVA) Parts)
- 7540A REV B Norge Dryer (Norge Dryer Model 7540A REV B (7540AREVB) Parts)
- 7540A REV C Norge Dryer (Norge Dryer Model 7540A REV C (7540AREVC) Parts)
- 7540A REV D Norge Dryer (Norge Dryer Model 7540A REV D (7540AREVD) Parts)
Keep searches simple, eg. "belt" or "pump".

Multi Rib Belt - 92-1/4"
PartSelect #: PS346995
Manufacturer #: 341241
This dryer drum belt (Whirlpool Dryer Belt, Drive Belt) has four ridges, three grooves and is 1/4" wide, and 92 1/4 inches in length. It comes in black and is made of rubber. The belt transfers the ro...
$14.65
In Stock

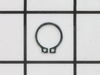
Dryer Retaining Ring
PartSelect #: PS11746909
Manufacturer #: WP9703438
This part is a retaining ring, sometimes called a retaining clip, that holds the drum support roller onto the shaft of a dryer. It is made entirely of metal and measures less than an inch in diameter....
$6.25
In Stock

Lint Filter
PartSelect #: PS11742807
Manufacturer #: WP53-0918
This is an OEM lint filter for a dryer. This lint filter screen has two side guides on either of the screen. One measures 3/8 of an inch wide, while the other measures 5/8 of an inch wide. This part i...
$50.42
In Stock

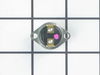
High Limit Kit
PartSelect #: PS2162282
Manufacturer #: LA-1053
The high limit kit comes with three separate thermal fuses for dryers. One electric thermal fuse with a limit of 258, one gas high limit at 240, and one gas and electric high limit thermostat with a l...
$43.21
In Stock

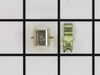
Dryer Door Catch Kit
PartSelect #: PS2162263
Manufacturer #: LA-1003
This door catch kit is designed for use in dryers. This is an authentic OEM replacement part. This catch assembly ensures the door of your appliance will close, and remain closed. It allows your appli...
$25.15
In Stock

Heating Element Kit - 240V 4750W
PartSelect #: PS2162280
Manufacturer #: LA-1044
This dryer heating element kit is 240 volts and 4750 watts. The function of the heating element is to produce the heat that allows you to dry your clothing during your dryer cycle. If your clothes tak...
$48.36
In Stock

Dryer Screw
PartSelect #: PS11746840
Manufacturer #: WP90767
This screw is sold individually.
$7.30
In Stock

Blower Wheel Clamp
PartSelect #: PS11740752
Manufacturer #: WP312967
This blower wheel clamp, used in a clothes dryer, is a clamp that holds the blower wheel to the motor shaft. This part helps hold the blower wheel in place to function easily and properly. If your clo...
$11.50
In Stock

Rear Drum Support Roller Kit
PartSelect #: PS2162268
Manufacturer #: LA-1008
The rear dryer drum roller functions by holding the drum in place while the drum rotates on support wheels during the drying spin/tumble cycle. Included in this rear drum support roller kit are four s...
No Longer Available

Screw
PartSelect #: PS11742755
Manufacturer #: WP489483
This screw is sold individually.
$11.50
In Stock

Range Screw
PartSelect #: PS11740978
Manufacturer #: WP3196164
This screw is sold individually.
$7.30
In Stock

Door Seal
PartSelect #: PS11740719
Manufacturer #: WP31001529
If this part appears to be too wide for your particular appliance, per the manufacturer, all you have to do is pull it apart.
$75.43
Special Order
Exact Part matches for your search term
[Viewing 4 of 4]
Flavorizer Set Ss Genesis E/s
This part number matches the current model number 7540
PartSelect #: PS10511757
Manufacturer #: 7540
$211.88
In Stock

Foot
This part number matches the current model number 7540
PartSelect #: PS12281554
Manufacturer #: 7540
No Longer Available
Compressor Id:
This part number matches the current model number 7540
PartSelect #: PS18315182
Manufacturer #: 7540
No Longer Available
WASHER
This part number matches the current model number 7540
PartSelect #: PS19138506
Manufacturer #: JT9-7540
$23.18
Special Order
Common Symptoms of models starting with 7540
[Viewing 12 of 12]Noisy
Fixed by
these parts
these parts

Show All
Drum Not Spinning
Fixed by
these parts
these parts
Show All
Door won’t close
Fixed by
these parts
these parts
Show All
Won’t Start
Fixed by
these parts
these parts

Show All
Not Heating
Fixed by
these parts
these parts

Show All
Too hot
Fixed by
these parts
these parts
Show All
Heat stays on after drum has stopped
Fixed by
these parts
these parts
Show All
Door Pops Open
Fixed by
these parts
these parts
Show All
Door latch failure
Fixed by
these parts
these parts
Show All
Will Not Start
Fixed by
these parts
these parts
Show All
Will not agitate
Fixed by
these parts
these parts
Show All
Touchpad does not respond
Fixed by
these parts
these parts
Show All


Keep searches simple. Use keywords, e.g. "leaking", "pump", "broken" or "fit".
lint filter broke
I pulled out the broken lint filter and put the new one back in, real easy. I am so happy with the prompt delivery I got from PartsSelect.com. I ordered on a Monday and and it was delivered on a Wednesday
Parts Used:
-
Jane from Grand Forks, ND
-
Difficulty Level:Really Easy
-
Total Repair Time:Less than 15 mins
484 of 497 people
found this instruction helpful.
Was this instruction helpful to you?
Thank you for voting!
Electric dryer would not heat - Thermal fuses - $25 fix - I love DIY
1. Unplug dryer from power outlet
2. Lift dryer top from front (hinged in rear). Just friction holding top down. Use flat scewdriver wrapped in cloth to help lift.
3. Locate heating element - rear top behind drum
4. Unplug red wires to the high limit thermal fuse
5. Unplug red wires to the heating element
6. Unlug ... Read more white wires to the high limit fuse
7. Remove high limit thermal fuse
8. Remove heating element
9. Remove high limit fuse
10 Clean heating box
Installation is reverse order but do the following first!
Clean lint trap - Remove front of dryer
1. Unplug white door switch wires. inside front top right
2. remove two screws securing the front of dryer - inside front top left and top right. Front of dryer is hinged at bottom
3. Clean all the lint you can find. If you have never cleaned out the lint, there might be a lot and the cause of over heating (shorting fuse life). Add to your yearly things to do list.
4. While your at it check the alignment of the plastic glides the drum sits on.
5. Also check the foam gasket between the fan housing and lint trap. Mine was off a bit. Realigned with doubled sided tape.
Read less
Parts Used:
-
Ronald from Fredericksburg, VA
-
Difficulty Level:Easy
-
Total Repair Time:30 - 60 mins
-
Tools:Nutdriver, Pliers, Screw drivers
218 of 239 people
found this instruction helpful.
Was this instruction helpful to you?
Thank you for voting!
Dry stopped heating - still had good air flow
I was about to purchase a new dryer because of the age of my dryer and not wanting to hire someone to fix it. After a little web research, I saw several do-it -yourself stories indicating this was a very easy repair.
This was an extremely easy repair and it save me lots of $$:
(1) Disconnected power
(2) Opened the ... Read more top of the dryer
(3) Disconnected wires to temperature sensor.
(4) Used a 1/2" socket wrench with extension and a drill to remove 2 screws holding down the temperature sensor
(5) Removed 1 screw holding down the heating element.
(6) Removed wires connected to heating element and pulled out old element.
(7) Reassembled new element.
(8) Turned on empty dryer for 30 minutes to burn off smell from the new element.
Worked like a charm!
Read less
Parts Used:
-
Brianna from Littleton, CO
-
Difficulty Level:Really Easy
-
Total Repair Time:Less than 15 mins
-
Tools:Socket set
211 of 241 people
found this instruction helpful.
Was this instruction helpful to you?
Thank you for voting!