















6GD5SHGXSS09 Whirlpool Refrigerator - Instructions
Keep searches simple. Use keywords, e.g. "leaking", "pump", "broken" or "fit".
The brackets that held the meat draw had broken from our nephew pulling down on it.
The most time consuming part was clearing off the old shelf and opening the boxes.
Placed the new shelf in place put in the old draw and that was it.
Placed the new shelf in place put in the old draw and that was it.
Parts Used:

-
MARY from ERIE, PA
-
Difficulty Level:Really Easy
-
Total Repair Time:30 - 60 mins
4 of 6 people
found this instruction helpful.
Was this instruction helpful to you?
Thank you for voting!
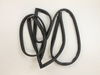
door would not close automatically and replaced torn gasket.
removed door took out single bolt pried out cam put new one in returned bolt rehung door. 15 minutes
pulled old gasket out cleaned area where gasket was and lube edge of new gasket with vaseline starting at top slide gasket in then sides last was bottom which was hardest. 20 minutes
pulled old gasket out cleaned area where gasket was and lube edge of new gasket with vaseline starting at top slide gasket in then sides last was bottom which was hardest. 20 minutes
Parts Used:

-
JOHN from DALLAS, TX
-
Difficulty Level:Really Easy
-
Total Repair Time:15 - 30 mins
-
Tools:Screw drivers, Wrench set
3 of 3 people
found this instruction helpful.
Was this instruction helpful to you?
Thank you for voting!
Ice bucket cracked and pieces broke off the bottom
I followed the video exactly, pausing it as I went along. So unbelievably easy! And I’m 78 year old great -grandma! Thank you
Parts Used:

-
Elizabeth from SANDY, UT
-
Difficulty Level:Really Easy
-
Total Repair Time:15 - 30 mins
-
Tools:Screw drivers
4 of 6 people
found this instruction helpful.
Was this instruction helpful to you?
Thank you for voting!
Ice Bin Auger Drum was broken.
First, I removed the 6 screws which hold the ice bin to the drum and the front cover. I then removed the screw which holds the door lever and bracket to the ice bin. Then I took the C clip and washer off the end of the auger to remove it from the housing. I removed the plastic nut to remove the auger drum from the auger shaft, being careful to place the blades on the table in the order they were removed. I then installed the new auger drum on the shaft and re-assembled everything in the reverse order. This was really easy for me because I had replaced the auger previously. (about 2 years ago)
Parts Used:

-
Charles from Liberty hill, TX
-
Difficulty Level:Really Easy
-
Total Repair Time:15 - 30 mins
-
Tools:Socket set, Wrench (Adjustable)
3 of 4 people
found this instruction helpful.
Was this instruction helpful to you?
Thank you for voting!
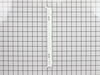
Meat drawer tracks(2) broken on ends
Ordered and received parts. Removed drawer and shelf unit. Removed the glass from top of shelf. Each track(2) slides out of slots on each of the metal shelf brackets. Slid old tracks out of each shelf bracket. Had to use small screwdriver to push down plastic tab that locks track before it would slide all the way out. Each new track had a small tab on each end, which would not let them slide into the slots on the metal shelf brackets. Used a small saw (could also use a file) to remove the 2 tabs on each track. Slid the new tracks onto metal shelf brackets, reinstalled shelf unit, glass top and drawer. Took about 40 minutes.
Parts Used:
-
CHRIS from BAYTOWN, TX
-
Difficulty Level:Easy
-
Total Repair Time:30 - 60 mins
-
Tools:Screw drivers
3 of 4 people
found this instruction helpful.
Was this instruction helpful to you?
Thank you for voting!
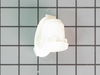
One of the light bulbs went out on my Whirlpool refrigerator.
I changed the bulb but it still didn’t work. I ordered a bulb holder and replaced it and it works properly now. It was an easy repair, remove the bulb, gently pry the bulb holder out with a screwdriver and snap the new one in.
It was useful that under the description of the part in the catalog, it showed that this part was often used to repair this issue. The service was great and the delivery was fast.
It was useful that under the description of the part in the catalog, it showed that this part was often used to repair this issue. The service was great and the delivery was fast.
Parts Used:
-
Brian from LAKE CHARLES, LA
-
Difficulty Level:Very Easy
-
Total Repair Time:Less than 15 mins
-
Tools:Screw drivers
3 of 4 people
found this instruction helpful.
Was this instruction helpful to you?
Thank you for voting!
Removed the ice maker/ Added a new shelf
Well - I simply snapped the new shelf into place and vwah la - I have an extra shelf now in our very crowded freezer! Hurray!!!! Super easy.
Parts Used:

-
David from Concord, VT
-
Difficulty Level:Really Easy
-
Total Repair Time:Less than 15 mins
9 of 22 people
found this instruction helpful.
Was this instruction helpful to you?
Thank you for voting!
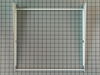
Had extra shelf but needed shelf frame
Super easy fix. Inserted shelf in to the shelf frame. Attached frame to refrigerator mounting bracket . Done in less than 5 minutes.
Parts Used:
-
Edd from Oklahoma City, OK
-
Difficulty Level:Really Easy
-
Total Repair Time:Less than 15 mins
3 of 4 people
found this instruction helpful.
Was this instruction helpful to you?
Thank you for voting!
Refrigerator door on a side by side unit would not stay closed.
First empty the shelves on the refrig. door. Then removed the upper hing cover and removed the three screws holding the hinge to the body of the refrigerator. Lifted the door off the bottom hinge and placed it clear of the unit.
Inspected the bottom hinge and cleaned off the screw holding the closing cam, then with a nutdriver removed the screw holding the cam and removed the cam from the hinge. Installed a new cam closer, secured the cam with a screw. Hanged the door back on the lower hinge and re-installed the upper hinge. Job Complete!
Inspected the bottom hinge and cleaned off the screw holding the closing cam, then with a nutdriver removed the screw holding the cam and removed the cam from the hinge. Installed a new cam closer, secured the cam with a screw. Hanged the door back on the lower hinge and re-installed the upper hinge. Job Complete!
Parts Used:

-
John from Conyers, GA
-
Difficulty Level:Easy
-
Total Repair Time:Less than 15 mins
-
Tools:Nutdriver, Screw drivers
3 of 4 people
found this instruction helpful.
Was this instruction helpful to you?
Thank you for voting!
Ice guide broke and was hanging out causing the freezer to thaw
Just clicked it in place and was done in less than a minute. Thanks for the fast ship and right part.
Parts Used:

-
Jake from alvarado, TX
-
Difficulty Level:Really Easy
-
Total Repair Time:Less than 15 mins
4 of 8 people
found this instruction helpful.
Was this instruction helpful to you?
Thank you for voting!
old part cracked and broke
-
Paul from Green Valley, AZ
-
Difficulty Level:Really Easy
-
Total Repair Time:Less than 15 mins
-
Tools:Nutdriver, Screw drivers
2 of 2 people
found this instruction helpful.
Was this instruction helpful to you?
Thank you for voting!
right side door not closing freely
Purchased the closing cam (both pieces). Removed door (3 bolts under the dust shield on top of door) and replaced the plastic cam pieces. So easy a caveman could do it. I actually had my 13 year old son do it while I supervised!
Parts Used:
-
Douglas from Phoenix, AZ
-
Difficulty Level:Really Easy
-
Total Repair Time:Less than 15 mins
-
Tools:Screw drivers, Socket set
2 of 2 people
found this instruction helpful.
Was this instruction helpful to you?
Thank you for voting!
A broken slide track for one of the drawers
The part came in two days!! It had a couple of little bumps that made it impossible to slide in, so I ground them down and had the entire project finished in less than five minutes.
When I ordered, I was confused about the "Left Side or Right Side statement - thinking I needed to specify so I wrote a short email to customer support asking about it. WIthin an hour, I had a reply.
The customer service and speed of delivery were the best ever!!!
When I ordered, I was confused about the "Left Side or Right Side statement - thinking I needed to specify so I wrote a short email to customer support asking about it. WIthin an hour, I had a reply.
The customer service and speed of delivery were the best ever!!!
Parts Used:
-
William from Derwood, MD
-
Difficulty Level:Really Easy
-
Total Repair Time:Less than 15 mins
2 of 2 people
found this instruction helpful.
Was this instruction helpful to you?
Thank you for voting!
Refrigrator door made loud pop when opening and closing.
Simply remove the cover over top hinge and remove the three outer screws (Do NOT remove the center screw). Lift the door off the lower pivot pin. Turn door upside down and replace the upper cam and then the lower cam on the pivot at the bottom of the refrigerator case. Reintall the door by setting the door on the lower pivot and then reinstall the top pivot and cover. VERY easy and what a difference. No more "POP".
Parts Used:
-
Robert from Sugar Land, TX
-
Difficulty Level:Really Easy
-
Total Repair Time:Less than 15 mins
-
Tools:Nutdriver
3 of 5 people
found this instruction helpful.
Was this instruction helpful to you?
Thank you for voting!
Broken support rail for sliding drawer
Remove sliding drawer. Remove glass shelf. Inspect the installation slots that the support rail is mounted through. Understand the direction you wish to apply force and then softly tap the rail and it will pop free. The same can be done for both sides. Interestingly, the parts are the same so you do not need a left and right rail if both rails are broken. In fact, they can be removed, flipped 180deg and reinstalled.
Parts Used:
-
mark from ALACHUA, FL
-
Difficulty Level:Very Easy
-
Total Repair Time:Less than 15 mins
2 of 2 people
found this instruction helpful.
Was this instruction helpful to you?
Thank you for voting!