















66515682000 Kenmore Dishwasher - Instructions
Keep searches simple. Use keywords, e.g. "leaking", "pump", "broken" or "fit".
dishwasher wasn't cleaning the dishes
I removed the bottom spray arm and replaced the worn part. Now the arm turned freely and was performing as it was designed to do. I appreciate parts select for having the part available since the manufacturer no longer supported the model.
Parts Used:
-
Mark from Danville, PA
-
Difficulty Level:Really Easy
-
Total Repair Time:Less than 15 mins
3 of 3 people
found this instruction helpful.
Was this instruction helpful to you?
Thank you for voting!
Dishwasher leaks at front door
My dishwasher started leaking at the door. I checked the level, door seal, fill float, etc. Nothing worked. Another reviewer of these parts said to replace the Seal, Lower Sprayarm, the Wash Arm Bearing Ring, and the wash arm. I replaced the seal and the bearing, not the washer arm, as my spray had little to no wear. This fixed the problem! If you dishwasher leaks at the door, it is possible these parts are worn and replacing them wil fix the leak. Thanks to the other reviewer I now have no leaks! Buy a spare nut because they break very easy if overtorqued!
Parts Used:

-
Sean from Oceanside, CA
-
Difficulty Level:Really Easy
-
Total Repair Time:Less than 15 mins
4 of 6 people
found this instruction helpful.
Was this instruction helpful to you?
Thank you for voting!
Lower spray arm wobble - poor cleaning
Removed the lower spray arm assembly thumb screw and lifted off the spray arm assembly. The lower seal had disintigrated - couldn't even find any pieces in the filter. After reassembly with the new seal and bearing I turned the spray arm by hand to ensure it was not binding. There was still was, what I would consider, some excessive wobble. I fashioned a shim washer out of some plastic from a Folgers coffee can lid and installed it on the thumbscrew threaded shaft and tightened it all down finger tight - it works very well and now, and no wobble.
I relaced the upper spray arm seal while I was doing the job (both the upper and lower seals are the same part #). I figured it would go out on me eventually, so I might as well replace it while I was doing the lower arm work. Kept the old upper arm seal as an emergency replacement.
Cleaned the filter screen of all debris (it is amazing what collects there over time). Cleaned the stainless tub with some spray Greased Lightning, ran the rinse cycle, and then put a few tablespoons of citric acid crystals in the soap dispenser and ran the dishwasher on NORMAL WASH with temperature boost.
Looks new inside; cleans the dishes, glasses and utensils well (no water spotting); and is nice and quite (like when it was new).
I relaced the upper spray arm seal while I was doing the job (both the upper and lower seals are the same part #). I figured it would go out on me eventually, so I might as well replace it while I was doing the lower arm work. Kept the old upper arm seal as an emergency replacement.
Cleaned the filter screen of all debris (it is amazing what collects there over time). Cleaned the stainless tub with some spray Greased Lightning, ran the rinse cycle, and then put a few tablespoons of citric acid crystals in the soap dispenser and ran the dishwasher on NORMAL WASH with temperature boost.
Looks new inside; cleans the dishes, glasses and utensils well (no water spotting); and is nice and quite (like when it was new).
Parts Used:
-
Howard from Catlett, VA
-
Difficulty Level:Really Easy
-
Total Repair Time:15 - 30 mins
-
Tools:Nutdriver, Screw drivers
3 of 3 people
found this instruction helpful.
Was this instruction helpful to you?
Thank you for voting!
Dishes Would Not Get Clean
First I removed the plastic bolt that holds the wash arm in place This exposed the upper ring that was worn out . I then lifted the arm off which exposed the larger ring. I replaced that ring, and then I put the arm back on and replaced the upper ring. I put the plastic bolt back in place and the repair was complete.-- Really Easy plus the dishwasher gets the dishes clean now
Parts Used:
-
Larry from Milford Center, OH
-
Difficulty Level:Really Easy
-
Total Repair Time:Less than 15 mins
3 of 3 people
found this instruction helpful.
Was this instruction helpful to you?
Thank you for voting!
tube holder lost its shape and began hanging preventing upper tray from closing
repair was simple and easy; just make sure you install the holder in the same direction and on same upper-tray prongs to prevent having to remove them to switch around (ensures spinner works properly).
Parts Used:
-
David from Louisville, KY
-
Difficulty Level:Really Easy
-
Total Repair Time:Less than 15 mins
5 of 9 people
found this instruction helpful.
Was this instruction helpful to you?
Thank you for voting!
The soap dispenser lid was broken
I ordered a dishwasher soap dispenser "lid assembly". When it arrived, it was not an assembly at all but only a lid. I had to reorder a pin and spring, When i finally had every thing, it was an easy repair.
Parts Used:
-
ed from potomac, MD
-
Difficulty Level:Easy
-
Total Repair Time:Less than 15 mins
4 of 7 people
found this instruction helpful.
Was this instruction helpful to you?
Thank you for voting!
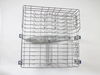
The coating on the upper rack had rust coming through.
Removed the plugs in the slides, removed the rack, slid the new rack in and replaced the plugs.
Parts Used:
-
Ernie from Salinas, CA
-
Difficulty Level:Really Easy
-
Total Repair Time:Less than 15 mins
3 of 4 people
found this instruction helpful.
Was this instruction helpful to you?
Thank you for voting!
dish washer leaking
Pulled the old gasket out with needle nose pliers, cleaned the slot for the gasket, installed the new gasket, needed no tools. This repair took 5 min.
Parts Used:
-
Gary from Winnemucca, NV
-
Difficulty Level:Really Easy
-
Total Repair Time:Less than 15 mins
-
Tools:Pliers
3 of 4 people
found this instruction helpful.
Was this instruction helpful to you?
Thank you for voting!
Broken Basket
-
Paul from MILWAUKIE, OR
-
Difficulty Level:Very Easy
-
Total Repair Time:Less than 15 mins
3 of 4 people
found this instruction helpful.
Was this instruction helpful to you?
Thank you for voting!
A spring was broken in the disposal chopper
I bought the kit because it had other parts that I thought I needed.
Parts Used:
-
Robert from Sherwood, OR
-
Difficulty Level:A Bit Difficult
-
Total Repair Time:1- 2 hours
-
Tools:Pliers, Screw drivers
3 of 4 people
found this instruction helpful.
Was this instruction helpful to you?
Thank you for voting!
SOAP DISPENSER DOOR DID NOT CLOSE.
WATCHED THE VIDEO FOR 2 MINUTES. REPLACED THE 3 PARTS IN LESS THAN A MINUTE. THANKS FOR THE VIDEOS.
Parts Used:

-
ROBERT from MAHWAH, NJ
-
Difficulty Level:Very Easy
-
Total Repair Time:Less than 15 mins
-
Tools:Screw drivers
4 of 7 people
found this instruction helpful.
Was this instruction helpful to you?
Thank you for voting!
Well, to make a long story short. My husband isn't mechanically inclined. He tried to surprise me and do it himself.???
I went back to the web site to make sure I'd ordered the right part.?? looked at the diagram and then watched your little video.?? He had the part hooked opposite of what was shown. (The arm wouldn't rotate) So I turned it arround. While he was still??. It took me less that 5 min and the dishwasher is working Great.????
Parts Used:
-
Jenni G from LEHI, UT
-
Difficulty Level:A Bit Difficult
-
Total Repair Time:Less than 15 mins
-
Tools:Screw drivers
2 of 2 people
found this instruction helpful.
Was this instruction helpful to you?
Thank you for voting!
Nut broke
Removed piece of nut that remained and screwed in new one by hand
Parts Used:
-
Kay from YORK, PA
-
Difficulty Level:Very Easy
-
Total Repair Time:Less than 15 mins
2 of 2 people
found this instruction helpful.
Was this instruction helpful to you?
Thank you for voting!
Lower sprayarm broken
Note I did not have a model number just the manufacturer and name on unit. The website was still able to find the part. Impressive!
Easy installation. I recommend you also get the sprayarm seal. Be careful to insure the nut is seated securely before screwing in the nut. Highly recommend the video. Good company.
Easy installation. I recommend you also get the sprayarm seal. Be careful to insure the nut is seated securely before screwing in the nut. Highly recommend the video. Good company.
Parts Used:
-
Robert from MENTOR, OH
-
Difficulty Level:Really Easy
-
Total Repair Time:Less than 15 mins
2 of 2 people
found this instruction helpful.
Was this instruction helpful to you?
Thank you for voting!
Water was leaking (gushing) out the door
Researched parts - 10 minutes - - - Ordered parts - 5 minutes - - - Waited for parts - 14 DAYS! - - - Installed parts - 5 minutes
Parts Used:
-
Carla from LEWISTOWN, MT
-
Difficulty Level:Very Easy
-
Total Repair Time:Less than 15 mins
-
Tools:Nutdriver
2 of 2 people
found this instruction helpful.
Was this instruction helpful to you?
Thank you for voting!