















66513409N410 Kenmore Dishwasher - Instructions
Keep searches simple. Use keywords, e.g. "leaking", "pump", "broken" or "fit".
One of the old stops broke

-
Dwight from KENT, WA
-
Difficulty Level:Very Easy
-
Total Repair Time:Less than 15 mins
6 of 8 people
found this instruction helpful.
Was this instruction helpful to you?
Thank you for voting!
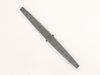
Dishes were not getting cleaned and water was coming out the bottom of the door
The top and bottom parts of the lower wash arm were separating. This caused water to spray out the ends of the wash arm and come out the front of the dishwasher. In addition this water was not spraying upward resulting in dishes not getting cleaned. Took me a while to figure this out but the repair was simple.
Parts Used:

-
Dennis from U SADDLE RIV, NJ
-
Difficulty Level:Really Easy
-
Total Repair Time:Less than 15 mins
5 of 5 people
found this instruction helpful.
Was this instruction helpful to you?
Thank you for voting!
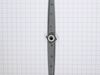
replace middle spray arm and water srayer
remove 2 locks on metal roller guides. remove top basket. turn upside down on counter.remove spray arm by pryng one side in and lift out then push other side down and the out. install same as removal. line spray arm and turn clockwise til you hear a click.install basket and install locking plugs.
Parts Used:
-
robert from INDIANOLA, IA
-
Difficulty Level:Really Easy
-
Total Repair Time:15 - 30 mins
-
Tools:Screw drivers
6 of 8 people
found this instruction helpful.
Was this instruction helpful to you?
Thank you for voting!
After cleaning the filter basket & metal grill (floor of dishwasher), I neglected to secure the bottom spray arm. It came loose, landed on the heating coil, and melted.
I simply removed the melted spray arm, then set the new spray arm in place, twisted the built-in securing nut (clockwise to its stop), and it worked without any problems.
Parts Used:
-
Scott from ALTADENA, CA
-
Difficulty Level:Very Easy
-
Total Repair Time:Less than 15 mins
5 of 5 people
found this instruction helpful.
Was this instruction helpful to you?
Thank you for voting!
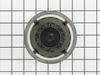
New filter
Ordering the part was very easy. It shipped fast and delivered over 3 days. It fit perfectly
Parts Used:
-
John from SAINT CHARLES, MO
-
Difficulty Level:Very Easy
-
Total Repair Time:Less than 15 mins
6 of 8 people
found this instruction helpful.
Was this instruction helpful to you?
Thank you for voting!
Dishwasher was not filling up with water.
First I got online to troubleshoot issue to save mysel from a service call. One of the first UTube videos, a young man said usually the main issue was the lever. He pushed down on the floater. If it didn't click, than the lever below needed to be replaced. Most important to turn off the circuit breaker before beginning the repair. I got on whirlpool.com, Part Select, ordered the lever, which was under $10. And once delivered, was able to switch out the old lever with the new replacement. Part Quote video took me through the process step by step. The lever package was marked that usually it was only 2% of the time that replacing the lever fixed the issue. Of course, I was thrilled, my dishwasher was up and running again. Thank you.
Parts Used:
-
Jolene from CINCINNATI, OH
-
Difficulty Level:A Bit Difficult
-
Total Repair Time:30 - 60 mins
-
Tools:Screw drivers
7 of 11 people
found this instruction helpful.
Was this instruction helpful to you?
Thank you for voting!
Door just fell down
Hardest part was pulling dishwasher away from cabinet, making sure to not disturb water and drain line. I replaced both door springs which are on the two sides and attached to the dishwasher frame towards the back. This necessiatated pulling the dishwasher about 2/3 out of cabinet. After attaching both springs to frame, replacing the balance kit was a breeze .One screw to remove and then replace with new pulley unit. Attach the supplied cord with attached fittings to spring and then around two pulleys and mounting point on frame. Done . Push dishwasher back into cabinet, reattach two screws to underside of counter. Probably did not require new springs as they seem heavy duty and were not broken upon examination but ordered them also and replaced just in case. Most problem would be with broken cord in balance link kit
Parts Used:
-
James from PUNTA GORDA, FL
-
Difficulty Level:Really Easy
-
Total Repair Time:30 - 60 mins
-
Tools:Nutdriver, Pliers
5 of 5 people
found this instruction helpful.
Was this instruction helpful to you?
Thank you for voting!
There was no problem
I simply had to hook up the power cord to the dishwasher so i could plug it into the outlet rather than direct wire the appliance. Everything went very smoothly. Everything needed for installation other than tools was provided. Easy to follow instructions if you know a little about electrical wiring.
Parts Used:
-
Briant from Byron, MN
-
Difficulty Level:Easy
-
Total Repair Time:30 - 60 mins
-
Tools:Pliers, Screw drivers, Wrench (Adjustable)
13 of 30 people
found this instruction helpful.
Was this instruction helpful to you?
Thank you for voting!
Leaking door seal
Pulled dishwasher out from under the counter, removed faulty seal, installed new seal. Easy to understand directions are on web site.
Parts Used:
-
Charles from ELGIN, IL
-
Difficulty Level:Easy
-
Total Repair Time:30 - 60 mins
-
Tools:Screw drivers
7 of 12 people
found this instruction helpful.
Was this instruction helpful to you?
Thank you for voting!
Dishwasher would not drain properly due to broken impeller in the pump. Could hear and feel vibration thru pump body.
Followed the easy how-to video from PS. It was as easy as changing a light bulb.
Parts Used:
-
Paul from FORT MYERS, FL
-
Difficulty Level:Very Easy
-
Total Repair Time:30 - 60 mins
-
Tools:Screw drivers, Wrench (Adjustable)
5 of 6 people
found this instruction helpful.
Was this instruction helpful to you?
Thank you for voting!
The diverter motor was leaking
Actually, I found a video on Youtube with excellent instructions once you got past the really simple stuff like disconnecting power and water and drain.
I would recommend just finding a fairly similar model on Youtube and follow their directions. It was really easy.
I would recommend just finding a fairly similar model on Youtube and follow their directions. It was really easy.
Parts Used:
-
brad from ABILENE, TX
-
Difficulty Level:Really Easy
-
Total Repair Time:30 - 60 mins
-
Tools:Nutdriver, Screw drivers, Wrench (Adjustable)
5 of 6 people
found this instruction helpful.
Was this instruction helpful to you?
Thank you for voting!
Door latch wouldn't close
Turned off power to the dishwasher. Removed the front panel via the screws on the inner wall of the door. Lifted and pulled out the front panel. Disconnected cable connections to fully remove the front panel. Pressed down on the latches to the left and right side of the door latch. Pulled out the door latch. Put in new door latch until it clicked into place. Reattached cable connections. Put the front panel back on with the screws. Turned back on power to the dishwasher.
Parts Used:
-
Colin from Goffstown, NH
-
Difficulty Level:Easy
-
Total Repair Time:30 - 60 mins
-
Tools:Screw drivers
5 of 6 people
found this instruction helpful.
Was this instruction helpful to you?
Thank you for voting!
Factory crimped end of link cord pulled out of plastic fastner that hooks on door.
Removed 2 screws that fasten dishwasher to underside of countertop. Pulled dishwasher out from under the countertop for access to sides. Hooked link on door, threaded cord around 2 wheels, hooked spring to back of dishwasher, stretched spring and hooked to eye on end of link cord. I found it very difficult to hook spring to link then try and stretch spring to hole at back of dishwasher. Easier to pull spring and link towards each other and connect. Note: This link was actually different from the original. The plastic end that connects to the door actually hits the first wheel when door is closed but it doesn't seem to prevent the door from locking properly (old design was better). However, I shaved this plastic end to provide better clearance.
Parts Used:
-
Scott from Miami, FL
-
Difficulty Level:Easy
-
Total Repair Time:15 - 30 mins
-
Tools:Screw drivers
6 of 9 people
found this instruction helpful.
Was this instruction helpful to you?
Thank you for voting!
the wheel on one side of the upper rack broke off
After I finally got the right parts and installed them I discovered that even though I had bought the OEM part for my dishwasher it not only didn't fit but prevented me from even getting the upper rack back in the dishwasher. The dishwasher won't work with out the upper rack properly in place. Every part store I looked at offered the same part for my dishwasher so obviously Whirlpool made a huge mistake. Since it's not possible to get the old parts back on (one of them was broken anyway which is what started all of this) I had to buy a new dishwasher. I did contact Whirlpool by email but got no response. If you own a Whirlpool dishwasher be very cautious buying any replacement parts.
Parts Used:
-
Richard from FONTANA, CA
-
Difficulty Level:Very Difficult
-
Total Repair Time:More than 2 hours
5 of 6 people
found this instruction helpful.
Was this instruction helpful to you?
Thank you for voting!
replaced lower rack wheel assembly
-
philip from racine, WI
-
Difficulty Level:Very Easy
-
Total Repair Time:Less than 15 mins
6 of 9 people
found this instruction helpful.
Was this instruction helpful to you?
Thank you for voting!