


6216 - Overview
Models starting with 6216
Click on the best match to narrow your results.
- 6216 (1690689) Simplicity Lawn Tractor (48-Inch Garden Tractor, 16hp)
- 6216 (1690931) Simplicity Lawn Tractor (Garden Tractor, 16hp)
- 6216 (1691064) Simplicity Lawn Tractor (42-Inch Garden Tractor, 16hp)
- 6216 (1690933) Simplicity Lawn Tractor (48-Inch Garden Tractor, 16hp)
- 6216 (1691063) Simplicity Lawn Tractor (Garden Tractor, 16hp)
- 6216 (1691035) Simplicity Lawn Tractor (Garden Tractor, 16hp)
- 6216 (1690735) Simplicity Lawn Tractor (42-Inch Garden Tractor, 16hp)
- 6216 (1691065) Simplicity Lawn Tractor (48-Inch Garden Tractor, 16hp)
- 6216 (1690702) Simplicity Lawn Tractor (Garden Tractor, 16hp)
- 6216 (1690930) Simplicity Lawn Tractor (Garden Tractor, 16hp)
- 6216 (1690688) Simplicity Lawn Tractor (Garden Tractor, 16hp)
- 6216 (1690734) Simplicity Lawn Tractor (Garden Tractor, 16hp)
- 6216 (1690756) Simplicity Lawn Tractor (Garden Tractor, 16hp)
- 6216 (1690687) Simplicity Lawn Tractor (42-Inch Garden Tractor, 16hp)
- 6216 (1690736) Simplicity Lawn Tractor (48-Inch Garden Tractor, 16hp)
- 6216 (1690932) Simplicity Lawn Tractor (42-Inch Garden Tractor, 16hp)
- 6216 Oster Toaster (Toaster Oven)
- 6216-0 Generac Generator (6216-0 4000w Xp Alt)
- 6216-5 Generac Generator (6216-5 4000w Xp Alt)
- 62160T3WB General Electric Dryer
- 62160T5WB General Electric Dryer
- 62163-0A Admiral Refrigerator (REFRIGERATOR)
- 62163-1 Admiral Refrigerator (REFRIGERATOR)
- 621640 Admiral Refrigerator (REFRIGERATOR)
- 6216D Makita Cordless Drill (Cordless Drill)
Keep searches simple, eg. "belt" or "pump".

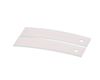
DRYER FRONT BEARING WHITE 2PK
PartSelect #: PS17137205
Manufacturer #: WE03X37318
This authentic, white Drum Bearing Slide, also known as the bearing drum slide, glide, or pad, is a plastic, easy-to-install part for your dryer. It replaces the dryer's front drum slide to allow for ...
$17.15
In Stock

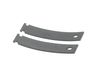
DRYER BEARING SLIDE GREEN 2PK
PartSelect #: PS17137203
Manufacturer #: WE03X37317
This original equipment manufacturer Drum Bearing Slide is a plastic, green, easy-to-install part for your dryer. It replaces the dryer's front drum slide to allow for easier movement. You'll know if...
$25.75
In Stock

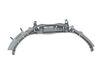
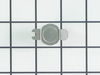
Front Drum Bearing
PartSelect #: PS960316
Manufacturer #: WE3M26
This Front Drum Bearing (Top Bearing, Dryer Drum Front Support Bearing, Drum Support Bearing, Dryer Drum Glide Bearing) holds the drum bearing and slides for the drum to turn on. The front drum bearin...
$53.55
In Stock

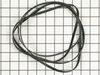
Drive Belt
PartSelect #: PS16542496
Manufacturer #: WE03X29897
This Drive Belt is 89.5" long and comes in black, featuring four ribs on the inside for a better grip. This is a long belt that wraps all the way around the dryer drum, around a tension pulley, and th...
$53.20
In Stock

Duct Felt Seal
PartSelect #: PS12722961
Manufacturer #: WE09X27634
This is a duct felt seal for a dryer. The duct felt seal allows the front-load dryer drum to glide smoothly on the front panel. Your dryer will not function properly if the drum felt seal is compromis...
$42.81
In Stock

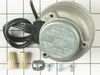
Replacement Ice Maker
PartSelect #: PS2121513
Manufacturer #: D7824706Q
This ice maker (Ice Maker Assembly, Refrigerator Ice Maker) produces ice cubes that are ejected into the storage bucket. It is located in the freezer section of your appliance, mounted on the freezer ...
$95.17
In Stock

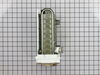
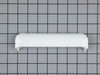
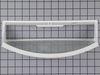
Lint Filter - White Frame
PartSelect #: PS11767017
Manufacturer #: WE18X25100
This is a lint filter screen that is used for many dryers. It has a metal screen with a white plastic frame, and is approximately 13 inches wide. This part is sold individually. The lint filter traps ...
$63.64
In Stock

Rear Drum Bearing Kit
PartSelect #: PS267529
Manufacturer #: WE25M40
This rear drum bearing kit includes a shaft, ground strap, bearing, seven screws, and installation instructions. The bearing plate comes with a slot in it for the ground strap. This part helps keep yo...
$77.75
In Stock

Door Handle - White
PartSelect #: PS9494490
Manufacturer #: WE01X20419
This part is on the outer door of the dryer.
$34.98
In Stock

Refrigerator Door Switch
PartSelect #: PS12728638
Manufacturer #: W11384469
Door switch turns the light off when you close the door.
$30.53
In Stock

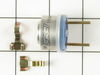
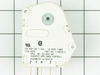
Rotary Start Switch
PartSelect #: PS268305
Manufacturer #: WE4X881
This part is used to start the dryer once you have selected a setting on the timer.
$74.75
In Stock

Refrigerator Condenser Fan Motor Kit
PartSelect #: PS395284
Manufacturer #: 833697
This condenser fan motor kit is designed for use with refrigerators. This fan draws air through the condenser coils and over the compressor. It does this with the goal of cooling the warm refrigerant ...
$65.73
In Stock
Exact Part matches for your search term
[Viewing 4 of 4]
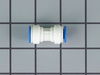
Screw
This part number matches the current model number 6216
PartSelect #: PS9048151
Manufacturer #: 6216
Acc, pump to hose qc
$54.42
Special Order
Pin And Plate Asm
This part number matches the current model number 6216
PartSelect #: PS9292148
Manufacturer #: 6216
$69.77
Special Order
VALVE
This part number matches the current model number 6216
PartSelect #: PS17998860
Manufacturer #: 6216
$707.68
Special Order
SHAFT
This part number matches the current model number 6216
PartSelect #: PS19134861
Manufacturer #: JT9-6216
$113.58
Special Order
Common Symptoms of models starting with 6216
[Viewing 28 of 28]Noisy
Fixed by
these parts
these parts
Show All
Ice maker not making ice
Fixed by
these parts
these parts

Show All
Leaking
Fixed by
these parts
these parts

Show All
Marks left on clothes
Fixed by
these parts
these parts

Show All
Light not working
Fixed by
these parts
these parts

Show All
Door won’t close
Fixed by
these parts
these parts


Show All
Drum Not Spinning
Fixed by
these parts
these parts
Show All
Fridge too warm
Fixed by
these parts
these parts

Show All
Will Not Start
Fixed by
these parts
these parts

Show All
Freezer section too warm
Fixed by
these parts
these parts
Show All
Ice maker won’t dispense ice
Fixed by
these parts
these parts

Show All
Won’t Start
Fixed by
these parts
these parts

Show All
Freezer not defrosting
Fixed by
these parts
these parts

Show All
Fridge runs too long
Fixed by
these parts
these parts
Show All
Ice maker dispenses too much ice
Fixed by
these parts
these parts

Show All
Fridge and Freezer are too warm
Fixed by
these parts
these parts
Show All
Too hot
Fixed by
these parts
these parts
Show All
Ice maker dispenses too little ice
Fixed by
these parts
these parts
Show All
Door latch failure
Fixed by
these parts
these parts
Show All
Door Pops Open
Fixed by
these parts
these parts
Show All
Not Heating
Fixed by
these parts
these parts

Show All
Not dispensing water
Fixed by
these parts
these parts

Show All
Won’t start
Fixed by
these parts
these parts
Show All
Frost buildup
Fixed by
these parts
these parts
Show All
Heat stays on after drum has stopped
Fixed by
these parts
these parts
Show All
Too warm
Fixed by
these parts
these parts
Show All
Freezer too cold
Fixed by
these parts
these parts
Show All
Fridge too cold
Fixed by
these parts
these parts

Show All


Keep searches simple. Use keywords, e.g. "leaking", "pump", "broken" or "fit".
Icemaker producing few or no cubes and often leaving "kling-ons" on ice tray
Interior surface of ice tray felt rough & flaky (coating deteriorated) so cubes would not release.
Unplug appliance.
Remove timer cover by hand pressure @ edge.
Remove single attachment screw & bracket at lower front of icemaker.
Disconnect wiring harness from socket @ rear of compartment.
Tricky part was determin ... Read more ing what type of connection held the other two attachment points along the long edge of the icemaker. I did not have repair manual or useful drawing but looked @ PartsDirect pic of side brackets & used a small mirror to confirm that mine were also some sort of "snap in" attachment.
Remove icemaker unit by pushing upward and outward on the unit. I takes a good bit of pressure and will pop loose, but be careful not to break attachment bracket from freezer wall.
Scavenge shut off bar and wiring harness from old icemaker once you have it out & attach to new one before installing it back in freezer.
Again, you might find a mirror useful to align those pesky snap-in brackets with the new unit.
Since you probably kept your freezer running while waiting for the part, the plastic snap-ins will be cold and brittle. I warmed them up first by applying a dampened cloth heated in the microwave to make them a little more pliable.
A good push of the new unit towards the snap-ins along with some upward force will get it stable.
Reattach the metal screw in bracket & connect the wiring harness to rear plug... and don't forget to plug the whole thing back in.
It will take awhile for the first batch of cubes dump as the timer may need to cycle completely around to get to the fill cycle... be patient.
Dump the first couple of batches of cubes just to make sure you're free of any residue.
Read less
Parts Used:
-
Bernie from Diamond Bar, CA
-
Difficulty Level:Easy
-
Total Repair Time:30 - 60 mins
-
Tools:Nutdriver
815 of 914 people
found this instruction helpful.
Was this instruction helpful to you?
Thank you for voting!
Due to over loading of the dryer the drum ruined the slides and was making a bad noise due to plastic rubbing plastic
It was pretty easy. After already taking apart the dryer to install a new belt I knew exactly my plan of action. I removed the two screws that hold the top panel of the dryer to the front panel. I then removed the top panel and removed the screws that hold the front to each side panel. I than pulled the front away from the cabinet and
... Read more
drum. I put the new slides in place and installed a new felt strip. I put it back together and that was that. Very easy.
Read less
Parts Used:
-
Matthew from Plainfield, IL
-
Difficulty Level:Really Easy
-
Total Repair Time:15 - 30 mins
-
Tools:Screw drivers
804 of 916 people
found this instruction helpful.
Was this instruction helpful to you?
Thank you for voting!
Intermittant squeaking noise
Basically, I followed the same steps a prior person posted.
1.Removed the two screws inside the door, on the top part of the opening.
2.Lifted up and removed the top.
3.Removed two screws holding the front panel in place.
4.Held up the drum while removing the front panel. I carefully turned the panel so I could get at ... Read more the drum bearing without pulling the wires connecting it to the front panel. The wires are not very long, so I had to be careful not to pull on them.
5.Carefully pried off the old drum bearing, using just my hands. It was fairly tight, and popped out just as I started to worry if I was putting too much pressure on it.
6.Checked to see how the old felt was installed, then I pulled out the old felt.
7.Inserted the new felt, being careful to insert one end into a slot the same way the original was installed.
8.Inserted the new slides into the new drum bearing. The gray slides went in at the eleven and one o'clock positions, the white slides went in at ten and two o'clock.
9.Removed a surplus plastic piece from the new drum bearing (where the light comes through).
10.Inserted the new drum bearing, putting the bottom tabs in first, then pivoting it into place. I squeezed it into place to make sure it was tight.
11.Lifted up the drum and put the front panel back on.
12.Screwed the front panel back on, using the two screws.
13.Carefully put the top back on.
14.Screwed in the two screws inside the front door to fasten down the top.
That was it! I started up the dryer and it worked fine. No more squeaking.
About the only thing odd about the repair is why PartSelect sells each slide separately (i.e., I had to order 2 white slides and 2 gray slides). I can't imagine replacing just one, so why not package them in pairs, or maybe even all four in one package.
At any rate, the repair was easy, and a lot cheaper than having someone come out to fix it.
Read less
Parts Used:
-
Mark from Addison, IL
-
Difficulty Level:Easy
-
Total Repair Time:15 - 30 mins
-
Tools:Screw drivers
629 of 788 people
found this instruction helpful.
Was this instruction helpful to you?
Thank you for voting!