















5KSM175PSBDR4 Whirlpool Mixer - Instructions
Keep searches simple. Use keywords, e.g. "leaking", "pump", "broken" or "fit".
broken thumb screw
remove the old screw and screwed the new part in place. I like your link because it shows a picture of the fixture and you can find the part you need real easy. Will order from you again when I need it.
Parts Used:
-
Kathleen from Silvis, IL
-
Difficulty Level:Really Easy
-
Total Repair Time:Less than 15 mins
12 of 15 people
found this instruction helpful.
Was this instruction helpful to you?
Thank you for voting!
I broke the motor brush when I was taking my mixer apart for some serious cleaning
unscrewed the screw holding the old brush. carefully removed the spring and old broken brush. we did have some of the old brush left inside, so my husband used a very thin drill bit to break it up. then carefully inverted the stand mixer to allow the broken pieces to fall out. then we were able to install the new brush. works great. yeah!!
Parts Used:

-
Veronique from Loganville, GA
-
Difficulty Level:Really Easy
-
Total Repair Time:Less than 15 mins
-
Tools:Screw drivers
12 of 18 people
found this instruction helpful.
Was this instruction helpful to you?
Thank you for voting!
The 5 feet on my Kitchen Aide, had worn out
Took the old feet (5) off and put new on the Kitchen Aide, looks great. Stands high and your assistance on the phone, was so appreciated.
Parts Used:
-
Beverly from Post Falls, ID
-
Difficulty Level:Easy
-
Total Repair Time:Less than 15 mins
-
Tools:Screw drivers
8 of 9 people
found this instruction helpful.
Was this instruction helpful to you?
Thank you for voting!
Moter would run, but nothing would turn
first removed the dress ring by tapping it very gently.then drive the pin out that holds the beater plate on, now wiggle it off, then you can see the screws that hold the gear reducer on. remove them. take that off and you will see the housing that hold the worm gear. remove the 3 screws that hold it down . Now you will have to drive the drift pin out that holds the worm gear in place, slide the shaft out then remove gear. reverse order to assemble
Parts Used:
-
Curtis from Green River, WY
-
Difficulty Level:Really Easy
-
Total Repair Time:15 - 30 mins
-
Tools:Screw drivers
8 of 9 people
found this instruction helpful.
Was this instruction helpful to you?
Thank you for voting!
1960s Kitchenaid K45 Mixer Screw Cap Stripped
My early '60's Kitchenaid K45 mixer screw cap/base plate would no longer hold the bowl, so I looked for another. This item, though not an exact replica of the original, fit and works great. The design is better by being more stout than the original. Pretty straightforward installation: remove three screws, take out old base plate, install new plate and screw down.
Parts Used:
-
Henry from CAMPO, CA
-
Difficulty Level:Very Easy
-
Total Repair Time:Less than 15 mins
-
Tools:Screw drivers
7 of 7 people
found this instruction helpful.
Was this instruction helpful to you?
Thank you for voting!
Stripped gear when I tried to make Pizza Dough
Very messy as there is lots of heavy grease inside the mixer and you have to fish out the blown gear parts. I vary glad I took shop class in High school as it preped me for the job. The machanical drawing you provide were very useful but you should mention the grease.
Mixer works just like new. and I got the parts in two days with standard shipping. Pizza on Thursday and fixed by Saturday
Mixer works just like new. and I got the parts in two days with standard shipping. Pizza on Thursday and fixed by Saturday
Parts Used:
-
Patrick from Cupertino, CA
-
Difficulty Level:Easy
-
Total Repair Time:30 - 60 mins
-
Tools:Screw drivers
7 of 8 people
found this instruction helpful.
Was this instruction helpful to you?
Thank you for voting!
wire broke
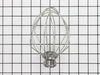
-
Carol from Rochester, NY
-
Difficulty Level:Really Easy
-
Total Repair Time:Less than 15 mins
6 of 6 people
found this instruction helpful.
Was this instruction helpful to you?
Thank you for voting!
Worm gear was missing teeth
Took the mixer apart and cleaned the grease so off I could see the pins. Wasn't a hard fix only thing is make sure to clean the grease off so you can see what your doing
Parts Used:
-
Terry from Pigeon, MI
-
Difficulty Level:Really Easy
-
Total Repair Time:15 - 30 mins
-
Tools:Pliers, Screw drivers
6 of 7 people
found this instruction helpful.
Was this instruction helpful to you?
Thank you for voting!
very simple could not been a easer job thank for partsSelect.
all that were required, were you take off old beater an replace new.simple push up old part an replace new. as you do after usage of the machine.
Parts Used:

-
terry from eudora, AR
-
Difficulty Level:Really Easy
-
Total Repair Time:Less than 15 mins
9 of 17 people
found this instruction helpful.
Was this instruction helpful to you?
Thank you for voting!
powder coating came off mixer paddle.
-
.JENNIFER from STAR, ID
-
Difficulty Level:Really Easy
-
Total Repair Time:Less than 15 mins
5 of 6 people
found this instruction helpful.
Was this instruction helpful to you?
Thank you for voting!
The coating was chipping off of the original Flat Beater
All I had to do was insert the new beater. Wonderful timing, was just going to start some holiday baking. will definetly use your website again. Thank you.
Parts Used:
-
Pat from Marshfield, WI
-
Difficulty Level:Really Easy
-
Total Repair Time:Less than 15 mins
6 of 9 people
found this instruction helpful.
Was this instruction helpful to you?
Thank you for voting!
beater was worn out
-
Juanita from Ferndale, CA
-
Difficulty Level:Really Easy
-
Total Repair Time:Less than 15 mins
6 of 9 people
found this instruction helpful.
Was this instruction helpful to you?
Thank you for voting!
Needed new flat beater
-
Juanita from Ferndale, CA
-
Difficulty Level:Really Easy
-
Total Repair Time:Less than 15 mins
5 of 7 people
found this instruction helpful.
Was this instruction helpful to you?
Thank you for voting!
When using the bread hook, the force of the dough would knock the bowl out of the retaining ring on the mixer (Cap-Screw.)
Three phillips-head screws held the "Cap Screw" in place on the stand of the mixer. After cleaning the stuff out of the screw slots, the screws came out surprisingly easy. After the plate was lifted off, we cleaned the residue from under the plate, placed the new one in position and easily screwed in the 3 screws.
We were very pleased by the quick delivery of the part.
We were very pleased by the quick delivery of the part.
Parts Used:
-
Jerry from Burnsville, MN
-
Difficulty Level:Really Easy
-
Total Repair Time:Less than 15 mins
-
Tools:Screw drivers
5 of 7 people
found this instruction helpful.
Was this instruction helpful to you?
Thank you for voting!
Worm gear broken
-
Jennife from Lancaster, PA
-
Difficulty Level:A Bit Difficult
-
Total Repair Time:30 - 60 mins
-
Tools:Screw drivers, Wrench (Adjustable)
6 of 10 people
found this instruction helpful.
Was this instruction helpful to you?
Thank you for voting!