















59679242016 Kenmore Refrigerator - Instructions
Keep searches simple. Use keywords, e.g. "leaking", "pump", "broken" or "fit".
No water from door, but icemaker working
I easily ordered the part. When it came in, I just shut off the water, disconnected the electricity, and followed instructions to remove shelving and drawers. Then removed the rear interior cover, removed the old water inlet valve and installed the new one. Just a couple moldex wire connections and the 3 water lines in and out. Don't know if this is still ok, but so simple a caveman could do it. Sorry Geico.
Parts Used:

-
Timothy from LITCHFIELD, NH
-
Difficulty Level:Really Easy
-
Total Repair Time:30 - 60 mins
-
Tools:Screw drivers, Wrench (Adjustable)
3 of 3 people
found this instruction helpful.
Was this instruction helpful to you?
Thank you for voting!
Icemaker was letting too much water in and freezing a big block of ice instead of making cubes
Looked online for instructions. I had to remove the shelves from inside the frig, then pop off part of the right inside back wall. The way the 3 water lines attached to the inlet valve was a terrible design. There are plastic little collars that need to be pushed back to release the water lines from the old valve, then when you install the new valve, you need to push them back to reattach the water lines. Once installed, one had a leak. No matter how hard I tried I couldn't get the little plastic collar to disengage. I couldn't push the line in further and I couldn't get it back out. Ended up cutting the line off at the valve just to get it out. Then had to cut out the piece that was still stuck in the valve. Tried to install it again and it leaked even more. Ended up putting the old valve back in and throwing away the $130 new inlet valve because there are no returns on electrical parts. Total waste of time and money ! ! ! Not happy to say the least.
Parts Used:
-
Mark from MT PLEASANT, MI
-
Difficulty Level:Difficult
-
Total Repair Time:30 - 60 mins
-
Tools:Nutdriver, Pliers, Screw drivers
3 of 3 people
found this instruction helpful.
Was this instruction helpful to you?
Thank you for voting!
Broken center crisper rail
Total time 10 minutes. 9 minutes to clear out the food and 1 minute to install the part. Installation was self evident and could have been done blindfolded. Part just snapped in.
Parts Used:

-
Allan from Tucson, AZ
-
Difficulty Level:Very Easy
-
Total Repair Time:Less than 15 mins
3 of 3 people
found this instruction helpful.
Was this instruction helpful to you?
Thank you for voting!
Snap on cover broke
-
Arja L. from NEWBURY PARK, CA
-
Difficulty Level:Easy
-
Total Repair Time:Less than 15 mins
3 of 3 people
found this instruction helpful.
Was this instruction helpful to you?
Thank you for voting!
Center Crisper Rail Broke Off At One End--Drawers Would Not Slide And Hang Right.
Very easily removed top shel glass above crisper--removed old rail by lifting up--and place new one in slots provided---simple!! Part was delivered in less than 3 days-------very fast and cheap !!!
Parts Used:
-
DANA from ASHTABULA, OH
-
Difficulty Level:Really Easy
-
Total Repair Time:Less than 15 mins
4 of 6 people
found this instruction helpful.
Was this instruction helpful to you?
Thank you for voting!
Center Crisper rail
Take everything off the top self, lift the self install the new part ,put self back in place and then install the drawers again. Took minutes.
Parts Used:
-
Richard from PASADENA, CA
-
Difficulty Level:Really Easy
-
Total Repair Time:Less than 15 mins
3 of 4 people
found this instruction helpful.
Was this instruction helpful to you?
Thank you for voting!
broke my original Kickplate Grille
knelt down, positioned replacement kickplate; popped into place, stood up!
took longer to open the box and peel bubble wrap off item than to replace it!
took longer to open the box and peel bubble wrap off item than to replace it!
Parts Used:

-
Daniel from GEORGETOWN, TX
-
Difficulty Level:Really Easy
-
Total Repair Time:Less than 15 mins
3 of 4 people
found this instruction helpful.
Was this instruction helpful to you?
Thank you for voting!
Seal would not stay on, letting cold air out of ice maker - did not make ice.
The old plactic ring can be removed with flat bladed screw driver, starting on the right side prying it up worked best for me. The new seal snaps in only one way take your time to get it wright.
Parts Used:

-
Larry from PALMDALE, CA
-
Difficulty Level:Really Easy
-
Total Repair Time:Less than 15 mins
-
Tools:Screw drivers
3 of 4 people
found this instruction helpful.
Was this instruction helpful to you?
Thank you for voting!
Boyfriends freezer door wouldn’t shut completely
I got really tired of taking food out covered in icicles and stabbing a huge block of ice out of the bottom. Turns out all he needed was a little wheel with cogs and I looked up the sticker model number on this site and clicked the part of the fridge. So simple, wish I would’ve done it sooner.
Parts Used:
-
Megan from NORFOLK, VA
-
Difficulty Level:Really Easy
-
Total Repair Time:Less than 15 mins
3 of 4 people
found this instruction helpful.
Was this instruction helpful to you?
Thank you for voting!
I had a loose fitting old condensor fan blade on my new motor.
I made a temporary repair by drilling the old blade plastic hub and put a small screw in it to hold it on to the shaft until the new blade arrived. The new blade came in within the two days I needed before Thanksgiving. I removed the old and pushed on the new. There were 8 screws on the back guard and two to hold the motor on. It was a snap.
Thank you PartSelect.com The wife is very, very happy now, we had 51 coming over for Thanksgiving. :)
Thank you PartSelect.com The wife is very, very happy now, we had 51 coming over for Thanksgiving. :)
Parts Used:
-
Roger from SMITHFIELD, RI
-
Difficulty Level:Very Easy
-
Total Repair Time:Less than 15 mins
-
Tools:Nutdriver
3 of 4 people
found this instruction helpful.
Was this instruction helpful to you?
Thank you for voting!
I purchased a display model that was missing a part.
-
Monte from Longview, WA
-
Difficulty Level:Really Easy
-
Total Repair Time:Less than 15 mins
3 of 4 people
found this instruction helpful.
Was this instruction helpful to you?
Thank you for voting!
Gasket Torn
Removed old gasket and installed the new one. Used a hairdryer to smooth out the edges.
Parts Used:
-
Mark from THE VILLAGES, FL
-
Difficulty Level:Very Easy
-
Total Repair Time:15 - 30 mins
3 of 4 people
found this instruction helpful.
Was this instruction helpful to you?
Thank you for voting!
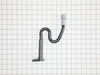
Water not draining to pan. It caused an ice build up under the freezer draw
Remove the grate at the back of the refrigerator. Remove the existing drawn tube. Replace the exiting drain tube with the updated drain tube. Check to see if water was draining properly. Replace the grate. Sit back and have a beer.
Parts Used:
-
Rich from WINSTED, CT
-
Difficulty Level:Very Easy
-
Total Repair Time:Less than 15 mins
-
Tools:Nutdriver, Pliers, Screw drivers
3 of 4 people
found this instruction helpful.
Was this instruction helpful to you?
Thank you for voting!
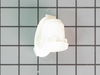
One of the light bulbs went out on my Whirlpool refrigerator.
I changed the bulb but it still didn’t work. I ordered a bulb holder and replaced it and it works properly now. It was an easy repair, remove the bulb, gently pry the bulb holder out with a screwdriver and snap the new one in.
It was useful that under the description of the part in the catalog, it showed that this part was often used to repair this issue. The service was great and the delivery was fast.
It was useful that under the description of the part in the catalog, it showed that this part was often used to repair this issue. The service was great and the delivery was fast.
Parts Used:
-
Brian from LAKE CHARLES, LA
-
Difficulty Level:Very Easy
-
Total Repair Time:Less than 15 mins
-
Tools:Screw drivers
3 of 4 people
found this instruction helpful.
Was this instruction helpful to you?
Thank you for voting!
not making ice
watched video
took me less than 5min. to replace inlet valve.
an cleaned my frig at the same time that took me longer to do.
took me less than 5min. to replace inlet valve.
an cleaned my frig at the same time that took me longer to do.
Parts Used:
-
Robert from Allentown, PA
-
Difficulty Level:Really Easy
-
Total Repair Time:Less than 15 mins
-
Tools:Screw drivers
2 of 2 people
found this instruction helpful.
Was this instruction helpful to you?
Thank you for voting!