















59672003014 Kenmore Refrigerator - Instructions
Keep searches simple. Use keywords, e.g. "leaking", "pump", "broken" or "fit".
The center rail was broken
The part just snapped in. super easy.
Parts Used:

-
Joella from THE DALLES, OR
-
Difficulty Level:Very Easy
-
Total Repair Time:Less than 15 mins
2 of 2 people
found this instruction helpful.
Was this instruction helpful to you?
Thank you for voting!
Drawer door broke
-
Linda from VINEYARD HVN, MA
-
Difficulty Level:Really Easy
-
Total Repair Time:15 - 30 mins
2 of 2 people
found this instruction helpful.
Was this instruction helpful to you?
Thank you for voting!
Evaporator fan motor stopped working
I'm a 37 year old woman who has never worked on a fridge before, ever.
I was able to google how to run diagnostics on it and determine what the issue was.
Once I received the part I was able to take apart the freezer to get to the motor. Remove the old motor and install the new motor.
This was extremely easy I watched a couple of the youtube videos provided here and now it's running just fine.
I was able to google how to run diagnostics on it and determine what the issue was.
Once I received the part I was able to take apart the freezer to get to the motor. Remove the old motor and install the new motor.
This was extremely easy I watched a couple of the youtube videos provided here and now it's running just fine.
Parts Used:

-
Leah from HAMILTON, OH
-
Difficulty Level:Really Easy
-
Total Repair Time:15 - 30 mins
-
Tools:Nutdriver, Screw drivers
2 of 2 people
found this instruction helpful.
Was this instruction helpful to you?
Thank you for voting!
ICE MAKER WATER FILTER HEAD REPLACEMENT
AS PER A VERY GOOD VIDEO I FOUND SIMPLY BY SEARCHING FOR THE PART NUMBER. IT MAY HAVE BEEN ON THIS SITE. SADLY, THE PUSHING ON THE CONNECTOR WITH THE 1/2" WRENCH LOOKED A LOT EASIER IN THE VIDEO, OTHERWISE EASY PEAZY AND I HAVE VERY PAINFUL ARTHRITIS IN MY SHOULDERS.
Parts Used:
-
KENNETH from STOCKBRIDGE, MI
-
Difficulty Level:Easy
-
Total Repair Time:30 - 60 mins
-
Tools:Nutdriver, Pliers, Screw drivers
2 of 2 people
found this instruction helpful.
Was this instruction helpful to you?
Thank you for voting!
No water and ice maker not working
Used a 1/4" nut driver for the project install, just one note when installing the water feed into the new inlet valve make sure it is seated properly, look for the indicator mark on the water feed. Very easy installation!
Parts Used:
-
Christopher from WARREN, RI
-
Difficulty Level:Really Easy
-
Total Repair Time:30 - 60 mins
-
Tools:Socket set
2 of 2 people
found this instruction helpful.
Was this instruction helpful to you?
Thank you for voting!
Head filter broke where you put the filter in
I watched a 5-minute YouTube video ordered the part. It was delivered fast and it took me about 30 minutes to put it on.
Parts Used:
-
David from HARRISBURG, PA
-
Difficulty Level:Really Easy
-
Total Repair Time:30 - 60 mins
-
Tools:Wrench set
2 of 2 people
found this instruction helpful.
Was this instruction helpful to you?
Thank you for voting!
Noticed fraying on the right side french door gasket and it didn't seem to be sealing like it should
When I received the gasket I laid it out on the floor in a spare room not too far from a heat register to let it straighten out. (If it were summer or sunny weather here I would have laid it out in the sun.) My adult son did the repair - it was very easy to pull out the old gasket and to gently clean the edges with a scraper to prepare for the new install. He followed instructions and other tips but the first section took a while before it would stay inserted. Once it did though, the rest of the gasket snapped in very quickly. I am happy the seal is much improved.
Parts Used:
-
Teresa from Depew, NY
-
Difficulty Level:Easy
-
Total Repair Time:30 - 60 mins
2 of 2 people
found this instruction helpful.
Was this instruction helpful to you?
Thank you for voting!
My refrigerator vegetable bins were sagging when I placed veggies in it.
I came across this site and looked at the diagrams. Instead of buying a new crisper bin frame, I noticed that the crisper bin frame was missing the frame brace. I purchased the frame brace and installed it in the crisper frame, which was easy to push into the slot. This solved my problem. No more sag!!
Parts Used:

-
Lee from SAMMAMISH, WA
-
Difficulty Level:Easy
-
Total Repair Time:30 - 60 mins
-
Tools:Screw drivers
2 of 2 people
found this instruction helpful.
Was this instruction helpful to you?
Thank you for voting!
Refridgerator was not cooling as cold as normal
Removed the freezer door, by loosening 4 screws and pulling upwards to disengage door from frame. Removed the top basket by pulling up on both slides on the gear shaft sides, note they have retaining tabs you must push in. once the slide / guards are up the top basket comes out. Remove the bottom basket. Remove to angled screws on the top tracks and remove. Remove 6 screws on bottom slides, 3 per side and slide out as a whole unit. Unplug the ice maker, remove 3 screws for it to come out. Note I cleaned mine while it was out with vinegar to remove the mineral build up on it. Remove the screws in the back panel, and pull it forwards. The top vent has 2 clips that hold it in and you will need to remove it prior to fully removing the plate. The plug for the icemaker needs to be removed also. Pull the back plate out. Once the plate is out you can see the fan and access it. Unplug the clips that hold the wiring harness secure. 2 screws to remove the fan assembly. Once fan assembly is out, disassemble it, then reverse assemble it with new parts and fire it up. Mine took right off and running like its brand new.
Parts Used:
-
Frank from Winchester, IN
-
Difficulty Level:Easy
-
Total Repair Time:30 - 60 mins
-
Tools:Nutdriver, Screw drivers
2 of 2 people
found this instruction helpful.
Was this instruction helpful to you?
Thank you for voting!
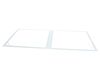
The old shelf shattered when we tried to clean it
-
Michael from COAL VALLEY, IL
-
Difficulty Level:Easy
-
Total Repair Time:30 - 60 mins
2 of 2 people
found this instruction helpful.
Was this instruction helpful to you?
Thank you for voting!
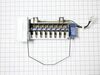
Ice maker quit working
Unplugged wire plug, removed mounting screws and removed ice maker. Installed new unit by reversing steps--
Parts Used:
-
Lloyd from Algona, IA
-
Difficulty Level:Really Easy
-
Total Repair Time:30 - 60 mins
-
Tools:Nutdriver
2 of 2 people
found this instruction helpful.
Was this instruction helpful to you?
Thank you for voting!
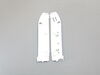
peg that swings the pantry door open and closed was broken off
watched partsselect video and simply followed the directions
Parts Used:
-
Dalton from BEAUFORT, NC
-
Difficulty Level:Really Easy
-
Total Repair Time:1- 2 hours
-
Tools:Nutdriver, Screw drivers
2 of 2 people
found this instruction helpful.
Was this instruction helpful to you?
Thank you for voting!
Ice was not ejecting - motor was dead
Followed some online videos. The replacement part actually matched exactly what the videos I found showed. It was my refrigerator that was slightly different where the unit would mount/screw into. The old unit had a bracket which easily attached to the replacement part. It is less than a 1 hour repair for sure. But it took me a few minutes to figure out the bracket adapter. Plus I forgot to seat the ice maker shut off bar and had to disassemble some things again to get in there to seat it properly. Part was shipped quickly and securely !
Parts Used:
-
David from PITTSBORO, NC
-
Difficulty Level:Really Easy
-
Total Repair Time:1- 2 hours
-
Tools:Nutdriver, Screw drivers
2 of 2 people
found this instruction helpful.
Was this instruction helpful to you?
Thank you for voting!
Ice Maker Not operationl
Have part need instructions to remove old and install new
Parts Used:
-
Kenneth from LAGUNA HILLS, CA
-
Difficulty Level:Really Easy
-
Total Repair Time:30 - 60 mins
3 of 6 people
found this instruction helpful.
Was this instruction helpful to you?
Thank you for voting!
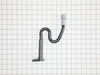
Easy fix for Whirlpool refrigerator
I followed the video provided by Part Select. I also let the refrigerator stay unplugged overnight with all the doors open. This p-trap kit has fixed the leaks out of the front of the refrigerator. There is no ice build-up in the freezer. Perfect!
Parts Used:
-
John from MABLETON, GA
-
Difficulty Level:Really Easy
-
Total Repair Time:30 - 60 mins
-
Tools:Nutdriver, Pliers, Screw drivers
2 of 3 people
found this instruction helpful.
Was this instruction helpful to you?
Thank you for voting!