















59672002011 Kenmore Refrigerator - Instructions
Keep searches simple. Use keywords, e.g. "leaking", "pump", "broken" or "fit".
Top of the rail was broken
I watched the repair video on the website and was able to complete the repair in under 5 minutes. Super Easy!
Parts Used:
-
Sharon from SPRINGFIELD, NJ
-
Difficulty Level:Very Easy
-
Total Repair Time:Less than 15 mins
-
Tools:Socket set
1 person
found this instruction helpful.
Was this instruction helpful to you?
Thank you for voting!
Condensation inside at the top of the refrigerator. Freezer compartment icing up.
Repair was very easy. I followed the instruction provided by this site for mullion rail. The door gaskets were a simple push fit. but needed the use of a hair drier to remove crimps in the rubber. Overall excellent. The refrigerator is working and cooling well.
Parts Used:

-
RICHARD from MIAMI, FL
-
Difficulty Level:Very Easy
-
Total Repair Time:15 - 30 mins
-
Tools:Nutdriver
1 person
found this instruction helpful.
Was this instruction helpful to you?
Thank you for voting!
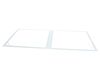
Clean the glass and asked my wife to install the glass. She is less likely to brake the glass
Removed the plastic frame, washed the frame and fridge, set new glass into the frame.
Parts Used:
-
Dan from WATERVILLE, MN
-
Difficulty Level:Easy
-
Total Repair Time:15 - 30 mins
1 person
found this instruction helpful.
Was this instruction helpful to you?
Thank you for voting!
Replace worn door gaskets
Viewed easy online instruction video. Laid gaskets on flat surface and warmed with hair dryer until they were smooth and unwrinkled. Starting at the top I pulled off the old gasket and beginning at the top I snapped in the new gasket. Carefully smooth as you go. I'm a 72 year old women and if I can do it, you can do it!
Parts Used:
-
MaryAnne from arroyo grande, CA
-
Difficulty Level:Very Easy
-
Total Repair Time:15 - 30 mins
1 person
found this instruction helpful.
Was this instruction helpful to you?
Thank you for voting!
The refrigerator doors were not shutting well. . I would come home from work and the door would be a little ajar, but not beeping. The gaskets were cracked and worn.
I watched video provided on the part page. It was very easy to pull off the old gaskets. No tools needed. Also easy to push new gaskets into the grooves. I think it helped solve the failure to close program.
Parts Used:
-
Margaret from Dublin, TX
-
Difficulty Level:Really Easy
-
Total Repair Time:15 - 30 mins
1 person
found this instruction helpful.
Was this instruction helpful to you?
Thank you for voting!
Broken glass crisper -shelving
The glass shelf sits on top of the crisper housing. That was the problem since when I turned the housing over to clean, the glass fell off. I just had to set the new part on to the housing and it was fixed.
I do want to comment on how easy it was to find the part on your website, how reasonable the price and the quick delivery. Thanks!
I do want to comment on how easy it was to find the part on your website, how reasonable the price and the quick delivery. Thanks!
Parts Used:
-
Sonny from Moraga, CA
-
Difficulty Level:Really Easy
-
Total Repair Time:Less than 15 mins
2 of 4 people
found this instruction helpful.
Was this instruction helpful to you?
Thank you for voting!
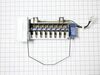
Replaced Ice Maker in Bottom Freezer
Looked at several videos on line in order to learn how to remove door and and all trays and bins and remove ice maker. Mostly straight forward. It helps to have a second pair of hands and eyes to assist. But could be done alone.Never did this before but I would say that, with a little courage, anyone could do this. I had a local repair estimate of almost $300. I did the job for the cost of the part, $80.
Parts Used:
-
Joseph from ONEONTA, NY
-
Difficulty Level:A Bit Difficult
-
Total Repair Time:30 - 60 mins
-
Tools:Nutdriver, Screw drivers, Socket set
1 person
found this instruction helpful.
Was this instruction helpful to you?
Thank you for voting!
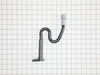
Fridge was leaking water because of bad drain
Switched the drain out using the video tutorial
Fixed the problem
Have had no more drain issues
Fixed the problem
Have had no more drain issues
Parts Used:
-
David from NEWTON, NJ
-
Difficulty Level:Easy
-
Total Repair Time:30 - 60 mins
-
Tools:Screw drivers, Socket set
1 person
found this instruction helpful.
Was this instruction helpful to you?
Thank you for voting!
Easy to clip in place
No tools required, but you must be careful not to shove or jam this kick plate into place as it is a plastic part and not really very sturdy. This is the second time I have replaced the kick plate and PartSelect has always been knowledgeable, polite, and helpful
!!
!!
Parts Used:

-
Dorothea from TOMS RIVER, NJ
-
Difficulty Level:Really Easy
-
Total Repair Time:30 - 60 mins
1 person
found this instruction helpful.
Was this instruction helpful to you?
Thank you for voting!
Torn gaskets
Laid out new gaskets in sunlight to make them pliable. Removed old gasket by gently pulling them out of the channels around the door. I then did the reverse with the new gaskets. Starting at the top I pushed the new gasket into the channel, moving in one direction around the door. Make sure the outer lip of the gasket does not fold under itself. It should lie flat on the surface of the door. It is truly that easy.
Parts Used:
-
Robert from PT CHARLOTTE, FL
-
Difficulty Level:Really Easy
-
Total Repair Time:30 - 60 mins
1 person
found this instruction helpful.
Was this instruction helpful to you?
Thank you for voting!
Water pooling on the floor.
This problem is caused by a "Duckbill" rubber grommet attached to the bottom drain tube of the freezer. This duckbill opens up during the defrost cycle and allows water to drain down the "water slide" to the evaporator pan. It doesn't take much to gum the Duckbill. Once gummed up the defrost water is trapped. The Defrost Cycle eventually makes the water flow out of the coil area to the bottom of the freezer then eventually to the floor. The repair involves unplugging the unit, removing the bottom back cover with a 1/4 nut driver, pop the power clip out to give you room, reach in and pull the duckbill grommet and the water slide, then installing this replacement drain kit. This is a p trap replacement that actually fixes the root cause of this problem. A tricky part is removing the water slide, you can see the white snap that holds the slide in place. Using a small flat blade from the top releases the snap and the unit is pulled upward rather easily. This replacement drain clip snaps in the same place. If I had to do this again it wouldn't take more than two minutes to replace. Oh, one major thing, you need to manually defrost the unit. I pulled the front door off, it is held with 4 screws ... don't remove them just loosen them and it pops off easily. I pulled the bottom tray out an it gave me room to squirt hot water with a baster into the back freezer area. Eventually everything thawed out. If I had it to do over I would have waited on connecting the tube to the evaporator pan and placed the bottom of the tube into a small sauce pan or something to collect the drain water and easily dump it into the sink. I used a sponge and that took forever. BTW, just to reiterate, use this item and not that Duck Bill for replacement, this actually fixes the root cause of this problem!
Parts Used:
-
Michael from McKinney, TX
-
Difficulty Level:A Bit Difficult
-
Total Repair Time:1- 2 hours
-
Tools:Nutdriver
1 person
found this instruction helpful.
Was this instruction helpful to you?
Thank you for voting!
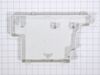
drip pan was cracked
Removed rear cover, removed fan and than drip tray. install new tray and reassemblied
Parts Used:
-
Brian from Bismarck, ND
-
Difficulty Level:A Bit Difficult
-
Total Repair Time:30 - 60 mins
-
Tools:Nutdriver
28 of 82 people
found this instruction helpful.
Was this instruction helpful to you?
Thank you for voting!
freezer would not freeze
inst said,"50 pct of the time this calls for new capacitor," so we changed the capacitor. Same prob. It also said,"25 pct of the time it's the bi-metal thermostat" So we ordered it. We removed the plastic rear panel from inside the freezer comp. using small nut driver. Here we found much ICE surrounding the defrost unit, three inches thick. We thawed the whole mess. and the freezer has worked fine ever since. I think my habit of getting ice cubes from the inside container rather than from the ice cube dispenser, had kep t the freezer door open too much, interfering with the normal defrost cycle and allowing ice to build up over time so that it finally defeated the system. My new rule, "get ice cubes only from the front."
Parts Used:

-
Michael from HELENDALE, CA
-
Difficulty Level:A Bit Difficult
-
Total Repair Time:30 - 60 mins
-
Tools:Nutdriver, Screw drivers
1 person
found this instruction helpful.
Was this instruction helpful to you?
Thank you for voting!
Dripping ice maker
-
Mark from KEWANNA, IN
-
Difficulty Level:Really Easy
-
Total Repair Time:30 - 60 mins
-
Tools:Screw drivers
1 person
found this instruction helpful.
Was this instruction helpful to you?
Thank you for voting!
compressor not running
Removed the access panel on back of unit located the Run Capacitor on the compressor and removed the bad one and put the new one on and pugged refrigerator back in and it started up and works fine now
Parts Used:
-
Doug from Lancaster, CA
-
Difficulty Level:Really Easy
-
Total Repair Time:15 - 30 mins
1 person
found this instruction helpful.
Was this instruction helpful to you?
Thank you for voting!