















41510119 General Electric Dishwasher - Instructions
Keep searches simple. Use keywords, e.g. "leaking", "pump", "broken" or "fit".
Water leaking onto the floor
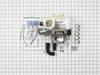
I removed the dishwasher, removed the front kick panel, layed the dishwasher on its back, loosened the clamps and removed the old motor and pump assy. Cleaned up the area where the unit was, Installed the new unit, tightened the clamps and it was done. Probably took around an hour because of my cleaning up the sealing areas.
Parts Used:
-
Jack from Caseyville, IL
-
Difficulty Level:Really Easy
-
Total Repair Time:30 - 60 mins
-
Tools:Nutdriver, Screw drivers
4 of 8 people
found this instruction helpful.
Was this instruction helpful to you?
Thank you for voting!
Replace rollers on dishwasher rack
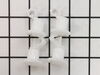
The hardest part is removing the plastic stop on the end of the two slides that support the roller rack. My unit was very old and I was afraid the plastic was brittle. Fortunately, the plastic could still be bent without breaking. You need to physically bend the plastic stops to remove. They came out easily, but you do need to apply some force.
Replacing the rollers was simple. Replacing the stops was easy once you understand how to pry them out. I would recommend trying to remove the stops with your hand only at first. You are less likely to damage the plastic.
Replacing the rollers was simple. Replacing the stops was easy once you understand how to pry them out. I would recommend trying to remove the stops with your hand only at first. You are less likely to damage the plastic.
Parts Used:
-
Clifford from Sugar Land, TX
-
Difficulty Level:Easy
-
Total Repair Time:15 - 30 mins
-
Tools:Screw drivers
2 of 2 people
found this instruction helpful.
Was this instruction helpful to you?
Thank you for voting!
no a/c
removed relay and replaced, found moth cacoon inside relay. Goodman a/c not3m no goodman in list
Parts Used:
-
joseph from wall, NJ
-
Difficulty Level:Really Easy
-
Total Repair Time:15 - 30 mins
-
Tools:Screw drivers, Socket set
3 of 5 people
found this instruction helpful.
Was this instruction helpful to you?
Thank you for voting!
The pump shaft leaked
I used the pump/motor replacement kit. It was a very easy repair and the parts were a direct replacement with no modification necessary. I saved over $300.
Parts Used:
-
Phillip from Canton, GA
-
Difficulty Level:Really Easy
-
Total Repair Time:15 - 30 mins
-
Tools:Pliers, Screw drivers, Socket set, Wrench set
2 of 2 people
found this instruction helpful.
Was this instruction helpful to you?
Thank you for voting!
Dishwasher was leaking when turned on
I removed the screws from inside door panel. Took door panel out. Noted the way the old gasket was placed, removed it and replaced with the new gasket. Replaced the door panel. Felt pretty proud of myself until I realized that the door lock wouldn't work when I was going to run it. I have now removed the door panel again and am trying to get the door lock lever to work.
Parts Used:
-
Marie from Westchester, IL
-
Difficulty Level:Easy
-
Total Repair Time:15 - 30 mins
-
Tools:Screw drivers
2 of 2 people
found this instruction helpful.
Was this instruction helpful to you?
Thank you for voting!
cable broke- door would fall down to floor
I made a substitute cable that worked ok, but was a bit loose. When the new cable part came in I simply unhooked the substitute and hooked the new part in its place. The two spring ends slip into a hole on the cable connector. The cable loops under a plastic pulley and the far end piece fits over a small retainer. Actually, unbolting the bottom case parts and bolting them back on took more time than replacing the broken cable. The door works fine now.
Parts Used:
-
CARL from GRAND RAPIDS, MI
-
Difficulty Level:Really Easy
-
Total Repair Time:15 - 30 mins
-
Tools:Screw drivers
2 of 2 people
found this instruction helpful.
Was this instruction helpful to you?
Thank you for voting!
One axle cracked and broke off; another wheel was had fallen off and was distorted when it hit the heating element.
Removed all 8 wheels and inserted the new one after inserting the axles into each wheel. Replacement wheels had a much better connection to the bottom rack and do not anticipate any problems in the future.
Parts Used:
-
Sheila from DEERFIELD, IL
-
Difficulty Level:Very Easy
-
Total Repair Time:15 - 30 mins
3 of 5 people
found this instruction helpful.
Was this instruction helpful to you?
Thank you for voting!
lost 2 front wheels.
There was a video on the page as the part. Done in a flash. The axle was a little hard to get into the wheel so I soaked it in a little hot water and it whet in like a charm.
Parts Used:
-
Elizabeth from Vacaville, CA
-
Difficulty Level:Very Easy
-
Total Repair Time:Less than 15 mins
2 of 2 people
found this instruction helpful.
Was this instruction helpful to you?
Thank you for voting!
Lower wheels kept falling off
-
helmut from EAST KINGSTON, NH
-
Difficulty Level:Really Easy
-
Total Repair Time:Less than 15 mins
3 of 5 people
found this instruction helpful.
Was this instruction helpful to you?
Thank you for voting!
Upper rollers were broken
Pulled out the top tray fully, popped off the end caps. Removed the tray and placed it on the cabinet top. Popped off the old rollers and snapped on the new rollers. Replaced the tray into the dishwasher, Popped the end caps back on and I was done.
Parts Used:
-
William from GEORGETOWN, TX
-
Difficulty Level:Really Easy
-
Total Repair Time:15 - 30 mins
-
Tools:Screw drivers
3 of 5 people
found this instruction helpful.
Was this instruction helpful to you?
Thank you for voting!
Peplace upper shelf rollers. (4)
With coin, to remove the end cap from the front inside of the rail, insert the edge of the coin into the side of the end cap and push the coin to the rear while rotating the end cap to the inside of the tray until it comes free. Don't force. Pepeat for other rail. Repeat to reinstall end caps. You can can now slide out the the tray. Use long nose pliers to remove old rollers and insert new roller(s) on same prong. Do all 4. Reinsert tray and end caps.
Parts Used:
-
phillip from DUNNELLON, FL
-
Difficulty Level:Easy
-
Total Repair Time:15 - 30 mins
-
Tools:Pliers, Screw drivers
3 of 5 people
found this instruction helpful.
Was this instruction helpful to you?
Thank you for voting!
The upper rack rollers are made of plastic after 5 years the plastic became brittle and broke so the rack fell.
Watched the video and swapped out the parts when they came. One of the arms that one of the rollers attached to was rusted and swollen had to remove the plastic coating and sand in order to get a good roller fit. Went super easy
Parts Used:
-
Frederick from LANSING, MI
-
Difficulty Level:Really Easy
-
Total Repair Time:15 - 30 mins
-
Tools:Screw drivers
2 of 2 people
found this instruction helpful.
Was this instruction helpful to you?
Thank you for voting!
Axles had broken, leaving the tray falling down when pulled out too far.
Followed the very excellent instructions provided on website by Hotpoint/GE
Parts Used:
-
Loren from BROWNSTOWN, MI
-
Difficulty Level:Very Easy
-
Total Repair Time:Less than 15 mins
-
Tools:Screw drivers
3 of 5 people
found this instruction helpful.
Was this instruction helpful to you?
Thank you for voting!
Top rack of the dishwasher had broken rollers.
Installation was very easy! Rack works perfectly now. Only problem...bought four sets instead of 4 parts since the order form didn't say it included 4 in each pack.
Parts Used:
-
Glenda from NORMAN, OK
-
Difficulty Level:Very Easy
-
Total Repair Time:Less than 15 mins
-
Tools:Screw drivers
3 of 5 people
found this instruction helpful.
Was this instruction helpful to you?
Thank you for voting!
NONE
UNPACKED WHEELS AND CLIP. USING NEEDLE NOSE PLIERS SQUEEZED WHEEL TIP TO INSERT IN WHEEL. REMOVED OLD WHEELS AND RETAINER BY HAND. INSTALLED NEW WHEELS INSTALLED AND NEW RETAINERS
Parts Used:
-
Edward from GRAND BLANC, MI
-
Difficulty Level:Very Easy
-
Total Repair Time:Less than 15 mins
-
Tools:Pliers
3 of 5 people
found this instruction helpful.
Was this instruction helpful to you?
Thank you for voting!