















36275502000 Kenmore Range - Instructions
Keep searches simple. Use keywords, e.g. "leaking", "pump", "broken" or "fit".
Front burners had to be lit with lighter
My son lifted up cooktop, unscrewed the front plate to gain access to old tube burners, removed and replaced with new parts.
Parts Used:
-
Marie from Woodstock, IL
-
Difficulty Level:Really Easy
-
Total Repair Time:15 - 30 mins
-
Tools:Screw drivers, Wrench set
2 of 5 people
found this instruction helpful.
Was this instruction helpful to you?
Thank you for voting!
failed oven controller
Removed screws to back plate, unplugged, removed controller and installed new.
Parts Used:
-
RICK from SAN JOSE, CA
-
Difficulty Level:Really Easy
-
Total Repair Time:Less than 15 mins
-
Tools:Nutdriver
2 of 5 people
found this instruction helpful.
Was this instruction helpful to you?
Thank you for voting!
Old dishwasher rack and silverware rack
The whole process was very easy! I just got the model number and bought a new rack and silverware holder on,one. There was no assembly needed so I just popped them in and replaced the old ones! Very easy to do!
Parts Used:
-
Anne Marie from Andover, MA
-
Difficulty Level:Really Easy
-
Total Repair Time:Less than 15 mins
Was this instruction helpful to you?
Thank you for voting!
broken left /right range lines broke off
loosen the compression fitting both ends and screwed new ones in place .
Parts Used:
-
AL from PHILADELPHIA, PA
-
Difficulty Level:Really Easy
-
Total Repair Time:Less than 15 mins
-
Tools:Nutdriver, Screw drivers
Was this instruction helpful to you?
Thank you for voting!
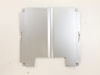
stove converted to propane. 2 year later a bad oder developed.
called appliance repairman. He found problem and ordered new part. After 2 months waiting for part to get there, my husband got on internet and calld your number, and ordered what was needed. Now for the great thing. Within 4 working days we received what we thought we needed. but we had ordered the wrong part number. Got back on internet, went right to your web site, found the part that we did need, a flame spreader instead of the Deflector. called your service number, talked to a very nice person, again, told her what we did and ordered the correct part. Another great thing, we got that part the very next day. I returned the wrong part that same day. We then had our son install it and now we have a very nice working oven. Though out this very long ordeal, we talked to the applicance service people and got the same answer. The part has been ordered and it should be here next week. When we found your web site and called for the part, I called the appliance service and told them we had ordered the part ourselves and I would be happy to give her this information. THE VERY NEXT DAY she called us to tell us the part had fially arrived and they could come out the next day. Told them sorry but it as already taken care of. The very next time we need some part for any appliance we will call you first. Thank you for your very nice service people and the fast way that this all took place.
Parts Used:
-
Robert W from Porterville, CA
-
Difficulty Level:Easy
-
Total Repair Time:15 - 30 mins
-
Tools:Screw drivers, Socket set, Wrench (Adjustable)
Was this instruction helpful to you?
Thank you for voting!
Open door. Put racks in.
-
Harriet from Jacksonville Beach, FL
-
Difficulty Level:Really Easy
-
Total Repair Time:Less than 15 mins
Was this instruction helpful to you?
Thank you for voting!
I needed an oven with three racks, mine came with two.
-
BETTY from CYPRESS, TX
-
Difficulty Level:Easy
-
Total Repair Time:Less than 15 mins
Was this instruction helpful to you?
Thank you for voting!
Replaced damaged oven rack
I ordered the oven rack on a Tuesday and received it the very next day - was wowed at the service.
Parts Used:
-
Vicki from Irvine, CA
-
Difficulty Level:Really Easy
-
Total Repair Time:Less than 15 mins
Was this instruction helpful to you?
Thank you for voting!
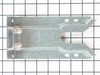
needed to unstall "anti tilt" bracket on back of electric range to be code compliant for property..
Turned off circuit breaker, Then pulled out range, straight out and away from wall and cabinets. Layed braket on flooring and moved stove back in to make certain it aligned with range rear stands. Moved range back out, marked holes in braket, screwed in screws to anchor bracket. Pushed range back into placed against wall. Tried to |"tilt" range by pulling down on door after opened - range was held in place sre
Parts Used:
-
Greg from Ft. Washington, PA
-
Difficulty Level:Really Easy
-
Total Repair Time:Less than 15 mins
-
Tools:Screw drivers
Was this instruction helpful to you?
Thank you for voting!
Cracked the left burner tubes
I opened cook top without disassemble cook top and broke the left front tube.
After I received left front tube and disassemble cook top to install and found right front tube also not good condition.
I ordered right front tube and installed both tube. I recommend order both front tubes to save shipping.
The tubes were easy to install but little bit hard to remove old Electrode for disassemble cook top and to line up cook top and holder orifice screw hole for assemble.
After I received left front tube and disassemble cook top to install and found right front tube also not good condition.
I ordered right front tube and installed both tube. I recommend order both front tubes to save shipping.
The tubes were easy to install but little bit hard to remove old Electrode for disassemble cook top and to line up cook top and holder orifice screw hole for assemble.
Parts Used:
-
JUNSOO from NORTHBROOK, IL
-
Difficulty Level:Easy
-
Total Repair Time:30 - 60 mins
Was this instruction helpful to you?
Thank you for voting!
The front tubing broke.
The parts were easy to locate on the website, reasonably priced, and arrived in two days. The installation was simple and the parts fit exactly as they should.
Parts Used:
-
Linda from New Milford, CT
-
Difficulty Level:Really Easy
-
Total Repair Time:30 - 60 mins
-
Tools:Screw drivers
Was this instruction helpful to you?
Thank you for voting!
break pain on the top

-
iosif from brooklyn, NY
-
Difficulty Level:Easy
-
Total Repair Time:30 - 60 mins
-
Tools:Pliers, Screw drivers
Was this instruction helpful to you?
Thank you for voting!
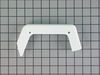
End cap cracked. Tried to fix it with epoxy, but it didn't work.
Used screwdriver w/star bit to remove two screws (longer one on top). Removed cracked end cap. Placed new end cap into position, making sure all tabs were correctly aligned. Replaced screws (top one first)tightening them slowly & alternating back & forth so as not to crack the new part.
Parts Used:
-
William from Lincoln, CA
-
Difficulty Level:Really Easy
-
Total Repair Time:Less than 15 mins
Was this instruction helpful to you?
Thank you for voting!
no racks to oven
-
Johnette from Baltimore, MD
-
Difficulty Level:Really Easy
-
Total Repair Time:Less than 15 mins
Was this instruction helpful to you?
Thank you for voting!
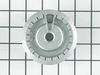
Missing burners and burner caps
I bought a used gas stove for canning for $25.00. I spent about an hour cleaning it up. It was missing two burners and burner caps, which I replaced. So, for $110.00 I have a practically new gas stove.
Parts Used:

-
Mark from Blairsville, GA
-
Difficulty Level:Really Easy
-
Total Repair Time:Less than 15 mins
Was this instruction helpful to you?
Thank you for voting!