















36261028892 Kenmore Range - Instructions
Keep searches simple. Use keywords, e.g. "leaking", "pump", "broken" or "fit".
gas flame flared and blackened pots; gas jets clogged
raised the range top so the supports locked in place. carefully lifted off the old burner assemblies. used a paper towel to remove any black soot from gas jets. opened the plastic package of the new burner assemblies, pulled out the new parts and carefully put them in place. turned on the flame to test... took less than 5 minutes to fix a problem that's been annoying for 3 years!!
Parts Used:
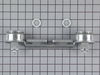
-
Patricia A from Newport, NH
-
Difficulty Level:Really Easy
-
Total Repair Time:Less than 15 mins
Was this instruction helpful to you?
Thank you for voting!
3 of 4 Burners would not light
Open the stove top pulled old burners out dropped new set in place. Theyclick right in NO TOOLS REQUIRED!!!!
Parts Used:
-
David from Cincinnati, OH
-
Difficulty Level:Really Easy
-
Total Repair Time:Less than 15 mins
Was this instruction helpful to you?
Thank you for voting!
needed to unstall "anti tilt" bracket on back of electric range to be code compliant for property..
Turned off circuit breaker, Then pulled out range, straight out and away from wall and cabinets. Layed braket on flooring and moved stove back in to make certain it aligned with range rear stands. Moved range back out, marked holes in braket, screwed in screws to anchor bracket. Pushed range back into placed against wall. Tried to |"tilt" range by pulling down on door after opened - range was held in place sre
Parts Used:
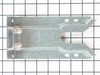
-
Greg from Ft. Washington, PA
-
Difficulty Level:Really Easy
-
Total Repair Time:Less than 15 mins
-
Tools:Screw drivers
Was this instruction helpful to you?
Thank you for voting!