















31213WAM Magic Chef Range - Instructions
Keep searches simple. Use keywords, e.g. "leaking", "pump", "broken" or "fit".
One burner was sparking but not lighting
I first switched the old burner to a new position and different ignitor wiring. The problem persisted in both places, so I bought a new burner assembly and now the burner lights immediately. Very happy and a very simple replacement.
Parts Used:
-
John from Albuquerque, NM
-
Difficulty Level:Really Easy
-
Total Repair Time:Less than 15 mins
2 of 3 people
found this instruction helpful.
Was this instruction helpful to you?
Thank you for voting!
Oven would not ignite
-
Dominick from CLARKS SUMMIT, PA
-
Difficulty Level:Very Easy
-
Total Repair Time:Less than 15 mins
-
Tools:Screw drivers, Wrench set
1 person
found this instruction helpful.
Was this instruction helpful to you?
Thank you for voting!
Burners would not ignite.
I was looking at replacing the stove and saw the $1200.00 price tag! So I found this web site and paid $100.00 to fix my old one. It was very simple. I twisted off the old burners by sliding off the two connecting wires. Cleaned the area around the seating area of the burners. Hooked the wires on the new burners and twisted them back in place! Tested them to insure that was the problem and was done! Thank you for saving me $1100.00!!! Next I am getting grates so the whole stove will look band new!
Parts Used:
-
Tami from Yuma, AZ
-
Difficulty Level:Really Easy
-
Total Repair Time:Less than 15 mins
1 person
found this instruction helpful.
Was this instruction helpful to you?
Thank you for voting!
Igniter for oven not working
Instead of buying a new range my son said he could replace the part so I looked your company up on internet and had it shipped. Three days later I was cooking with gas again! Thanks!
Parts Used:
-
RONNIE from SAG HARBOR, NY
-
Difficulty Level:Easy
-
Total Repair Time:Less than 15 mins
-
Tools:Wrench set
1 person
found this instruction helpful.
Was this instruction helpful to you?
Thank you for voting!
oven would not heat up fully, smelled of gas.
Took off the top plate at the bottom of the oven, and the flame spreader, removed 2 screws on the igniter, pulled out the broiler tray and unplugged it. Took longer to get off the floor than it did to replace the part.
Parts Used:
-
Brian from Spotswood, NJ
-
Difficulty Level:Really Easy
-
Total Repair Time:Less than 15 mins
-
Tools:Screw drivers
1 person
found this instruction helpful.
Was this instruction helpful to you?
Thank you for voting!
oven would not light reliably.
Just like the example I removed the oven base, removed the two screws holding the igniter. Pulled out the wires opened the connector, plugged in the new igniter put everything back and turned on the oven. The oven now lights better than it did when new. And it holds a steady temp.
Parts Used:
-
Joe from West Winfield, NY
-
Difficulty Level:Easy
-
Total Repair Time:Less than 15 mins
-
Tools:Screw drivers
1 person
found this instruction helpful.
Was this instruction helpful to you?
Thank you for voting!
Stove Would Not Light To Heat Up.
Removed grates and bottom plate two screws holding it. Turn oven light on and unwire the wire. Unscrewed the two screws and replace. This took my husband about ten min. And for him he says that this was a walk in the park. He says if he can do it anyone can. This was one of the easy honey dews. Good luck with yours. Nola & keith
Parts Used:
-
Nola from Enid, OK
-
Difficulty Level:Really Easy
-
Total Repair Time:Less than 15 mins
-
Tools:Screw drivers
1 person
found this instruction helpful.
Was this instruction helpful to you?
Thank you for voting!
Old seal breaking off oven door. Oven not baking food well, wasting heat and fuel.
Used pliers to remove clips and old seal. Snap in new seal. DONE! Less than 5 mins.
Parts Used:
-
Mz from COLUMBIA, ME
-
Difficulty Level:Very Easy
-
Total Repair Time:Less than 15 mins
-
Tools:Pliers
1 person
found this instruction helpful.
Was this instruction helpful to you?
Thank you for voting!
igniter failed to ignite
Replaced the igniter by removing 2 screws, pulling on the wires to pull the connector in from the back thru the oval opening, screwing in the the new element, reconnecting the wires, pushing the connector back and that did it.
Parts Used:
-
Gino from ARLETA, CA
-
Difficulty Level:Really Easy
-
Total Repair Time:Less than 15 mins
-
Tools:Socket set
1 person
found this instruction helpful.
Was this instruction helpful to you?
Thank you for voting!
My original back leg broke because the floor is uneven. Had to pull it out several times.
Put the back of stove on blocks of wood to get high enough to screw the new leg in.
Parts Used:

-
Phyllis from BROWNVILLE, NY
-
Difficulty Level:Really Easy
-
Total Repair Time:Less than 15 mins
-
Tools:Wrench (Adjustable)
1 person
found this instruction helpful.
Was this instruction helpful to you?
Thank you for voting!
My oven door seal had dried rotted
I took pliers to get the old one off, and popped the new one back in its place, and it fit perfect.
Parts Used:
-
Anita from ELKTON, VA
-
Difficulty Level:Really Easy
-
Total Repair Time:15 - 30 mins
-
Tools:Pliers
1 person
found this instruction helpful.
Was this instruction helpful to you?
Thank you for voting!
The oven bottom was warped and could not be positioned properly in the oven.
Removing the old oven bottom was easy...as it was already outside of its slots. Installing the new one was pretty easy. I placed the oven bottom in the front slots first...then the rear slots...no tools necessary.
Parts Used:
-
Tara from ALBANY, NY
-
Difficulty Level:Easy
-
Total Repair Time:15 - 30 mins
1 person
found this instruction helpful.
Was this instruction helpful to you?
Thank you for voting!
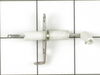
gas burner on stove top not lighting ,other 3 work fine.
Make sure all burners on stove top are off.Half twist burner top to separate burner from stove top.The burner slide fits over the metal tube that transports the gas to the burner.Remove the 2 slip fit connected wires from the underside of the burner.They should be of different sizes so no worries about incorrectly re-attaching them.The igniter has 2 philips screws holding the igniter to the burner, Remove those and the igniter will be able to be removed with a little wiggling.Insert new igniter thru the hole in the burner and secure with the 2 screws. Reattach wires , place burner back on top making sure the wires aren't being crimped when the burner slides over the aforementioned metal tube and twist burner to seat in stove top, turn on burner to confirm igniter now ignites properly.
Parts Used:
-
Philip from Santa Maria, CA
-
Difficulty Level:Really Easy
-
Total Repair Time:15 - 30 mins
-
Tools:Screw drivers
1 person
found this instruction helpful.
Was this instruction helpful to you?
Thank you for voting!
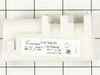
no spark on top burners
part was by the brolier drawer inside under stove removed 2 screws on cover/ part was attached to cover removed module line 1-2 fit/ had to use supplied disconects crimped on 4 burner wire leads/taped around module w/ elec. tape put back 2 screws finished. works now.
Parts Used:
-
eric from winter haven, FL
-
Difficulty Level:A Bit Difficult
-
Total Repair Time:15 - 30 mins
-
Tools:Pliers, Screw drivers
2 of 4 people
found this instruction helpful.
Was this instruction helpful to you?
Thank you for voting!
The igniter of the burner was worn out of constant use.
First I did was to google the problem I have. There several video how to solve the problem. It show me different ways to solve my problem. I just follow the instructions. Thank to google without it, I am lost. I may add, that google is a big saver for me.
Parts Used:
-
Israel from HYATTSVILLE, MD
-
Difficulty Level:Really Easy
-
Total Repair Time:15 - 30 mins
-
Tools:Pliers, Screw drivers
1 person
found this instruction helpful.
Was this instruction helpful to you?
Thank you for voting!