















31003PAWD Magic Chef Range - Instructions
Keep searches simple. Use keywords, e.g. "leaking", "pump", "broken" or "fit".
Gas range and top oven does not light up
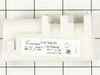
I pulled out the gas range, unplugged the unit from the outlet. Unscrewed about two panels, one is the black cardboard panel located on top, then the aluminum main panel.
Located the spark module, unscrewed the unit from resting plate. Did not change the plate, although the new unit came with a new one, but it doesn't fit. So I just rested the new one on the old plate.
Pulled each wire slowly out and inserted it onto the new spark module.
Screwed in all the panels back and returned the stove to its proper place.
The range now works as well as the oven, but my broiler still does not light up.
Located the spark module, unscrewed the unit from resting plate. Did not change the plate, although the new unit came with a new one, but it doesn't fit. So I just rested the new one on the old plate.
Pulled each wire slowly out and inserted it onto the new spark module.
Screwed in all the panels back and returned the stove to its proper place.
The range now works as well as the oven, but my broiler still does not light up.
Parts Used:
-
Albert from Boston, MA
-
Difficulty Level:Easy
-
Total Repair Time:15 - 30 mins
-
Tools:Screw drivers
3 of 3 people
found this instruction helpful.
Was this instruction helpful to you?
Thank you for voting!
Self tapping screws stripped out, one broke in mounting hole
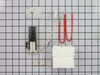
Punched out broken screw. Drilled out damaged threads to same size as igniter mounting holes. I used nuts, bolts and lock washers to mount igniter. Would have been very easy if mounting screws had come out. Video very helpful.
Parts Used:
-
Scott from FORT WORTH, TX
-
Difficulty Level:A Bit Difficult
-
Total Repair Time:30 - 60 mins
-
Tools:Nutdriver, Screw drivers
3 of 3 people
found this instruction helpful.
Was this instruction helpful to you?
Thank you for voting!
Oven ignighter no longer works
Well Got the part within 3 days. Followed instructions to install it and it worked. One thing you need to add to your kit is replacement mounting screws (2 nuts and bolts). It turns out that the original burner because of its age, had a hard time unscrewing it. The screws were very tight and ended up stripped. I ended up using a Dremel tool to cut the screws off. By now the holes were a little bigger than original so I had to put it back together with a nut and bolt that would fit the small hole. But overall this was my first repair and I would definitely order from you again. Your site's part search and documentation with video clarified it wonderfully. Great service and site!
Barry
Barry
Parts Used:
-
Barry from PORTERVILLE, CA
-
Difficulty Level:A Bit Difficult
-
Total Repair Time:30 - 60 mins
-
Tools:Nutdriver, Pliers, Screw drivers, Socket set
3 of 3 people
found this instruction helpful.
Was this instruction helpful to you?
Thank you for voting!
Gas was escaping from underneath the burner head
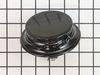
The old burner head had corroded allowing gas to come out at the bottom. The actual replacement is just turning the head, lifting it out, transferring two wires with slip-on connectors from the old burner to the new one, and dropping the new one in place. Most of the time was spent sanding away corroded metal on the base to make a good fit. The information on the burner head says that the company has decided not to use a gasket under the head. I suggest that was a bad decision.
Parts Used:
-
Edward from ALEXANDRIA, VA
-
Difficulty Level:Easy
-
Total Repair Time:30 - 60 mins
-
Tools:Pliers
3 of 3 people
found this instruction helpful.
Was this instruction helpful to you?
Thank you for voting!
OVEN WOULD NOT HEAT
TOOK OVEN BOTTOM APART AND LOSSENED OLD IGNITERTHEN WENT TO BACK OF OVEN TOOK BACK OFF DISCONETED OLD IGNITER PULLED THE NEW THUR AND CONNECTED PUT BACK ON THEN ATTACHED FROM THE FRONT PUT OVEN BACK TOGATHER THEN TURNED OVEN ON IT WORKED I DID IT MYSELF I AM 64 YEAR OLD WOMEN
Parts Used:
-
Mary from MEADVILLE, PA
-
Difficulty Level:Really Easy
-
Total Repair Time:30 - 60 mins
-
Tools:Screw drivers
3 of 3 people
found this instruction helpful.
Was this instruction helpful to you?
Thank you for voting!
Oven taking to long to preheat.
Accessed igniter removed 2screws holding it.unpluged igniter installed new one.
Parts Used:
-
Isaac from LATHRUP VLG, MI
-
Difficulty Level:Very Easy
-
Total Repair Time:30 - 60 mins
-
Tools:Screw drivers
3 of 4 people
found this instruction helpful.
Was this instruction helpful to you?
Thank you for voting!
Oven burner would periodically go out and re-light
The ignitor is held on by two screws which were rusted in place. When I tried to remove them, the screws became stripped and had to be cut off.
Once the part was free, the rest of the repair went quickly . At that point:
- Pull the element leads enough to get to the plastic connector
- Disconnect the old part
- Connect the new part
- Re-attach to the bracket with new screws.
Once the part was free, the rest of the repair went quickly . At that point:
- Pull the element leads enough to get to the plastic connector
- Disconnect the old part
- Connect the new part
- Re-attach to the bracket with new screws.
Parts Used:
-
Richard from Merrimac, MA
-
Difficulty Level:Easy
-
Total Repair Time:15 - 30 mins
-
Tools:Screw drivers, Wrench set
3 of 4 people
found this instruction helpful.
Was this instruction helpful to you?
Thank you for voting!
The old thermostat broke
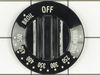
The installation was very easy.
The knob fit right into place and that was it.
No screws or tools were necessary.
There was a "D Shaped" slot in the back of the knob that slid right into the metal piece attached to the stove.
The delivery was very quick and the ordering process was very easy.
The knob fit right into place and that was it.
No screws or tools were necessary.
There was a "D Shaped" slot in the back of the knob that slid right into the metal piece attached to the stove.
The delivery was very quick and the ordering process was very easy.
Parts Used:
-
Gregory from Braintree, MA
-
Difficulty Level:Really Easy
-
Total Repair Time:Less than 15 mins
3 of 4 people
found this instruction helpful.
Was this instruction helpful to you?
Thank you for voting!
Oven Was Not Getting Hot
First I want thank you for being there for me . If it wasn't for you I would be having thanksgiving at my mother inlaw first iremoved the two screwsthat holds thy element in place. I then pulledthe element out about 3 in and disconnected the two wires . It's easy as 1. 2. 3
Parts Used:
-
Joe from Duarte, CA
-
Difficulty Level:Really Easy
-
Total Repair Time:Less than 15 mins
-
Tools:Screw drivers
3 of 5 people
found this instruction helpful.
Was this instruction helpful to you?
Thank you for voting!
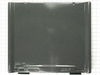
floor panel heavily stained and warped
-
Joel from Monroe, NY
-
Difficulty Level:Really Easy
-
Total Repair Time:Less than 15 mins
3 of 5 people
found this instruction helpful.
Was this instruction helpful to you?
Thank you for voting!
Igniter glowed but oven would not light
The repair was straight forward. Turn off gas, unplug stove. Remove the oven door by opening slightly and lifting straight up. The bottom plate lifts from the back. Remove two screws and plug; install new unit. Turn everything back on; proceed with baking...
Parts Used:
-
Richard from West Mifflin, PA
-
Difficulty Level:Easy
-
Total Repair Time:Less than 15 mins
-
Tools:Nutdriver
2 of 2 people
found this instruction helpful.
Was this instruction helpful to you?
Thank you for voting!
Broken burner - easy fix
The burner was leaking a rust colored dirt and shooting flames all over the place. The top came off and I needed channel-locks to get the bottom half out. The wires were hard to get off and I broke one connector off so I soldered the wire on to the new part which fit the stove top perfectly. It still took less than a half hour to replace. Without problems it should take about 5 minutes.
Parts Used:
-
Don from NEW YORK, NY
-
Difficulty Level:Really Easy
-
Total Repair Time:15 - 30 mins
-
Tools:Pliers
2 of 2 people
found this instruction helpful.
Was this instruction helpful to you?
Thank you for voting!
Burner igniter problem.
-
Dhirajlal from SKOKIE, IL
-
Difficulty Level:Really Easy
-
Total Repair Time:15 - 30 mins
-
Tools:Pliers
2 of 2 people
found this instruction helpful.
Was this instruction helpful to you?
Thank you for voting!
The problem was exactly what was described on your site.
I pretty much did the repair the same way the video described it. I first turned off the gas valve and disconnected the power. Then removed the two screws holding in the burner tube and removed it. Then I unplugged the old igniter. The screws were a bit corroded so I gave them a little spray of liquid wrench. They came right out them. After removing them I replaced the igniter plugged it in. Then I put the wire through the hole in the wall of the oven. Replaced the insulation that was included in the kit. Replaced the burner tube on the venture. And reinstalled the screws. It was pretty cut and dry. The glow plug had the burner fired up in 15 seconds.
Parts Used:
-
William from FREELAND, MI
-
Difficulty Level:Very Easy
-
Total Repair Time:15 - 30 mins
-
Tools:Nutdriver, Screw drivers
2 of 2 people
found this instruction helpful.
Was this instruction helpful to you?
Thank you for voting!
The oven igniter came on but the gas valve never turned on.
1. remove oven door 2. remove racks and oven floor 3. remove oven burner 4. unhook igniter 5. install new igniter 6. tuck wiring back in as reinstalling burner 7. put in the insulation supplied in kit 8. install floor and racks. 9. install door. 10. test system 11. oven came on. SUCCESS
Parts Used:
-
James from PEORIA, IL
-
Difficulty Level:Very Easy
-
Total Repair Time:Less than 15 mins
-
Tools:Screw drivers
2 of 2 people
found this instruction helpful.
Was this instruction helpful to you?
Thank you for voting!