















2539287413 Kenmore Freezer - Instructions
Keep searches simple. Use keywords, e.g. "leaking", "pump", "broken" or "fit".
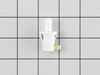
Pushbutton light switch failed.
Needed a Phillips head screwdriver to remove bottom plate (kick panel). UNPLUGGED FREEZER. Removed plate pulled switch out through the mounting hole and unhooked the two electric wires. Placed wires on new switch, pushed wires back through the hole and seated the switch. Plugged in the freezer and opened the door - magic, the light came on. Replaced the front kick panel (hardest part was to line up the plate holes with the holes in the mounting bracket).
Parts Used:
-
Arlee from HOUSTON, TX
-
Difficulty Level:Very Easy
-
Total Repair Time:15 - 30 mins
-
Tools:Screw drivers
4 of 5 people
found this instruction helpful.
Was this instruction helpful to you?
Thank you for voting!
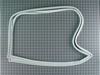
frost and ice build up/ gasket wasnt sealing properly
I did watch a repair a utube video which I asked for when ordering. Pretty much followed most of the directions but:
started in left corner an lossed all screws from left to right. took off old gasket in small sections and inserted the new gasket and semi tighten screws
proceeded down left side then right little by little as above. to get to bottom of door.
bottom corners were a little snug to get them into place. the last corner was snug but once connected. tighten screws not too tight. You dont want to strip them.
test door with piece of paper.
if paper is not a snug tug, you can adjust gasket with a hair dryer set to low.
it was easy. freezer is all set.
Partselect was great to deal with, support verified the part number was correct for my freezer and help with that video.
started in left corner an lossed all screws from left to right. took off old gasket in small sections and inserted the new gasket and semi tighten screws
proceeded down left side then right little by little as above. to get to bottom of door.
bottom corners were a little snug to get them into place. the last corner was snug but once connected. tighten screws not too tight. You dont want to strip them.
test door with piece of paper.
if paper is not a snug tug, you can adjust gasket with a hair dryer set to low.
it was easy. freezer is all set.
Partselect was great to deal with, support verified the part number was correct for my freezer and help with that video.
Parts Used:
-
Richard from Warren, MA
-
Difficulty Level:Easy
-
Total Repair Time:30 - 60 mins
-
Tools:Screw drivers
3 of 3 people
found this instruction helpful.
Was this instruction helpful to you?
Thank you for voting!
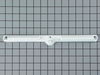
Piece broken off of drawer slide
I removed the screws and replace the broken slide with the new slide. Put the basket drawer back on the track and it now stays in place and can easily be used once again.
Parts Used:
-
Carol from Lawrence, KS
-
Difficulty Level:Really Easy
-
Total Repair Time:Less than 15 mins
-
Tools:Screw drivers
4 of 6 people
found this instruction helpful.
Was this instruction helpful to you?
Thank you for voting!
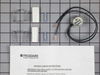
Freezer coils kept freezing over.
1. Turned off the cooling cycle and unplugged the refrigerator.
2. Removed all of the shelving and bottom basket.
3. Removed rear covering in the freezer section.
4. If frosted over, manually defrost coils with hairdryer.
5. Located original thermostat and after marking the wire locations cut the wires and removed the Thermostat.
6. Connected matching wires using a lighter to melt the wires together. Wrapped repaired wires with electricians tape.
7. Unable to install the thermostat in the recommended location (freezer is a tight fit) the new part was installed at the original location.
8. Replaced the rear cover and shelves.
9. Plugged in the refrigerator and set the cycle back to cooling.
10. Monitored freezer coils couple of days/weeks depending on how fast they freeze over (slots at bottom of cover) to validate if problem solved.
2. Removed all of the shelving and bottom basket.
3. Removed rear covering in the freezer section.
4. If frosted over, manually defrost coils with hairdryer.
5. Located original thermostat and after marking the wire locations cut the wires and removed the Thermostat.
6. Connected matching wires using a lighter to melt the wires together. Wrapped repaired wires with electricians tape.
7. Unable to install the thermostat in the recommended location (freezer is a tight fit) the new part was installed at the original location.
8. Replaced the rear cover and shelves.
9. Plugged in the refrigerator and set the cycle back to cooling.
10. Monitored freezer coils couple of days/weeks depending on how fast they freeze over (slots at bottom of cover) to validate if problem solved.
Parts Used:
-
Kyle from Porter, OK
-
Difficulty Level:Really Easy
-
Total Repair Time:Less than 15 mins
-
Tools:Nutdriver
4 of 6 people
found this instruction helpful.
Was this instruction helpful to you?
Thank you for voting!
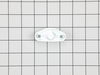
End cap for side door shelf broken
Both end caps were missing on the door side bottom metal shelf. succesfully installed no tools needed
Parts Used:
-
wissam farhat from medley, FL
-
Difficulty Level:Easy
-
Total Repair Time:Less than 15 mins
3 of 3 people
found this instruction helpful.
Was this instruction helpful to you?
Thank you for voting!
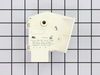
Defrost Timer
The old defrost timer started making a screeching noise (probably bearings going out). The replacement part was a cinch to install. When I initially spoke to a PartsSelect person, they said the part number I gave them was not consistent with my old '94 Tappan Freezer. They were able to still find the proper replacement part number. The video that was on-line helpful also.
Parts Used:
-
DAVE from LOS RANCHOS, NM
-
Difficulty Level:Very Easy
-
Total Repair Time:Less than 15 mins
-
Tools:Screw drivers
4 of 6 people
found this instruction helpful.
Was this instruction helpful to you?
Thank you for voting!
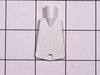
Missing key
After removing the key from its shipping package I pushed it into the freezer locking slot and turned it to lock and unlock the lid and then removed it. I had no problems with this fix. Of course, I am an older gentleman with a lot of experience in repairs around my house,as well as other houses. I am sure that a less experienced person may have more of problem with this type of "repair".
Parts Used:
-
John from DUNBAR, WV
-
Difficulty Level:Very Easy
-
Total Repair Time:Less than 15 mins
3 of 4 people
found this instruction helpful.
Was this instruction helpful to you?
Thank you for voting!
freezer colk, refrig warm
Followed the instructions provided in your video, took less than 15 minutes and works like new. Thank you for the parts and the advice.
Parts Used:
-
Jeff from GLENDORA, CA
-
Difficulty Level:Really Easy
-
Total Repair Time:Less than 15 mins
-
Tools:Nutdriver
2 of 2 people
found this instruction helpful.
Was this instruction helpful to you?
Thank you for voting!
broken drawer slide
removed old broken part, 3 screws, then installed new part.....done
Parts Used:
-
warren from Farmdale, OH
-
Difficulty Level:Really Easy
-
Total Repair Time:Less than 15 mins
-
Tools:Screw drivers
3 of 5 people
found this instruction helpful.
Was this instruction helpful to you?
Thank you for voting!
Freezer not cooling due to icing up of coil.
The timer in this older unit is clearly exposed at the back of the freezer underneath the freezer compartment. It is attached with two Phillips head screws. After the screws are removed, the timer can be unplugged and the new one plugged in. The new timer has an extra flange to allow it to be used on more than one model of freezer. In order to mount the timer in this unit, you have to remove the extra flange by carefully cutting it away from the timer body, in similar fashion to what's depicted in the online video. This will allow you to mount the new timer to the mounting plate using the two screws from the old timer.
Parts Used:
-
Thomas from GRANBURY, TX
-
Difficulty Level:Really Easy
-
Total Repair Time:15 - 30 mins
-
Tools:Screw drivers
2 of 2 people
found this instruction helpful.
Was this instruction helpful to you?
Thank you for voting!
I knockedoff the door light sensor when I dropped a frozen jug of ice
I removed the plate (recommend using a magnetic phillips head screw driver to remmove screws which are recessed). I removed the old part and pushed the new part through the hole and carefully reached in behindto attach the wires to the new part.
Parts Used:
-
Rob from HILLSBORO, NH
-
Difficulty Level:Very Easy
-
Total Repair Time:15 - 30 mins
-
Tools:Screw drivers
2 of 2 people
found this instruction helpful.
Was this instruction helpful to you?
Thank you for voting!
Door alarm going off indicating door ajar
This did not fix the problem. Call a repairman and he cannot come until 9/11. Food is staying frozen. Alarm sounds for awhile and then shuts off for a bit.
Parts Used:
-
CONSTANCE from NEW COLUMBIA, PA
-
Difficulty Level:Really Easy
-
Total Repair Time:30 - 60 mins
-
Tools:Screw drivers
2 of 2 people
found this instruction helpful.
Was this instruction helpful to you?
Thank you for voting!
freezer was warm
Top freezer took off the panel in freezer and melted the ice around coils and found the defrost thermostat and replaced with the new one. Just followed the instructions from your video on line. Freezer works just fine now. Refrigerator is 38 years old.
Parts Used:
-
Carol from OSHKOSH, WI
-
Difficulty Level:Easy
-
Total Repair Time:30 - 60 mins
-
Tools:Screw drivers
2 of 2 people
found this instruction helpful.
Was this instruction helpful to you?
Thank you for voting!
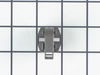
Freezer was not freezing.
I removed the compressor start relay and replaced it with the new part. Initially it did not work. When I checked my work, I had to tighten the connector on the new part. Once I made the correction, the freezer is freezing normally again.
Parts Used:
-
Andre from ANDERSON, SC
-
Difficulty Level:Really Easy
-
Total Repair Time:15 - 30 mins
-
Tools:Pliers, Screw drivers
2 of 2 people
found this instruction helpful.
Was this instruction helpful to you?
Thank you for voting!
Fridge not cooling
My fridge side had warmed up to 70 degrees but the freezer side was still cold. The coils inside had iced up. After thawing with a hair dryer, it froze back after another week. I removed the old defrost thermostat and wired the heater strip directly and turned on the defrost timer. It began melting the ice so that ruled out the heater strip being bad. I couldn't get a reading with my ohm meter on the defrost thermostat so I took a chance and bought the part. Installation was a breeze and it fixed the problem.
Parts Used:
-
WESTLEY from HATTIESBURG, MS
-
Difficulty Level:Easy
-
Total Repair Time:15 - 30 mins
-
Tools:Nutdriver
3 of 5 people
found this instruction helpful.
Was this instruction helpful to you?
Thank you for voting!