















2539284213 Kenmore Freezer - Instructions
Keep searches simple. Use keywords, e.g. "leaking", "pump", "broken" or "fit".
Fan in freezer quit
This was an easy job. First remove the ice maker, if you have one. Mine was mounted with just two screws. Loosen these screws, unplug the power cord at the connector and then lift the ice maker off. Remove the light bulb cover and the light bulb, just so you dont break it. Remove two hex screws and the back cover can be removed. My fan was mounted in the middle of a bracket retained between two rubber bushingings. Just push the fan blad of the shaft and pull the motoer out. Dissonect the power cord at the connector. My moter was differant than the replacement on the mounting so with the removial of the two screws on the motor I was able to exchange the upper and lower cast motoer housings. Reverse the assembly process and you good. Mine is running great.
Parts Used:
-
Dan from Woodstock, GA
-
Difficulty Level:Easy
-
Total Repair Time:30 - 60 mins
-
Tools:Nutdriver, Screw drivers
Was this instruction helpful to you?
Thank you for voting!
Side rail for sliding shelf would not stay tight
The sliding shelf side rail is held by three philips head screws that tighten into nut inserts. No amount of tightening would keep two of the three screws tight. I found that the nut inserts which are plastic and insert into the side of the freezer would pull loose, probably from years of overloading the sliding shelf basket. Ordered two nut inserts from PartSelect. 1. Remove three screws to remove shelf slide side rail. 2. Remove nut inserts to be replaced with needle nose pliers or reinsert screw a couple of turns and pull nut insert out with pliers. 3. Insert new nut inserts, position side rail, and tighten screws. Replace sliding shelf/basket.
Parts Used:
-
Scott J from Westminster, CO
-
Difficulty Level:Really Easy
-
Total Repair Time:Less than 15 mins
-
Tools:Pliers, Screw drivers
Was this instruction helpful to you?
Thank you for voting!
door switch broke
Removed bottom cover , just two screws , slid old part through install hole and removed wires from old switch and installed on new switch. Installed new switch in same hole and pushed gently until it locked in place. Reinstalled bottom cover and done.
Parts Used:
-
Ricardo from VICTORVILLE, CA
-
Difficulty Level:Really Easy
-
Total Repair Time:Less than 15 mins
-
Tools:Screw drivers
Was this instruction helpful to you?
Thank you for voting!
broken light switch
Removed 2 screws holding front bottom vent grille. . Through opening behind grille found broken part of switch hanging on wires. Removed wires from switch and fed them out through hole for mounting switch, connected wire and pushed into place. The greatest difficulty encountered was my 82 year old knees.
Parts Used:
-
John W from Gloucester, MA
-
Difficulty Level:Easy
-
Total Repair Time:15 - 30 mins
-
Tools:Pliers, Screw drivers
Was this instruction helpful to you?
Thank you for voting!
Gasket was worn and needed replaced. It was causing frost to form around inside of door.
Pulled the freezer out and unscrewed the screws around door. Gasket slide right out. After placing the new gasket, I used a hair dryer and sealed the gasket tighter. Works like a charm!! Very pleased with this do-it-yourself fix.
Parts Used:
-
Karen from Winter Haven, FL
-
Difficulty Level:Easy
-
Total Repair Time:15 - 30 mins
-
Tools:Screw drivers
Was this instruction helpful to you?
Thank you for voting!
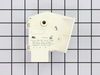
Coils not Defrosting and stopped freezing
Upluged power pulled freezer out from wall removed the two screws that holds the defrost timer unpluged defrost timer pluged new timer in mounted new timer back with the two screws pluged freezer back in and job was complete. Freezer working fine.
Parts Used:
-
Joseph from Yulee, FL
-
Difficulty Level:Really Easy
-
Total Repair Time:15 - 30 mins
-
Tools:Screw drivers
Was this instruction helpful to you?
Thank you for voting!