















25371762017 Kenmore Refrigerator - Instructions
Keep searches simple. Use keywords, e.g. "leaking", "pump", "broken" or "fit".
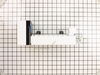
Replacing Icemaker
Pull refrigerator from wall and disconnect the water line and unplug the power.
On top of the icemaker, two machine screws hold the icemaker to the side of the refrigerator. You will have to feel around to find the machine screws, but once you do, it is simple to slip the appropriate size socket over the hex heads. I found it helpful to have an extension on the socket wrench. Disconnect the power cable inside the refrigerator (there are little pressure clips on the side that help release the cable) and move it out of the way for the time-being.
Back out both machine screws several turns, but do not remove them completely. The icemaker slips over the screws, so leaving them in the side of the refrigerator makes that process a lot easier. Hand tighten the machine screws once you have positioned the new icemaker in place. One thing to be sure and do is make sure the water line hose coming out of the back of the refrigerator inside is on top of the icemaker. It fits into a slot in the top of the icemaker - failing to do this will result in water pouring into the freezer compartment, not into the icemaker..
Reconnect the power cable to the new icemaker and tuck it up behind the icemaker assembly. Tighten the machine screws completely, but do not over-tighten.
Reconnect the water line on the back of the refrigerator at the wall, and plug in the refrigerator. You should hear the unit fill immediately.
In about an hour you should have ice filling the bin. Enjoy!
On top of the icemaker, two machine screws hold the icemaker to the side of the refrigerator. You will have to feel around to find the machine screws, but once you do, it is simple to slip the appropriate size socket over the hex heads. I found it helpful to have an extension on the socket wrench. Disconnect the power cable inside the refrigerator (there are little pressure clips on the side that help release the cable) and move it out of the way for the time-being.
Back out both machine screws several turns, but do not remove them completely. The icemaker slips over the screws, so leaving them in the side of the refrigerator makes that process a lot easier. Hand tighten the machine screws once you have positioned the new icemaker in place. One thing to be sure and do is make sure the water line hose coming out of the back of the refrigerator inside is on top of the icemaker. It fits into a slot in the top of the icemaker - failing to do this will result in water pouring into the freezer compartment, not into the icemaker..
Reconnect the power cable to the new icemaker and tuck it up behind the icemaker assembly. Tighten the machine screws completely, but do not over-tighten.
Reconnect the water line on the back of the refrigerator at the wall, and plug in the refrigerator. You should hear the unit fill immediately.
In about an hour you should have ice filling the bin. Enjoy!
Parts Used:
-
Richard Allen from PHOENIX, AZ
-
Difficulty Level:Really Easy
-
Total Repair Time:30 - 60 mins
-
Tools:Socket set
8 of 8 people
found this instruction helpful.
Was this instruction helpful to you?
Thank you for voting!
Ice maker stopped working
-
Fred from Las Vegas, NV
-
Difficulty Level:Really Easy
-
Total Repair Time:Less than 15 mins
-
Tools:Nutdriver
11 of 18 people
found this instruction helpful.
Was this instruction helpful to you?
Thank you for voting!
Not running
After waiting over 2wks for my part to arrive, I purchased the part locally and made the repair the same day as I am still waiting for the part to arrive from you guys. Your customer service really needs improving. I paid for 2 day shipping, what a joke. I will be returning the part as soon as I receive it thanks.
Parts Used:
-
Kenneth from SAVANNAH, GA
-
Difficulty Level:Really Easy
-
Total Repair Time:Less than 15 mins
-
Tools:Nutdriver
8 of 10 people
found this instruction helpful.
Was this instruction helpful to you?
Thank you for voting!
Oven light bulb went dark; it needed replacing

-
Lise from CEDAR GROVE, NJ
-
Difficulty Level:Very Easy
-
Total Repair Time:Less than 15 mins
10 of 17 people
found this instruction helpful.
Was this instruction helpful to you?
Thank you for voting!
Freezer door gasket with a holes
-
Karine Lepold /BM CARGO from Miami, FL
-
Difficulty Level:Very Easy
-
Total Repair Time:Less than 15 mins
7 of 8 people
found this instruction helpful.
Was this instruction helpful to you?
Thank you for voting!
Refrigerator Light bulb went out
I replaced the bulb using my hands to twist the bulb in the socket located at the top of the refrigerator.
Parts Used:
-
ANGELA from MEBANE, NC
-
Difficulty Level:Very Easy
-
Total Repair Time:Less than 15 mins
7 of 10 people
found this instruction helpful.
Was this instruction helpful to you?
Thank you for voting!
Water Valve was leaking water and not making ice
I unplugged the fridge and unscrewed the back cover,unscrewwd the two screws holding the water valve in place and the water line to the ice maker and the electrical connection and install the new water valve,then buttoned everything back up and plugged the fridge back in and it is working great,making ice as normal.
Parts Used:
-
timothy from georgetown, TN
-
Difficulty Level:Really Easy
-
Total Repair Time:15 - 30 mins
-
Tools:Pliers
13 of 28 people
found this instruction helpful.
Was this instruction helpful to you?
Thank you for voting!
Replace ice maker which was splashing water
Turn off ice maker
Slide wire harness shield off connector
Disconnected harness
Loosened 2 wall screws
Remove old ice maker
Installed new one reversing process
Slide wire harness shield off connector
Disconnected harness
Loosened 2 wall screws
Remove old ice maker
Installed new one reversing process
Parts Used:
-
John from PHOENIX, AZ
-
Difficulty Level:Really Easy
-
Total Repair Time:15 - 30 mins
-
Tools:Screw drivers, Wrench set
5 of 5 people
found this instruction helpful.
Was this instruction helpful to you?
Thank you for voting!
Missing door rack
Just snapped them into place without any problems! The parts were exactly what I was looking for.
Parts Used:
-
Bryan from Minneapolis, MN
-
Difficulty Level:Really Easy
-
Total Repair Time:Less than 15 mins
6 of 8 people
found this instruction helpful.
Was this instruction helpful to you?
Thank you for voting!
Icemaker stopped making ice and i knew it wasnt the mechanism since I could hear that working when I unplugged and plugged the unit back on.
I found a couple of videos online of a similar product fix to get a lay of the land. When I got the part, I unplugged the unit and turned off the water. It was easy to take off the back panel and remove the old water intake valve to swap it out for the new one. Once I attached everything again I could see that the valve was taking up water but it didnt seem to be going all the way to the icemaker. I gave it some time and by the next day, there was fresh ice!
Parts Used:
-
Jennifer from BUFFALO, NY
-
Difficulty Level:Really Easy
-
Total Repair Time:15 - 30 mins
-
Tools:Screw drivers
5 of 6 people
found this instruction helpful.
Was this instruction helpful to you?
Thank you for voting!
Freezer was not defrosting
Turned off fridge circuit breaker
Removed all food from freezer and put in cooler.
Removed shelves from freezer
Removed ice maker
Removed 2 hex head screws
Tilted back evaporator cover and tried to unplug connection.
Found connection was iced over with a huge block of ice coming from water inlet to ice maker
Spent several hours trying to melt and chip away ice without damaging fridge.
Finally was able to break up ice with long flat head screwdriver and hammer.
Unplugged connector and was able to remove evaporator cover.
Cut wires near thermostat and removed
Stripped wire as needed and crimped new thermostat in place.
Used heat gun and lighter to melt heat shrink. This took a long time and required a lot more heat than expected.
Reconnected evaporator cover connection and reattached cover.
Reinstalled ice maker
Reinstalled shelves.
Put food back in
Turned circuit breaker back on.
Removed all food from freezer and put in cooler.
Removed shelves from freezer
Removed ice maker
Removed 2 hex head screws
Tilted back evaporator cover and tried to unplug connection.
Found connection was iced over with a huge block of ice coming from water inlet to ice maker
Spent several hours trying to melt and chip away ice without damaging fridge.
Finally was able to break up ice with long flat head screwdriver and hammer.
Unplugged connector and was able to remove evaporator cover.
Cut wires near thermostat and removed
Stripped wire as needed and crimped new thermostat in place.
Used heat gun and lighter to melt heat shrink. This took a long time and required a lot more heat than expected.
Reconnected evaporator cover connection and reattached cover.
Reinstalled ice maker
Reinstalled shelves.
Put food back in
Turned circuit breaker back on.
Parts Used:
-
David from N KINGSTOWN, RI
-
Difficulty Level:A Bit Difficult
-
Total Repair Time:More than 2 hours
-
Tools:Nutdriver, Pliers, Screw drivers
4 of 4 people
found this instruction helpful.
Was this instruction helpful to you?
Thank you for voting!
broken restrained rack
-
Anthony from LANCASTER, OH
-
Difficulty Level:Very Easy
-
Total Repair Time:Less than 15 mins
4 of 4 people
found this instruction helpful.
Was this instruction helpful to you?
Thank you for voting!
I want to mention this is a garage ref with freezer on top. Freezer was to warm 20-32 deg.
Replaced thermostat and defrost timer and still freezer to warm.
After research with U-tube video of (Fixin it with Pappy) discovered that my fridge has one thermostat in fridge section and in cold months (live in ohio)the garage is cold therefore themostat in fridge does"nt need to tell the compressor to kick on. Pappy is a retired engineer and in very easy to follow instructions will show you how to fix this problem. Strongly suggest to search for his video on Utube. I did as he instructed and my fridge freezer works great in cold weather now. Its apparent to me I wasted my money on the parts. I didn't` need to replace. Just happy my Beer fridge is working all seasons now.
John from Ohio
After research with U-tube video of (Fixin it with Pappy) discovered that my fridge has one thermostat in fridge section and in cold months (live in ohio)the garage is cold therefore themostat in fridge does"nt need to tell the compressor to kick on. Pappy is a retired engineer and in very easy to follow instructions will show you how to fix this problem. Strongly suggest to search for his video on Utube. I did as he instructed and my fridge freezer works great in cold weather now. Its apparent to me I wasted my money on the parts. I didn't` need to replace. Just happy my Beer fridge is working all seasons now.
John from Ohio
Parts Used:
-
John from S CHARLESTON, OH
-
Difficulty Level:Easy
-
Total Repair Time:15 - 30 mins
4 of 4 people
found this instruction helpful.
Was this instruction helpful to you?
Thank you for voting!
8 loud pops and then dump ice .
Turn off power. Remove ice tray. Back out the two screws with nut driver and just lift ice maker off screws. Do not bend the water fill tube in the back . Now unplug the wire and remove ice maker .
To replace, match the color of wires on plug. Adjust wires in place and water fill tube and back on to the screws. Hold in place and snug screws. Turn power back on. In 4 to 5 hours your ice will start .
FED-EX UT to MN was 13 days to deliver .
To replace, match the color of wires on plug. Adjust wires in place and water fill tube and back on to the screws. Hold in place and snug screws. Turn power back on. In 4 to 5 hours your ice will start .
FED-EX UT to MN was 13 days to deliver .
Parts Used:
-
Douglas from INVER GROVE, MN
-
Difficulty Level:Very Easy
-
Total Repair Time:Less than 15 mins
-
Tools:Nutdriver
4 of 4 people
found this instruction helpful.
Was this instruction helpful to you?
Thank you for voting!
door rack broke in half
-
Roberta from Port William, OH
-
Difficulty Level:Really Easy
-
Total Repair Time:Less than 15 mins
5 of 7 people
found this instruction helpful.
Was this instruction helpful to you?
Thank you for voting!