















25371762015 Kenmore Refrigerator - Instructions
Keep searches simple. Use keywords, e.g. "leaking", "pump", "broken" or "fit".
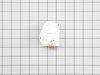
Freezer iced up and no cold air in lower potion of refrigerator.
Simple repair and less than 30 minutes.
But the video you had was taken down which showed you need to wind the timer. I called and was promptly sent another video, thanks Ashley !
Unfortunately the second video did not mention that you have to wind the timer, like the first video did. Turn clockwise till you hear 2 clicks.
All good. 20 year old fridge chugging along.
But the video you had was taken down which showed you need to wind the timer. I called and was promptly sent another video, thanks Ashley !
Unfortunately the second video did not mention that you have to wind the timer, like the first video did. Turn clockwise till you hear 2 clicks.
All good. 20 year old fridge chugging along.
Parts Used:
-
David from COLLEYVILLE, TX
-
Difficulty Level:Really Easy
-
Total Repair Time:15 - 30 mins
-
Tools:Screw drivers, Socket set
3 of 3 people
found this instruction helpful.
Was this instruction helpful to you?
Thank you for voting!
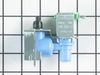
The fan had stopped spinning. According to the internet it should spin freely if I use my hand, but it wouldn't.
After pulling the fridge away from the wall and opening the paper backing on the bottom, I could see the motor. It's affixed to 3 metal ribs by 3 small screw/nuts. There is also a 12" wiring harness that led to a simple disconnect. Removing the disconnect and the 3 nuts was easy. However, there was no room to remove the motor with the fan attached. Between frame parts, the drip pan below, the ribs, and small, delicate copper tubing that can't get bent, it wouldn't fit thru any openings. So we rotated the motor inside the framework until the blade faced out, then reached in with a pair of needle nose pliers to remove the washer. Removing the washer is easy, it's just difficult to reach. With the washer off the fan was out of the way and very carefully (it was tight) the motor came out. Reverse was the same issue. Motor tight going in, not a lot of room to maneuver fan onto motor, and needed needle nose to tighten washer again. Make sure you tighten the washer before you install the motor on the prongs. Otherwise you need to remove it from the ribs, twist it to face you, then reinstall it on the prongs. Also, I felt I was stripping the nuts into the new motor. Turns out the holes in the motor aren't tapped. i realized the nuts are self tapping once I looked at them. I'm a big time DIYer and this wasn't bad at all. If your motor/fan assembly comes out whole, it's even easier.
Parts Used:
-
Patrick from RICHWOOD, TX
-
Difficulty Level:A Bit Difficult
-
Total Repair Time:15 - 30 mins
-
Tools:Nutdriver, Pliers
3 of 3 people
found this instruction helpful.
Was this instruction helpful to you?
Thank you for voting!
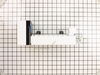
Drive great stripped for ice eject. Heater bad
Loosened the 2 bolts 4 turns where it mounts inside the freezer. Lift maker off the bolts unplug 1 plug. Reverse to install.
Parts Used:
-
Danny from PUEBLO, CO
-
Difficulty Level:Really Easy
-
Total Repair Time:Less than 15 mins
-
Tools:Nutdriver
4 of 6 people
found this instruction helpful.
Was this instruction helpful to you?
Thank you for voting!
I purchased a new frigh as a back-up downstairs that came with only two shelves. Since I wanted to used it for pop and beer, two more shelves would separate them well.
1.unpack box.
2. slide out of plastic bag.
3. open refirgheratior door.
4. slide in shelves.
5. fill with stuff.
6.figure out a way to reuse packing.
2. slide out of plastic bag.
3. open refirgheratior door.
4. slide in shelves.
5. fill with stuff.
6.figure out a way to reuse packing.
Parts Used:

-
David from Sioux Falls, SD
-
Difficulty Level:Really Easy
-
Total Repair Time:Less than 15 mins
9 of 21 people
found this instruction helpful.
Was this instruction helpful to you?
Thank you for voting!
Ice maker stopped making ice.
The repair was fast and easy .I removed the ice tray , disconnected the wiring connector and lossend two screws. I removed ice maker assy.and repeated in reverse order to install. I also installed a new water filter. I had ice in about 20 minutes.
Parts Used:
-
Thomas from WESTAMPTON, NJ
-
Difficulty Level:Really Easy
-
Total Repair Time:30 - 60 mins
-
Tools:Nutdriver
4 of 6 people
found this instruction helpful.
Was this instruction helpful to you?
Thank you for voting!
Ice maker would dump ice one time and then stop. Turning the ice maker off for a minute and back on would repeat the process.
I removed the two side mount screws with a screwdriver and disconnected the electrical plug to the ice maker to remove it. I reversed the process to install the new one.
It was the thermostat that was the problem, but I chose to replace the entire ice maker for only $25 more.
It was the thermostat that was the problem, but I chose to replace the entire ice maker for only $25 more.
Parts Used:
-
James from KNOXVILLE, TN
-
Difficulty Level:Very Easy
-
Total Repair Time:Less than 15 mins
-
Tools:Screw drivers
3 of 4 people
found this instruction helpful.
Was this instruction helpful to you?
Thank you for voting!
top shelf broke; replaced it
It just snaps in place, no biggie. What was a big deal was... that I ordered the part one day at like 2pm and got it the next day by about 2pm. That was very strange!!! Never expected that sort of delivery. Very nice!
Parts Used:

-
Kristy from Woodbridge, VA
-
Difficulty Level:Really Easy
-
Total Repair Time:Less than 15 mins
3 of 4 people
found this instruction helpful.
Was this instruction helpful to you?
Thank you for voting!
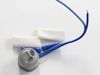
i smell very bad smell coming from refrigerator
I started look inside ,disconnected power, and open all possible compartments to see any burned part. Fortunately I fined a small part look like melted and then i went online and make my research .Then i ordered that part and change it.
Parts Used:
-
Arsen from Glendale, CA
-
Difficulty Level:Really Easy
-
Total Repair Time:15 - 30 mins
-
Tools:Pliers, Screw drivers
7 of 16 people
found this instruction helpful.
Was this instruction helpful to you?
Thank you for voting!
Ice maker stopped working. Part needed to repair it no longer available so had to replace the whole icemaker.
Loosened the two mounting screws (no need to remove them), lift off the icemaker and unplug it. Reverse the order and done.
Parts Used:
-
Edward from GROTON, CT
-
Difficulty Level:Very Easy
-
Total Repair Time:Less than 15 mins
-
Tools:Nutdriver
4 of 7 people
found this instruction helpful.
Was this instruction helpful to you?
Thank you for voting!
Fridge started making a loud racket. Condenser Fan Blade then disintegrated to dust and pieces. The plastic had degraded significantly.
The repair itself total time was quick and easy. Since the original fan blade blew apart, it was only a matter of putting the new one on in it's place. This can be done by feeding the blade between the cowling and Condenser coil and applying pressure to get it on the shaft.
If your fan is still on the shaft, simply push it off and extract it the same way. Then place the new one on the shaft.
In my case, since the part would take a couple days to get, and I had food both in the fridge and the freezer, I removed and unplugged the Condenser Fan Motor and the cowling frame and temporarily spliced a small fan I had into the line for the condenser motor. This kept the fridge working long enough to get the replacement part.
Side note. Direction of airflow is towards the Compressor, and draws air across the Condenser coils.
Hope this helps someone. :)
If your fan is still on the shaft, simply push it off and extract it the same way. Then place the new one on the shaft.
In my case, since the part would take a couple days to get, and I had food both in the fridge and the freezer, I removed and unplugged the Condenser Fan Motor and the cowling frame and temporarily spliced a small fan I had into the line for the condenser motor. This kept the fridge working long enough to get the replacement part.
Side note. Direction of airflow is towards the Compressor, and draws air across the Condenser coils.
Hope this helps someone. :)
Parts Used:

-
Jack from WALLING, TN
-
Difficulty Level:Really Easy
-
Total Repair Time:15 - 30 mins
-
Tools:Nutdriver, Socket set
4 of 7 people
found this instruction helpful.
Was this instruction helpful to you?
Thank you for voting!
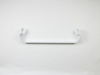
Was broken
The repair was not the issue. When I received it there was no protection packing, no invoice and if you call the number, no one is there to help. The rack was plastic with no protection in box and it was damaged. Tried to resolve this matter with no response. Will never go through part select again.
Parts Used:
-
Donna from EDGERTON, OH
-
Difficulty Level:Really Easy
-
Total Repair Time:15 - 30 mins
2 of 2 people
found this instruction helpful.
Was this instruction helpful to you?
Thank you for voting!
No problems
Easy to install. It is self explanatory. You do not even need a manual or video explanation.
Parts Used:
-
Karamo from MADISON, WI
-
Difficulty Level:Really Easy
-
Total Repair Time:Less than 15 mins
2 of 2 people
found this instruction helpful.
Was this instruction helpful to you?
Thank you for voting!
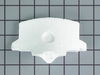
The Refrigerator was not cooling properly. At 40-45 degrees milk spoiled
My upper and bottom air diffuser was missing.
Purchased both air diffuser and placed it.
Purchased both air diffuser and placed it.
Parts Used:
-
Marcos from E STROUDSBURG, PA
-
Difficulty Level:Really Easy
-
Total Repair Time:15 - 30 mins
-
Tools:Socket set
2 of 2 people
found this instruction helpful.
Was this instruction helpful to you?
Thank you for voting!
Not making ice

-
Sam from Ravenswood, WV
-
Difficulty Level:Really Easy
-
Total Repair Time:30 - 60 mins
-
Tools:Screw drivers, Wrench set
2 of 2 people
found this instruction helpful.
Was this instruction helpful to you?
Thank you for voting!
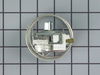
Freezer no freezing the food
Disconnect the power. To install the Defrost timer which is located inside the console at the top of the fridge I followed a YouTube video. It is very easy. Keep in mind that the Defrost timer comes settled in defrost mode so the compressor will not start after the power is reconnected.There is a hole in the console just behind the Defrost timer where you engaged it with a flat driver and rotate the clock until the compresor start. Now the compressor works for 6 hours and stop for 20 minutes for the defrosting cicle. The freezer now is freezing the meat!!
Parts Used:
-
Orlando from FT LAUDERDALE, FL
-
Difficulty Level:Easy
-
Total Repair Time:30 - 60 mins
-
Tools:Nutdriver, Pliers, Screw drivers
2 of 2 people
found this instruction helpful.
Was this instruction helpful to you?
Thank you for voting!