















25361722011 Kenmore Refrigerator - Instructions
Keep searches simple. Use keywords, e.g. "leaking", "pump", "broken" or "fit".
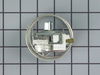
Refrigerator did not cycle
Installation was fairly straight forward. The major complaint is that the problem returned 2 weeks later. I don’t know if I care to re-invest in another switch.
Now what?
Now what?
Parts Used:
-
JACOB from YOUNGSTOWN, OH
-
Difficulty Level:Really Easy
-
Total Repair Time:30 - 60 mins
1 person
found this instruction helpful.
Was this instruction helpful to you?
Thank you for voting!
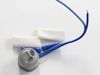
Evaporator was freezing up and was running non stop
I tested the components in the refrigerator defrost function. I used digital multimeter and checked for continuity. Defrost thermostat must 32 degrees or lower.
Parts Used:
-
James from PHILADELPHIA, PA
-
Difficulty Level:Very Easy
-
Total Repair Time:Less than 15 mins
-
Tools:Nutdriver
1 person
found this instruction helpful.
Was this instruction helpful to you?
Thank you for voting!
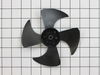
Noisy condenser fan
Remove lower cardboard refrigerator panel. Carefully pull existing cracked fan blade off of the motor shaft and replace with new fan blade. Reinstall cardboard panel.
Parts Used:
-
Ben from FRANKLIN, TN
-
Difficulty Level:Really Easy
-
Total Repair Time:30 - 60 mins
2 of 4 people
found this instruction helpful.
Was this instruction helpful to you?
Thank you for voting!
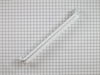
Door rack broke
-
Margaret from NEW YORK, NY
-
Difficulty Level:Very Easy
-
Total Repair Time:Less than 15 mins
1 person
found this instruction helpful.
Was this instruction helpful to you?
Thank you for voting!
Refrigerator light stopped working
The bulb wasn't the issue so I was hopeful the switch was. utube helped me some, but figuring my model was different than any on utube. Got the switch in and plugged it back in. Moment of truth. Didn't light. Ugggh! Out $50 for switch plus $20 for nut driver set.
Parts Used:

-
Karla from UNION, MO
-
Difficulty Level:Difficult
-
Total Repair Time:1- 2 hours
-
Tools:Socket set
1 person
found this instruction helpful.
Was this instruction helpful to you?
Thank you for voting!
Kid broke to bottom door rack
This was so easy it took longer to open the door than it did to install the rack. WOW. Nice to see something fits without messing with it. Thanks.
Parts Used:
-
W. Noah from Leominster, MA
-
Difficulty Level:Really Easy
-
Total Repair Time:Less than 15 mins
1 of 2 people
found this instruction helpful.
Was this instruction helpful to you?
Thank you for voting!
Easy and simple!
-
Mordechai from Brooklyn, NY
-
Difficulty Level:Really Easy
-
Total Repair Time:Less than 15 mins
1 of 2 people
found this instruction helpful.
Was this instruction helpful to you?
Thank you for voting!
Refrigerator evaporator coil was icing up
The evaporator coil is behind the freezer. Remove the rack that makes the shelf and remove two 1/4” hex head screws I the back of the freezer to access the coil.
I used a hair dryer to melt the ice off the coil.
The thermostat clips on the refrigeration pipe to the coil. Remove the old thermostat and cut the wires at least a few inches from the thermostat. Clip the new thermostat on the pipe and strip about a 1/4” of the wire ends. The electrical connectors (provided with the new part) must be crimped to connect the wires.
I used a hair dryer to melt the ice off the coil.
The thermostat clips on the refrigeration pipe to the coil. Remove the old thermostat and cut the wires at least a few inches from the thermostat. Clip the new thermostat on the pipe and strip about a 1/4” of the wire ends. The electrical connectors (provided with the new part) must be crimped to connect the wires.
Parts Used:
-
David from VENICE, FL
-
Difficulty Level:Easy
-
Total Repair Time:15 - 30 mins
-
Tools:Nutdriver
1 of 2 people
found this instruction helpful.
Was this instruction helpful to you?
Thank you for voting!
replacing broken door racks
Super easy it took no more than 5 minutes to replace the fridge door racks. Starting from opening the box when it arrived to closing the fridge door with the new racks in place. no tools needed, except a knife to open the box.
Parts Used:
-
francine from brick, NJ
-
Difficulty Level:Really Easy
-
Total Repair Time:Less than 15 mins
1 of 2 people
found this instruction helpful.
Was this instruction helpful to you?
Thank you for voting!
The original shelf cracked and fell off. No glue or tape would hold.
-
Christina from Essington, PA
-
Difficulty Level:Really Easy
-
Total Repair Time:Less than 15 mins
1 of 2 people
found this instruction helpful.
Was this instruction helpful to you?
Thank you for voting!
light bilb went out

-
Denise from Landover, MD
-
Difficulty Level:Really Easy
-
Total Repair Time:Less than 15 mins
2 of 6 people
found this instruction helpful.
Was this instruction helpful to you?
Thank you for voting!
loud noise fan blade broke,off balance
take 1/4 hex screws out clean out dust ,remove old fan blade replace with new install bolts .
Parts Used:

-
EDWIN from ELWOOD, IN
-
Difficulty Level:Really Easy
-
Total Repair Time:15 - 30 mins
-
Tools:Nutdriver
0 of 1 people
found this instruction helpful.
Was this instruction helpful to you?
Thank you for voting!
while cleaning the condenserI accidentally hit the fan blade and broke it
Had my 3 year old remove the 4 screws to holds the carboard in place. Pryde the old fan blade off with a screwdriver. slid the new fan blade on to the shaft then my 3 year old put the screws back in.
Parts Used:
-
james from vandergrift, PA
-
Difficulty Level:Really Easy
-
Total Repair Time:15 - 30 mins
-
Tools:Nutdriver, Screw drivers
Was this instruction helpful to you?
Thank you for voting!
warm fridge, cold frosty freezer
remove food, then the shelf, then use a hot air gun to defrost and loosen the back panel, then remove the panel, then defrost the coil and thermostat area. using wire tools, replaced the defrost thermostat,and re-assembled freezwr and test
Parts Used:
-
Jim from AuSable Forks, NY
-
Difficulty Level:Easy
-
Total Repair Time:30 - 60 mins
-
Tools:Nutdriver, Screw drivers
Was this instruction helpful to you?
Thank you for voting!
Refrigerator section warm
My husband watched the video on your website and found it very easy to do the repair. The repair company that diagnosed the problem wanted $210 to do it. The part I ordered was under $20, and after he installed it the refrigerator has been working great. We would highly recommend your site to anyone who needs to fix anything!
Parts Used:
-
Laurie from Meridian, ID
-
Difficulty Level:Easy
-
Total Repair Time:15 - 30 mins
-
Tools:Nutdriver, Screw drivers
Was this instruction helpful to you?
Thank you for voting!