


1746 - Overview
Models starting with 1746
Click on the best match to narrow your results.
- 1746 (YTH YTHK B -954568533 -2002-02) Husqvarna Lawn Tractor (Ride Mower)
- 1746 (YTH YTHK A -954568533 -2002-01) Husqvarna Lawn Tractor (Ride Mower)
- 1746-4 Broil-Mate Grill
- 1746-7 Broil-Mate Grill
- 17460-1 General Electric Range
- 17460-2 General Electric Range
- 17460-3 General Electric Range
- 17461-1 General Electric Range
- 17461-2 General Electric Range
- 17461-3 General Electric Range
- 17468-1 General Electric Range
- 17468-2 General Electric Range
- 17468-3 General Electric Range
- 1746A (YTH 954567055 -2000-11) Husqvarna Lawn Tractor (Ride Mower)
- 1746B (YTH 954567055 -2001-01) Husqvarna Lawn Tractor (Ride Mower)
Keep searches simple, eg. "belt" or "pump".

Door Handle End Cap
PartSelect #: PS256613
Manufacturer #: WB7X7183
This oven door handle end cap is used on both the left and right hand sides. Sold individually.
No Longer Available

Door Handle End Cap
PartSelect #: PS256619
Manufacturer #: WB7X7189
This end cap can be used for either the left or right side.
$38.36
In Stock

Burner Bowl - 8 Inch
PartSelect #: PS244397
Manufacturer #: WB31T10013
This burner bowl or drip pan is found beneath the heating element on your cooktop or range. This part measures 8 inches in diameter, and should not be confused with the smaller pan, which measures 6 i...
$37.91
In Stock

Drip Bowl - 6 Inch
PartSelect #: PS244396
Manufacturer #: WB31T10012
This gray drip bowl is sold individually.
$38.96
In Stock

Door Handle
PartSelect #: PS231857
Manufacturer #: WB15K5076
This replacement door handle is designed to fit select range models and provides a secure grip for opening and closing the oven door. Measuring approximately 22 inches by 1 inch, it is constructed fro...
$59.18
In Stock

Lawn Mower Flange Wheel Bearing
PartSelect #: PS9006914
Manufacturer #: 532009040
The OEM bearing, also known as the flange bearing, is silver, made of metal, and sold individually. It is used on riding mowers to secure the wheel in place and allow it to rotate freely on the shaft....
$11.85
In Stock

Bottom Trim - White
PartSelect #: PS2321159
Manufacturer #: WB07K10250
Screws not included.
$31.86
In Stock

Lawn Mower Ring Clip
PartSelect #: PS9143890
Manufacturer #: 812000029
The Ring Klip Number T5304-75, also known simply as a ring clip, is an OEM part designed to secure your mower wheel to its axle.
This part is black, made of metal, and around an inch in length. It i...
$6.72
In Stock

Terminal Block Kit
PartSelect #: PS953027
Manufacturer #: WB17T10011
This part provides a way of connecting individual electrical wires and offers protection of the device from electrical surges (voltages and/or currents).
$64.77
In Stock

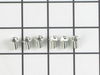
Washer Head Screw
PartSelect #: PS9982804
Manufacturer #: 584953901
This part is the replacement washer head screw for your lawn tractor. It is black in color and is approximately an inch and a half in length. This self-threading screw is most commonly used for securi...
$6.72
In Stock

Lawn Mower Washer
PartSelect #: PS9008998
Manufacturer #: 532121749
This OEM washer, also known as a flat washer, has dimensions of 25/32 x 1-1/4. Silver in color and metal, the washer is sold individually. Although this part can have a range of applications depending...
$6.72
In Stock

Cap Axle Black 1 50 x 1 00
PartSelect #: PS9007667
Manufacturer #: 532104757
This genuine black cap axle, also sometimes known as the dust cap, is around 2 inches in diamater and sold individually. Comprised of plastic, it is designed to keep debris out of the hub and axle of ...
$6.72
In Stock
Exact Part matches for your search term
[Viewing 2 of 2]
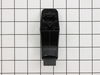
Starter Button
This part number matches the current model number 1746
PartSelect #: PS8897923
Manufacturer #: 1746
No Longer Available
Key, Woodruff, #9
This part number matches the current model number 1746
PartSelect #: PS9906216
Manufacturer #: 1746
No Longer Available
Common Symptoms of models starting with 1746
[Viewing 3 of 3]Element will not heat
Fixed by
these parts
these parts
Show All
Will Not Start
Fixed by
these parts
these parts
Show All
Door won’t close
Fixed by
these parts
these parts
Show All


Keep searches simple. Use keywords, e.g. "leaking", "pump", "broken" or "fit".
terminal block melted
The existing terminal block on my Ge oven/Range had melted due to a loose wire causing sparking and starting the plastic casing of the terminal block on fire and melting it, Part select made the part easy to find and had it at my house in 2 days. All I had to do was remove six screws to take the back sheet metal cover off of the oven. U
... Read more
nscrew the terminal connections remove two mounting screws that held the terminal on to the oven body. This was a little trickier than it should have been because the melted plastic had reformed making it very hard to access the mounting screws. i then mounted the new piece and plugged the oven in, it took 15 minutes and was very easy. definitely saved me at-least a $100 for the service call i would have made if finding the part wasn't so convenient
Read less
Parts Used:
-
jonathan from willow springs, IL
-
Difficulty Level:Easy
-
Total Repair Time:Less than 15 mins
-
Tools:Nutdriver, Screw drivers
56 of 77 people
found this instruction helpful.
Was this instruction helpful to you?
Thank you for voting!
The end caps broke on my oven door handle.
1st I opened the oven door and removed the 2 screws that hold the outside and inside of the door together. With the door separated I removed the 2 screws that hold the end caps in place, then removed the old end caps. I put the new end caps on the oven door handle, aligned the holes for the end cap screws and reinstalled the screws,then
... Read more
reinstalled the oven door screws,closed the oven door and started cooking.
Read less
Parts Used:
-
Harry from Thomasville, GA
-
Difficulty Level:Easy
-
Total Repair Time:15 - 30 mins
-
Tools:Screw drivers
45 of 46 people
found this instruction helpful.
Was this instruction helpful to you?
Thank you for voting!
Wheel bushings were bad
Removed old clip removed rim from tractor, removed grease fitting on rim, took hammer and screw driver knocked out old bushing turned rim over knocked out other bushing. Press in new bushings reinstalled grease fitting slide tire back on tractor, put retaining washers on then locking clip put on dust cover grease at grease fitting. Repeat
... Read more
other side.
Read less
Parts Used:
-
Anthony from OLIVEHILL, TN
-
Difficulty Level:Easy
-
Total Repair Time:15 - 30 mins
-
Tools:Pliers, Screw drivers
29 of 46 people
found this instruction helpful.
Was this instruction helpful to you?
Thank you for voting!