


15 - Overview
Models starting with 15
Click on the best match to narrow your results.
Keep searches simple, eg. "belt" or "pump".

Chrome Drip Bowl - 8 inch
PartSelect #: PS11750107
Manufacturer #: WPW10196405
This manufacturer-certified drip bowl is also known as a drip pan, and it is designed for use with cooktops and ranges. It sits below 8-inch burner elements and catches drips and spills from the cookw...
$11.77
In Stock

Drip Bowl - 6 Inch
PartSelect #: PS11750108
Manufacturer #: WPW10196406
This drip bowl is used for electric cooktops and ranges, it is designed to sit under a 6-inch surface burner. It catches the drips and spills coming from the cookware on the surface burner. This drip ...
$8.55
In Stock

Light Bulb - 40W
PartSelect #: PS884734
Manufacturer #: 8009
This an authentic OEM 40-Watt replacement light bulb, used in a number of household appliances. It is specially designed to withstand extreme temperatures, which is why these replacement bulbs are mos...
$19.54
In Stock

Drip Bowl - 6 Inch
PartSelect #: PS2366565
Manufacturer #: W10196406RW
If your element will not heat, there could be an issue with your drip bowl. This chrome drip bowl is 8 inches in diameter, and fits most electric ranges. Before you replace the drip bowl, make sure th...
$15.00
In Stock

Bake Element - Push On Terminals - 240V
PartSelect #: PS249286
Manufacturer #: WB44T10011
The bake element in your oven provides the cooking heat. This part can be found at the bottom of your oven, and attaches to the power source on the back wall. It has two terminals that fit into the po...
$81.83
In Stock

Bake Element
PartSelect #: PS17626202
Manufacturer #: WB30X46987
The bake element is located on the bottom of the oven. If your oven will not heat properly it may be due to a faulty or damaged baking element. If you can see that the element has been separated or bl...
$100.47
In Stock

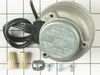
Defrost Timer - 60Hz 120V
PartSelect #: PS423801
Manufacturer #: 215846602
This Defrost Timer works like a clock by switching on the defrost heater circuit after a predetermined amount of compressor run time. This allows the defrost circuit to clear the evaporator of ice or ...
$40.02
In Stock

Burner Bowl - 8 Inch
PartSelect #: PS244399
Manufacturer #: WB31T10015
This part is located beneath the element and catches any spills.
$22.52
In Stock

Burner Bowl - 6 Inch
PartSelect #: PS244398
Manufacturer #: WB31T10014
This burner bowl is also known as a burner drip bowl or burner drip pan, and is designed for use with your cooktop or range. It is black in color and is approximately 6 inches in diameter. It can be f...
$18.22
In Stock

Door Handle End Cap
PartSelect #: PS256613
Manufacturer #: WB7X7183
This oven door handle end cap is used on both the left and right hand sides. Sold individually.
$34.75
Special Order

Surface Burner Terminal Block Kit
PartSelect #: PS783534
Manufacturer #: WB17T10006
This kit includes the female contact with wires, terminal block and mounting clip.
$35.80
In Stock

Range Surface Burner Plug-In Block Kit
PartSelect #: PS340571
Manufacturer #: 330031
The surface burner plug-in block kit features a newer-style terminal block. This kit is designed for use with ranges and cooktops. This terminal block is how the coil element on your stove connects to...
$16.07
In Stock
Exact Part matches for your search term
[Viewing 7 of 7]
DISCONTINUED
This part number matches the current model number 15
PartSelect #: PS3436341
Manufacturer #: 15
No Longer Available
32146-8 Locknut
This part number matches the current model number 15
PartSelect #: PS8867675
Manufacturer #: 15
No Longer Available
4
This part number matches the current model number 15
PartSelect #: PS8868385
Manufacturer #: 15
No Longer Available
Venturi (Kit No.)
This part number matches the current model number 15
PartSelect #: PS12102850
Manufacturer #: 15
No Longer Available
Evaporator
This part number matches the current model number 15
PartSelect #: PS12185673
Manufacturer #: 15
No Longer Available
Arm pin
This part number matches the current model number 15
PartSelect #: PS12397989
Manufacturer #: 15
No Longer Available
Drag Spring Washer
This part number matches the current model number 15
PartSelect #: PS18272030
Manufacturer #: 15
No Longer Available
Common Symptoms of models starting with 15
[Viewing 8 of 8]Noisy
Fixed by
these parts
these parts
Show All
Fridge too warm
Fixed by
these parts
these parts
Show All
Freezer section too warm
Fixed by
these parts
these parts
Show All
Fridge runs too long
Fixed by
these parts
these parts
Show All
Fridge and Freezer are too warm
Fixed by
these parts
these parts
Show All
Will Not Start
Fixed by
these parts
these parts
Show All
Leaking
Fixed by
these parts
these parts
Show All
Too warm
Fixed by
these parts
these parts
Show All


Keep searches simple. Use keywords, e.g. "leaking", "pump", "broken" or "fit".
Sometimes the condenser fan would start causing the refrigerator to overheat.
Unplug the appliance.
Removed the screws holding the back panel.
Removed the fan blade.
removed 3 screws holding the condenser fan.
Remove the 3 metal brackets attached to the fan.
(First note which studs the brackets are attached to. Attach the 3 metal brackets to the new fan. (New screws were supplied)
Cut ... Read more and strip the wire about two inches from the fan.
Cut and strip the new wire. I cut the new wire in half (about 6 inches.) Connect the two wires, twist and used 2 wire nuts. Tie wrap the wire to the wire harness. Mount the new fan (three screws)
Screw the back panel back on.
Mount the new
Read less
Parts Used:

-
Tom from Franklin, WI
-
Difficulty Level:A Bit Difficult
-
Total Repair Time:15 - 30 mins
-
Tools:Nutdriver, Pliers
184 of 220 people
found this instruction helpful.
Was this instruction helpful to you?
Thank you for voting!
noisy fan motor
rmv panel (5min) rmv fan/motor 3 screws (10 m) cut wire 2in from motor, re route remainder of wire to front so can strip for wire nuts. ( 10m) attach old fan to new motor, place in old opening ,3 screws, a little fussy to align, ( 15m ) route and strip wire from new motor , zip ties work well, wire nuts , plug in fridge vola, no noise, c
... Read more
lose up, reverse panel. ( 20m). i also took time to clean grilles with small vac and damp rag, ( looks and sounds like new) bob Wi.
Read less
Parts Used:
-
robert from nashotah, WI
-
Difficulty Level:A Bit Difficult
-
Total Repair Time:30 - 60 mins
-
Tools:Nutdriver, Socket set
38 of 46 people
found this instruction helpful.
Was this instruction helpful to you?
Thank you for voting!
Freezer and Fridge wouldnt cool
My husband replaced the condenser fan. It took awhile and a few choice words but he got it replaced. The fan seemed to work fine, but it still wasn't cooling. I noticed that when we had the fridge unplugged that water started draining out the dials at the top of the fridge under the freezer. And there was absolutely no water at all in
... Read more
the drip pan under the fridge. So I took the doors off and totally took the inside of the freezer apart. I discovered that the styrofoam on the floor of the freezer had become inudated with fluid and the under the foam the coils were all frozen solid with ice. Hence not allowing any drainage. I put a lamp in the freezer area and defrosted all the ice. In searching the internet i discovered that they no longer produce the foam so i went to home depot and got a piece of foam and aluminum foil and cut it to replace the ruined foam. I put the fridge all back together said a prayer and crossed my fingers and lo and behold it works perfectly now!!!!
Read less
Parts Used:
-
Janet from Hillsboro, OR
-
Difficulty Level:A Bit Difficult
-
Total Repair Time:More than 2 hours
-
Tools:Nutdriver, Pliers, Screw drivers, Socket set, Wrench (Adjustable), Wrench set
24 of 25 people
found this instruction helpful.
Was this instruction helpful to you?
Thank you for voting!