















11042924201 Kenmore Washer - Instructions
Keep searches simple. Use keywords, e.g. "leaking", "pump", "broken" or "fit".
Water collecting in tub next day after use
(1) Turn off water valves (2) remove water lines (3) remove three metric star screws from top/back of washer (4) remove to plate (5) remove single screw retaining water inlet valve at back of washer (6) remove electrical connections from water inlet valve and flow meter (7) loosen hose clamps at back of soap dispenser (8) remove assembly/apply new parts (9) reverse above directions. Because the plastic nipple at the back of the soap dispenser was brittle, it partially broke on me. I applied urethane glue to the break and let it dry overnight. Next day I applied marine-grade silicone sealant around the break area. That evening I assembled and then used the washer to test for leaks. Success!
Parts Used:
-
Jerome from Ashburn, VA
-
Difficulty Level:Easy
-
Total Repair Time:More than 2 hours
Was this instruction helpful to you?
Thank you for voting!
Warn Out Baffle
I saw a u tube video and followed the presenters instructions. Very simple instruction very simple repair. The whirlpool duet is a well designed machine with the mechanical parts easily accessible. I know if if would have had a professional service come and repair if it would have cost several hundred dollars. It cost me the parts, $50. 00 (That was for the 3-pack of baffles), 1 beer and my time. "Easy fix".
Parts Used:
-
Daniel from Half moon Bay, CA, CA
-
Difficulty Level:Easy
-
Total Repair Time:30 - 60 mins
-
Tools:Screw drivers, Socket set
Was this instruction helpful to you?
Thank you for voting!
Washer would not drain at all. Impeller spun on shaft.
The difficult part was getting the water from the washer without making a huge mess. I used a shop vac loosened the cover on the filter/strainer assembly use the shop vac to suck up the water before spills all over. if the tub is full I dumped my shop vac twice total. 1 Remove pedestal drawer 2 removed lower cover to expose mechanicals and pump assembly 3 vac out the water by using above procedure. 4 rotate hose clamps to a position where you can get the needle vice grip on them/remove hose clamps. 5 lift cover exposing electrical connections on the pump assembly depress tab slide connector out. 6 remove 1 torx head screw securing pump to base of washer. 7 remove pump assembly. 8 Reinstall in reverse of above instruction. I also took the lower tub hose off and washed, bleached along with hot water to. clean it
Parts Used:
-
Jeffrey from Marshfield, WI
-
Difficulty Level:Really Easy
-
Total Repair Time:30 - 60 mins
-
Tools:Nutdriver
Was this instruction helpful to you?
Thank you for voting!
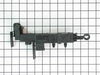
Washer flashed error code DL (door lock) and wouldn't start.
We followed another very helpful repair story. Unplug machine. Unscrew top back screws, remove top of washer. Reach inside from the top in the front of the machine. Remove screws holding latch in place, unplug the three plugs attached to latch. Replace with new door latch, screw it in place, replug the three plugs, put top of machine back on, replace screws on back and your'e done! Works great! Job made easy thanks to others helpfulness!
Parts Used:
-
Marybeth from Warwick, RI
-
Difficulty Level:A Bit Difficult
-
Total Repair Time:30 - 60 mins
Was this instruction helpful to you?
Thank you for voting!
Washing Machine walking across the floor, and what started it was it wouldn't drain and it would get the error codes F and U don't remember the numbers that go with the codes, it was telling me it took to long to drain.
Slid the washer out, took the hoses off and the back panel then the front panel, found coins in the filter tray and a baby bottle plastic cap was sealinhg the drain going into the plastic filter housing (it fits perfectly) removed all the items and put the white plastic screw cap back on the drain. Next problem was the washer walking around the laundry room, upon fixing the drain problem noticed the front shock absorber was unhooked and two on the right side of the machine had leak some grease, rehook the front shock and ordered two new ones it don't walk around anymore and works smooth and quiet now. I also have to add that Parts Select has been absolutely GREAT had the parts, delivered when promised.
Parts Used:

-
Dale from Sterling, AK
-
Difficulty Level:A Bit Difficult
-
Total Repair Time:30 - 60 mins
-
Tools:Nutdriver, Pliers, Screw drivers
Was this instruction helpful to you?
Thank you for voting!
Replacing washer gasket/bellow on front-loader
Could not have been easier. Have spent more time building kids' Star Wars Lego than this took...
Parts Used:

-
Paul from Bethesda, MD
-
Difficulty Level:Easy
-
Total Repair Time:30 - 60 mins
-
Tools:Pliers, Screw drivers
Was this instruction helpful to you?
Thank you for voting!
Water smells bad if washer sits for a few days.
I replaced the pump thinking this was the most likely cause of the problem. The pump is easy to access and get to. The reviews were helpful. The hose clamps were difficult to get back in place especially the one from the washer drain to the pump (need wide-jaw pliers). Now that I have seen the system work, the pump was not bad and the water from the drain still smells bad. I just ordered the filter 8181683, which looks like the only other thing that would prevent the water from draining completely. The drain hose is not blocked.
Parts Used:
-
Thomas from Troy, MI
-
Difficulty Level:Easy
-
Total Repair Time:30 - 60 mins
-
Tools:Pliers, Screw drivers
Was this instruction helpful to you?
Thank you for voting!
Drain pump wasnt working
Looked at how the old drain pump was installed, then removed it and installed the new one. It was a fairly simple fix. The only feedback were that the parts picture was a little confusing becuase the picture didnt really look like the actual part, so we were unsure if we were ordering the correct part.
Parts Used:
-
Tracey from Salem, OR
-
Difficulty Level:Easy
-
Total Repair Time:30 - 60 mins
-
Tools:Nutdriver, Pliers, Screw drivers, Socket set
Was this instruction helpful to you?
Thank you for voting!
Wasn't draining
Washed three loads and it was ok but then it stopped draining again. I don't know what to do.
Parts Used:
-
Billie from Dixie, WV
-
Difficulty Level:Easy
-
Total Repair Time:30 - 60 mins
-
Tools:Socket set
Was this instruction helpful to you?
Thank you for voting!
Squealing towards end of cycle during high speed spin
Made a bad call after googling "bearing squeal for HE 4t" and replaced the bearings and seal on the drum.... Turns out my squeal was coming from the drain pump, didn't realize until after a major tear down and replacement of bearings and seal. Managed to break one of the electrical connectors on the heating element on that repair as well... Compared to the bearing replacement the drain pump was super simple. Lots of good instructions above, the only thing I would add is that if you put a little pressure on the hose clamps and spin them to an easier position to see and get pliers on, they will be much less of a headache. Vice grips were the best tool for getting them released and re-installed. The heating element was pretty easy, loosen the center nut to the end of the threads but don't remove. Use a flat screwdrive to gently pry the unit out. Use a little dish washing soap to lube up the rubber plug on the new one before installing and it slides right in.
Parts Used:
-
david from bozeman, MT
-
Difficulty Level:Easy
-
Total Repair Time:30 - 60 mins
-
Tools:Pliers, Screw drivers, Socket set
Was this instruction helpful to you?
Thank you for voting!
washer would fill with water when it was not in use
Pulled washer away from wall, unplugged power from outlet, shut off water valves and removed hosed from back of machine. Removed the 3 screws on the back top of washer that holds top on and removed top. Unplugged the 4 wires on the back of the valve, removed the screw that holds the valve in place, pulled the valve out so I could remove the hose clamp and hose from the valve. I then reversed the operation. It is really pretty simple.
Parts Used:
-
Dennis from Dumas, TX
-
Difficulty Level:Easy
-
Total Repair Time:30 - 60 mins
-
Tools:Nutdriver, Pliers, Screw drivers
Was this instruction helpful to you?
Thank you for voting!
My washing machine started leaking.
My son pulled the washer out and found the parts that was leaking. He ordered the parts from your company. they arrived the next day and he re-pared the leaks and all is well.thank you
Parts Used:

-
Barbara from Reno, NV
-
Difficulty Level:A Bit Difficult
-
Total Repair Time:30 - 60 mins
Was this instruction helpful to you?
Thank you for voting!
Washer fails to drain water
First I want to acknowledge Parts Select for their prompt delivery(received parts in less than two days)and their unbeatable prices(approximately 1/3 less than two local appliance repair/parts shops). Repair was straight forward a simple swap of the pump and I saved quite a few dollars.Thanks Parts Select.Any future appliance parts needs will be purchased here.
Parts Used:
-
George from Houston, PA
-
Difficulty Level:Easy
-
Total Repair Time:30 - 60 mins
-
Tools:Nutdriver, Pliers, Screw drivers
Was this instruction helpful to you?
Thank you for voting!
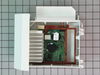
motor control
I just take out the botton part and fine what part what i need chage and just chage exactly like the old if yoo dot remember all the wires please take pictures and you hava guia to check went you are finished
Parts Used:
-
EDGAR from DALLAS, TX
-
Difficulty Level:Really Easy
-
Total Repair Time:30 - 60 mins
-
Tools:Screw drivers, Socket set
Was this instruction helpful to you?
Thank you for voting!
Washer filling when not in use
removed top cover,disconnected wires to valve,removed valve and hooked up a washer hose to test valve,one side was leaking,valve would not close.replaced with new valve that I received in 2 days,do not buy after market.
Parts Used:
-
KURT from Quakertown, PA
-
Difficulty Level:Easy
-
Total Repair Time:30 - 60 mins
-
Tools:Nutdriver, Pliers
Was this instruction helpful to you?
Thank you for voting!