















10697502820 Kenmore Dryer - Instructions
Keep searches simple. Use keywords, e.g. "leaking", "pump", "broken" or "fit".
Dryer would power up but not run.
Removed front of dryer. Located thermal fuse, replaced blown thermal fuse. Reassembled.
Parts Used:
-
Jeremy from VILLA RICA, GA
-
Difficulty Level:Easy
-
Total Repair Time:30 - 60 mins
-
Tools:Nutdriver
1 person
found this instruction helpful.
Was this instruction helpful to you?
Thank you for voting!
The belt broke
It was a lot easier then I thought. Just watch the tutorial of how to fix it on this website and you wont have a problem.
Parts Used:
-
Micah L from PORT ORANGE, FL
-
Difficulty Level:Very Easy
-
Total Repair Time:30 - 60 mins
-
Tools:Screw drivers, Socket set
1 person
found this instruction helpful.
Was this instruction helpful to you?
Thank you for voting!
Clothes would not dry
Unplug from electric ? outlet. Set the meter to ohm setting, check part ,no reading. Remove old part ,check new part with meter ,get a reading of 11 or more mA. Install new part and blower cover done.
Parts Used:
-
John from WOODBRIDGE, VA
-
Difficulty Level:Easy
-
Total Repair Time:1- 2 hours
-
Tools:Nutdriver
1 person
found this instruction helpful.
Was this instruction helpful to you?
Thank you for voting!
Dryer would not heat.
The hardest part was figuring out how to access the dryer mechanism. This Amana dryer has a lower front panel that is removed and not the top. There are few instructions available for this configuration. Then the part locations do not resemble the video instructions for trouble shooting. I discovered the broken part because when fiddling with the wire connections the metal tab disconnected due to fatigue or corrosion. Removing, identifying and replacing the flame sensor was quite simple. The dryer now works as before. The dryer is 23 years old. The most time in this repair was spent figuring out how to disassemble and identify a different configuration than in the videos.
Parts Used:
-
Jon from WILLIAMSBURG, MA
-
Difficulty Level:A Bit Difficult
-
Total Repair Time:More than 2 hours
-
Tools:Nutdriver, Socket set
1 person
found this instruction helpful.
Was this instruction helpful to you?
Thank you for voting!
Dryer would not light
I thought it had to be the igniter so I replaced that part. The dryer still did not start. I replaced the high limit and hoorah dryer works. Two weeks go by, the dryer is drying the clothes but my wife smells gas in the laundry room. I replaced the coil pak on the gas valve. My wife says she still smells gas. I replaced the radiant flame sensor and no gas smell for 2 weeks now.
Parts Used:
-
Charles from MT PROSPECT, IL
-
Difficulty Level:A Bit Difficult
-
Total Repair Time:1- 2 hours
-
Tools:Nutdriver, Screw drivers
1 of 2 people
found this instruction helpful.
Was this instruction helpful to you?
Thank you for voting!
Loud Dryer
Please do not buy parts from Parts Select. My order was not shipped the next day (as advertised on the web site), but instead 3 days later. I paid an extra couple of dollars for expedited shipping, which did made no difference (except for a couple of extra dollars for Parts Select to pocket).
When I emailed customer service to complain, I never received any response. I can't believe that customer service can be so unimportant in such a competitive marketplace. And with the power of social media, you would think customer service would be a big differentiator.
I ended having to buy another part (the igniter). I found a different vendor with better prices and a commitment to satisfying customers. I got my part in 3 days for cheaper shipping than the starting point of Parts Select shipping. So I guess I should thank Parts Select for forcing me to look elsewhere because I found a better place with better prices and better shipping and better customer service!
When I emailed customer service to complain, I never received any response. I can't believe that customer service can be so unimportant in such a competitive marketplace. And with the power of social media, you would think customer service would be a big differentiator.
I ended having to buy another part (the igniter). I found a different vendor with better prices and a commitment to satisfying customers. I got my part in 3 days for cheaper shipping than the starting point of Parts Select shipping. So I guess I should thank Parts Select for forcing me to look elsewhere because I found a better place with better prices and better shipping and better customer service!
Parts Used:

-
Rod from YORBA LINDA, CA
-
Difficulty Level:Really Easy
-
Total Repair Time:30 - 60 mins
-
Tools:Nutdriver, Screw drivers, Socket set
2 of 5 people
found this instruction helpful.
Was this instruction helpful to you?
Thank you for voting!
Dryer would not start
This was so easy to take apart and put back together following the repair video. I figure my family saved $200.00 by doing it myself.
Parts Used:
-
Stephanie from BEAR CREEK, WI
-
Difficulty Level:Really Easy
-
Total Repair Time:30 - 60 mins
-
Tools:Nutdriver, Screw drivers
1 of 2 people
found this instruction helpful.
Was this instruction helpful to you?
Thank you for voting!
Clanging of dryer when rolling

-
John from Bel Air, MD
-
Difficulty Level:Easy
-
Total Repair Time:15 - 30 mins
-
Tools:Nutdriver, Screw drivers
1 of 2 people
found this instruction helpful.
Was this instruction helpful to you?
Thank you for voting!
Door wouldn't fasten shut
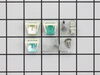
Popped the latch out and popped a new one in.
The real story here is that there was an ANSWER and a SOLUTION, to what was a GREAT
annoyance. If I wouldn't have found a part, I may have run off and bought a new dryer, when I really didn't need to, or paid A LOT of money for a repair man to come out. THANK YOU for your service. You made my life easier.
The real story here is that there was an ANSWER and a SOLUTION, to what was a GREAT
annoyance. If I wouldn't have found a part, I may have run off and bought a new dryer, when I really didn't need to, or paid A LOT of money for a repair man to come out. THANK YOU for your service. You made my life easier.
Parts Used:
-
Susan from Laingsburg, MI
-
Difficulty Level:Really Easy
-
Total Repair Time:Less than 15 mins
-
Tools:Screw drivers
1 of 2 people
found this instruction helpful.
Was this instruction helpful to you?
Thank you for voting!
Dryer Door Wouldn't Shut
My husband is the one who fixed the door. He said he just popped it into place and was done in just a couple of seconds! The best part though was the quick service we received. . . I ordered the part around 10:30 in the morning, and it was at my front door by 5pm the next day!!! What great service!!!! We will definitely do business again with partselect. Com if we ever need more parts.
Parts Used:
-
Megan from Kettering, OH
-
Difficulty Level:Really Easy
-
Total Repair Time:Less than 15 mins
1 of 2 people
found this instruction helpful.
Was this instruction helpful to you?
Thank you for voting!
Received part in 3 days from ordering. I was surprised when it showed up at my front door so quickly. Less than 1/2 hour later we were drying laundry again. Very impressed with the speed of service and the price.
First removed 2 screws on lint remover vent. Used a screw driver to force up top of dryer from out front. These will require pressure to pop the top off the dryer. Once the top was up I could reach the actuator and remove the 2 screws holding it. Once removed just replaced with new actuator and bam, done. Snapped top of dryer back on and reinstalled 2 screws on lint vent and Done. Easy, no problem....Thank you PartSelect!!.
Parts Used:

-
Patrick from Ramsey, MN
-
Difficulty Level:Really Easy
-
Total Repair Time:Less than 15 mins
-
Tools:Screw drivers
2 of 5 people
found this instruction helpful.
Was this instruction helpful to you?
Thank you for voting!
The dryer door catch wouldn't hold the door closed
I ordered the door catch kit on a Wednesday at it arrived Saturday AM. It took less than 1 minute to pry out the old catch with a flat screwdriver and pop in the new one!
Parts Used:
-
Gerald from Thompsonville, MI
-
Difficulty Level:Really Easy
-
Total Repair Time:Less than 15 mins
-
Tools:Screw drivers
1 of 2 people
found this instruction helpful.
Was this instruction helpful to you?
Thank you for voting!
Door keeps opening while operating
Removed old catch and strike with screwdriver and needle nose pliers. Installed new parts. My old catch did not have comparible numbers so I just used the yellow one. Worked fine.
Parts Used:
-
Carmine from MASSAPEQUA PK, NY
-
Difficulty Level:Really Easy
-
Total Repair Time:15 - 30 mins
-
Tools:Pliers, Screw drivers
1 of 2 people
found this instruction helpful.
Was this instruction helpful to you?
Thank you for voting!
Loud squeaky sound at start up
Pulled the back panel off with nut driver , reached in removed belt from pulley , disconnected the spring , removed the the 1 bolt holding the bracket .
Put the new one in , in reverse order . Very simple , maybe 15 minutes total . While back is off , shop vac out any lint !!
Put the new one in , in reverse order . Very simple , maybe 15 minutes total . While back is off , shop vac out any lint !!
Parts Used:
-
DANIEL from FOND DU LAC, WI
-
Difficulty Level:Very Easy
-
Total Repair Time:Less than 15 mins
-
Tools:Nutdriver, Socket set
1 of 2 people
found this instruction helpful.
Was this instruction helpful to you?
Thank you for voting!
dryer latch engagem ent
our son was able to diagnosis and order the part and very pleased with quite response. Dryer now working fine.
Parts Used:
-
Earl from Terre Haute, IN
-
Difficulty Level:Easy
-
Total Repair Time:15 - 30 mins
-
Tools:Nutdriver, Screw drivers
1 of 2 people
found this instruction helpful.
Was this instruction helpful to you?
Thank you for voting!