















1068698684 Kenmore Refrigerator - Instructions
Keep searches simple. Use keywords, e.g. "leaking", "pump", "broken" or "fit".
Evaporator Fan in Freezer Making Load Noise
Removed freezer shelving. Removed 3 shelving brackets (dovetailed) by sliding them up off of the small square mounted on the freezer wall. This was a stumbling block until
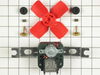
I figured out how to remove these brackets. Removed three Philips head screw in freezer back panel (24) with nut driver. Removed light bulb cover to get some grip on back panel. Lifted the back panel up slightly and then folded in down a bit then rotated it to the left. Removed 4 hex head (1/4in) screws on fan shroud (23) and brought down into the freezer. Disconnected electrical spade connectors from motor and removed entire unit from freezer to work on motor. Removed two hex head screws (18) holding motor to the brackets. Pushed new fan on to new motor using a 1/4 nut driver and hammer. Mounted motor to old brackets with two screws (18). Placed motor/fan/shroud unit in freezer and reconnected electrical spade connectors. Replaced motor/fan/shroud in freezer with the 4 hex head screws (15), dropping one behind the coils. Just replaced it with a look alike. Turned power back on to check if the fan was operating normally. Put back panel in place and screwed it in place then put shelving clips back into place and then all the shelving. Appears to operating quietly so far. About 30 minutes to complete the job.
I figured out how to remove these brackets. Removed three Philips head screw in freezer back panel (24) with nut driver. Removed light bulb cover to get some grip on back panel. Lifted the back panel up slightly and then folded in down a bit then rotated it to the left. Removed 4 hex head (1/4in) screws on fan shroud (23) and brought down into the freezer. Disconnected electrical spade connectors from motor and removed entire unit from freezer to work on motor. Removed two hex head screws (18) holding motor to the brackets. Pushed new fan on to new motor using a 1/4 nut driver and hammer. Mounted motor to old brackets with two screws (18). Placed motor/fan/shroud unit in freezer and reconnected electrical spade connectors. Replaced motor/fan/shroud in freezer with the 4 hex head screws (15), dropping one behind the coils. Just replaced it with a look alike. Turned power back on to check if the fan was operating normally. Put back panel in place and screwed it in place then put shelving clips back into place and then all the shelving. Appears to operating quietly so far. About 30 minutes to complete the job.
Parts Used:
-
Ralph from SAINT PAUL, MO
-
Difficulty Level:Really Easy
-
Total Repair Time:30 - 60 mins
-
Tools:Nutdriver, Pliers, Screw drivers
4 of 5 people
found this instruction helpful.
Was this instruction helpful to you?
Thank you for voting!
Freezer froze and refrigerator wet
First took all frozen food out and than undid the screws that held back on--than cut the wires that held the piece and replaced it but also found that the plug was frozen so we thawed that out, that is why it took longer. Used air compressor to blow air and it broke it free and than we finished and put the food back after it got cold. So far it is working find and to beat all we received our part the next day so my husband could fix it that weekend--Thank you for the quick respond-
Patricia in Marengo Ohio
Patricia in Marengo Ohio
Parts Used:

-
Patricia from Marengo, OH
-
Difficulty Level:Easy
-
Total Repair Time:1- 2 hours
-
Tools:Screw drivers, Socket set
5 of 8 people
found this instruction helpful.
Was this instruction helpful to you?
Thank you for voting!
Lights not working some times
-
Harry from COLUMBIA STA, OH
-
Difficulty Level:A Bit Difficult
-
Total Repair Time:30 - 60 mins
-
Tools:Nutdriver, Screw drivers
4 of 5 people
found this instruction helpful.
Was this instruction helpful to you?
Thank you for voting!
Replaced broken shelf supports
-
Cheryl from Los Angeles, CA
-
Difficulty Level:Really Easy
-
Total Repair Time:Less than 15 mins
4 of 6 people
found this instruction helpful.
Was this instruction helpful to you?
Thank you for voting!
Fan motor
Remove bottom of freezer by sliding out the gaskets on each side.
Remove back of freezer. 6 screws.
Remove fan cover. 4 screws.
Remove fan. 3 wires to disconnect. 2 screws to take out.
Install the fan. Connect the 3 wires. Fastened with 2 screws.
Put fan cover back on. 4 screws.
Put back of freezer back on. 6 screws.
Put bottom of freezer back in. Slide gaskets in on each side.
Remove back of freezer. 6 screws.
Remove fan cover. 4 screws.
Remove fan. 3 wires to disconnect. 2 screws to take out.
Install the fan. Connect the 3 wires. Fastened with 2 screws.
Put fan cover back on. 4 screws.
Put back of freezer back on. 6 screws.
Put bottom of freezer back in. Slide gaskets in on each side.
Parts Used:
-
Bonnie from DETROIT LAKES, MN
-
Difficulty Level:Easy
-
Total Repair Time:15 - 30 mins
-
Tools:Nutdriver, Screw drivers
3 of 3 people
found this instruction helpful.
Was this instruction helpful to you?
Thank you for voting!
Compressor making excessive noise
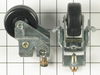
One front roller was flat on one side. Decided to replace all rollers at same time. Placed shims under unit and removed mounting screws for one front and one rear roller. With new rollers in place, I was able to level the refrigerator side to side, but unable to do so, front to back. Left the new front roller in place and reinstalled the old rear roller. Have decided to replace refrigeratorin the near future. This is one of my few repair failures!
Parts Used:

-
chester from Tampa, FL
-
Difficulty Level:Easy
-
Total Repair Time:30 - 60 mins
-
Tools:Nutdriver, Socket set
5 of 9 people
found this instruction helpful.
Was this instruction helpful to you?
Thank you for voting!
Noisy freezer evaporator fan motor
Removed the shelves from the freezer and the brackets holding it along with the covers for the light and plate for the ice maker (we don't have one). Pulled the ground wire from the tab off the port for the ice maker. Removed back plate exposing the fan motor and then the 4 hex screws holding on part #23 of the diagram which the fan motor is mounted to. Flipped it over, unscrewed the 2 hex screws from the fan motor mounting and removed it. Removed and replaced 3 wire connectors on new fan motor. Installed new fan motor and new grommets but used the old screws because the provided screws were larger. Pushed the new fan on to the motor shaft. Reassembled. Half hour most.
Parts Used:
-
Lloyd from Long Beach, CA
-
Difficulty Level:Easy
-
Total Repair Time:15 - 30 mins
-
Tools:Nutdriver, Pliers, Screw drivers
4 of 6 people
found this instruction helpful.
Was this instruction helpful to you?
Thank you for voting!
Fan was making alot of noise
I removed all the shelves and the back shelf hanger. Removed two screws on the back plate.Pulled it out.Removed the screws that hold the fan housing. Pulled it out so I could write down the three wires color and location.Unpluged them.Removed the old fan and installed the new one.and put everthing back together.
Parts Used:
-
JERRY from ALBION, AL
-
Difficulty Level:Easy
-
Total Repair Time:15 - 30 mins
-
Tools:Pliers, Screw drivers, Socket set
4 of 6 people
found this instruction helpful.
Was this instruction helpful to you?
Thank you for voting!
Refrigerator quit cooling and the freezer wasn't freezing anything
Order the part from the Internet on Sunday, it mailed out on Monday and I received it on Tuesday. I unplugged the fan then undone 3 screws that held the fan bracket to the refrigerator pulled it out unscrewed 3 more nuts and replaced the fan on the bracket and I cut the old wire plug off the old fan and with 2 wire nuts put it on my new fan. Replaced the fan and bracket back on the refrigerator plugged it in and it works like a new refrigerator.
Parts Used:

-
Tonya from Grand Prairie, TX
-
Difficulty Level:Really Easy
-
Total Repair Time:15 - 30 mins
-
Tools:Socket set
4 of 7 people
found this instruction helpful.
Was this instruction helpful to you?
Thank you for voting!
Divider front of fridge hot to touch Condenser fan not working
removed back cover, removed fan motor and replaced with new one. connected new power wires. worked right away
Parts Used:
-
John from Holden, MA
-
Difficulty Level:Easy
-
Total Repair Time:15 - 30 mins
-
Tools:Nutdriver, Pliers
3 of 4 people
found this instruction helpful.
Was this instruction helpful to you?
Thank you for voting!
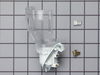
the light socket broke apart
I took out the old socket by moving a clip. Reattached the electrical wires, clicked in the socket and that was it.
Parts Used:
-
Elyse from Skokie, IL
-
Difficulty Level:Really Easy
-
Total Repair Time:15 - 30 mins
-
Tools:Screw drivers
4 of 7 people
found this instruction helpful.
Was this instruction helpful to you?
Thank you for voting!
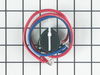
fans and lights worked in refrigerator but not cooling
By going on line and going to PartsSelect, the check out procedures traced the problem to the start/overload relay. Using a nut driver, I removed the back panel and using their instruction, I installed the overload relay. On the next to the last step on the instruction, the sealer in the kit was already hardened. I called the service hot line at PartsSelect and they apologized and sent me another kit to finish the repair. In two days, the new kit came and the repair was complete. The whole experience with PartsSelect was great.
Parts Used:
-
James from Blue Springs, MO
-
Difficulty Level:Easy
-
Total Repair Time:30 - 60 mins
-
Tools:Nutdriver, Pliers, Screw drivers
9 of 23 people
found this instruction helpful.
Was this instruction helpful to you?
Thank you for voting!
Fan was noisy - bearing had failed
It's self-explanatory. The procedure is obvious; it's just a little difficult. The only hard part is attaching the mounting brackets to the fan. If you can't tighten the mounting bolts, loosen them and reposition the brackets. You might end up mispositioning them at first, because they are hard to reach.
Parts Used:
-
Karl from Wellesley, MA
-
Difficulty Level:A Bit Difficult
-
Total Repair Time:30 - 60 mins
-
Tools:Nutdriver
2 of 2 people
found this instruction helpful.
Was this instruction helpful to you?
Thank you for voting!
Bad fan motor
Pop off six mounting screws and the ground screw. Remove the fan blade and reattach. Reinstall. Save yourself big bucks.
Parts Used:
-
Mark from Farmington Hills, MI
-
Difficulty Level:Easy
-
Total Repair Time:15 - 30 mins
-
Tools:Nutdriver
3 of 5 people
found this instruction helpful.
Was this instruction helpful to you?
Thank you for voting!
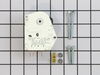
Fridge stopped cooling
I replaced the defrost relay folling instructions I read on the internet--and it still didn't work--So I replaced the compressor start relay which was easier than the defrost relay--it worked and the fridg is working good.
Parts Used:
-
ray from palm bay, FL
-
Difficulty Level:Easy
-
Total Repair Time:30 - 60 mins
-
Tools:Nutdriver, Pliers, Screw drivers
3 of 5 people
found this instruction helpful.
Was this instruction helpful to you?
Thank you for voting!