















1068263580 Kenmore Freezer - Instructions
Keep searches simple. Use keywords, e.g. "leaking", "pump", "broken" or "fit".
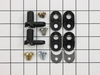
badly worn cam
Exactly as the demo instructed. It was very detail friendly and was very easy to follow.
Parts Used:
-
harry from KINGSPORT, TN
-
Difficulty Level:Really Easy
-
Total Repair Time:15 - 30 mins
-
Tools:Nutdriver, Screw drivers
3 of 3 people
found this instruction helpful.
Was this instruction helpful to you?
Thank you for voting!
Broken Freezer Door Cams
1. Put pieces of wood under door to support it.
2. Unscrew three screws holding door hinge.
3. Disconnect water line.
4. Unscrew screw holding each cam. One to door and one to hinge.
5 Replace cams.
6. Retrieve plate with threaded holes behind frame that the hinge attaches to.
7. Use thin philips screwdriver through the hinge bracket, shim, frame and screw plate to align it for the other two screws.
8. Replace all three hinge screws.
9. Connect water line fitting.
10. Remove wood for door support.
11. Check door for smooth movement and strong pressure when closed.
2. Unscrew three screws holding door hinge.
3. Disconnect water line.
4. Unscrew screw holding each cam. One to door and one to hinge.
5 Replace cams.
6. Retrieve plate with threaded holes behind frame that the hinge attaches to.
7. Use thin philips screwdriver through the hinge bracket, shim, frame and screw plate to align it for the other two screws.
8. Replace all three hinge screws.
9. Connect water line fitting.
10. Remove wood for door support.
11. Check door for smooth movement and strong pressure when closed.
Parts Used:

-
Dennis from Corona, CA
-
Difficulty Level:Easy
-
Total Repair Time:30 - 60 mins
-
Tools:Socket set
3 of 3 people
found this instruction helpful.
Was this instruction helpful to you?
Thank you for voting!
door closing cam was broken
the process was pretty straight forward though the part came without instructions. We were able to replace the part improperly with ease. however, we were not able to get the pieces aligned properly for a long time. We ended up taking the door off many times to try to realign the pieces. After many hours I finally unscrewed the bottom cam while the door was in place. The piece popped into place and all was fixed. Had the part come with directions telling us to do this we would have replaced the cam within 15 minutes!
Parts Used:
-
lizie from nantucket, MA
-
Difficulty Level:A Bit Difficult
-
Total Repair Time:More than 2 hours
-
Tools:Nutdriver, Screw drivers
3 of 3 people
found this instruction helpful.
Was this instruction helpful to you?
Thank you for voting!
side by side freezer door wouldn't close
Friend did for me, had to take off door after disconnecting water like a power cord from top of door, now works fine, also did the cam on frig side too, works better also.
Parts Used:

-
Dorothy M from Galway, NY
-
Difficulty Level:Easy
-
Total Repair Time:15 - 30 mins
-
Tools:Nutdriver, Screw drivers, Socket set
3 of 4 people
found this instruction helpful.
Was this instruction helpful to you?
Thank you for voting!
Refrigerator door on a side by side unit would not stay closed.
First empty the shelves on the refrig. door. Then removed the upper hing cover and removed the three screws holding the hinge to the body of the refrigerator. Lifted the door off the bottom hinge and placed it clear of the unit.
Inspected the bottom hinge and cleaned off the screw holding the closing cam, then with a nutdriver removed the screw holding the cam and removed the cam from the hinge. Installed a new cam closer, secured the cam with a screw. Hanged the door back on the lower hinge and re-installed the upper hinge. Job Complete!
Inspected the bottom hinge and cleaned off the screw holding the closing cam, then with a nutdriver removed the screw holding the cam and removed the cam from the hinge. Installed a new cam closer, secured the cam with a screw. Hanged the door back on the lower hinge and re-installed the upper hinge. Job Complete!
Parts Used:
-
John from Conyers, GA
-
Difficulty Level:Easy
-
Total Repair Time:Less than 15 mins
-
Tools:Nutdriver, Screw drivers
3 of 4 people
found this instruction helpful.
Was this instruction helpful to you?
Thank you for voting!
No leveling legs
Ordered the leveling bolts, very fast shipping, parts correct as shown. Purchased a condo by the shore, frige had no levelers, they went in smoothly & was done in no time.
Steve
Steve
Parts Used:

-
stephen from montgomery, NY
-
Difficulty Level:Really Easy
-
Total Repair Time:Less than 15 mins
-
Tools:Wrench (Adjustable)
3 of 4 people
found this instruction helpful.
Was this instruction helpful to you?
Thank you for voting!
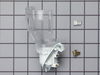
the light socket broke apart
I took out the old socket by moving a clip. Reattached the electrical wires, clicked in the socket and that was it.
Parts Used:
-
Elyse from Skokie, IL
-
Difficulty Level:Really Easy
-
Total Repair Time:15 - 30 mins
-
Tools:Screw drivers
4 of 7 people
found this instruction helpful.
Was this instruction helpful to you?
Thank you for voting!
Faulty light socket
-
Larry from HOUSTON, TX
-
Difficulty Level:Very Easy
-
Total Repair Time:15 - 30 mins
-
Tools:Screw drivers
3 of 5 people
found this instruction helpful.
Was this instruction helpful to you?
Thank you for voting!
cracked, broke and fell out
Simple read about three of the other peoples repairs,did the same and (PIECE OF CAKE)
Only problem ordered the cam kit with shipping over # 18.oo and only needed two pieces to do the job. Should have ordered just the two cams and saved a lot of dough.
But done and over with a happy camper (WIFE)
Only problem ordered the cam kit with shipping over # 18.oo and only needed two pieces to do the job. Should have ordered just the two cams and saved a lot of dough.
But done and over with a happy camper (WIFE)
Parts Used:
-
Jerry from Victor, ID
-
Difficulty Level:Really Easy
-
Total Repair Time:Less than 15 mins
-
Tools:Nutdriver, Screw drivers
2 of 2 people
found this instruction helpful.
Was this instruction helpful to you?
Thank you for voting!
door making loud noise when opening or closing
-
phil from cocoa, FL
-
Difficulty Level:Really Easy
-
Total Repair Time:Less than 15 mins
-
Tools:Socket set
2 of 2 people
found this instruction helpful.
Was this instruction helpful to you?
Thank you for voting!
old part cracked and broke
-
Paul from Green Valley, AZ
-
Difficulty Level:Really Easy
-
Total Repair Time:Less than 15 mins
-
Tools:Nutdriver, Screw drivers
2 of 2 people
found this instruction helpful.
Was this instruction helpful to you?
Thank you for voting!
door would not stay shut on refrigerator side
Remove one 5/16 screw from top hinge cover plate. Trace outline of hinge on top of refrigerator with sharpie, so you will know where to put hinge back. Remove 3 5/16 screws from hinge. Lift door up out of bottom hinge, place on table to be able to work on. Remove one 5/16 screw and upper cam piece from bottom of door and replace with new upper cam piece. Remove one 5/16 screw and lower cam piece from bottom hinge on refrigerator. Replace with new lower cam piece and one screw Set door back in place and reattach top hinge with 3 screws adjust refrigerator door as needed for a nice even gap between freezer and refrigerator doors. Tighten screws down and put hinge cover back on with one screw.
Parts Used:
-
tom from BASSETT, VA
-
Difficulty Level:Really Easy
-
Total Repair Time:15 - 30 mins
-
Tools:Nutdriver, Socket set
2 of 2 people
found this instruction helpful.
Was this instruction helpful to you?
Thank you for voting!
Lower hinge on freezer door on side-by-side broke
Removed the cover plate on top. Used a wrench and the nut driver to remove the three screws & the screw holding the grounding wire. Pulled apart the plastic coupling for the wiring to light the freezer. Then with the aid of a friend - lifted the door (with food removed from door shelves) off the hinge. This freezer had a water line which we didin't know how to disconnect so we were careful to move the door slightly away from the broken hinge, set it on a stool with one person holding the door steady while the other person installed the new hinge piece. Definitely takes two people (as suggested in the directions) to both lift and guide the door into place. Once it was in place - I reinserted the screws up top and tightened them. Then had to untighten them to get the door to line up as it should vertically - so I would suggest just lighten tighen the upper screws until the door is aligned and swinging smoothly. Then reattached ground wire and plastic coupling. Works great.
Parts Used:
-
Paul from Amherst, MA
-
Difficulty Level:Easy
-
Total Repair Time:15 - 30 mins
-
Tools:Screw drivers, Wrench set
2 of 2 people
found this instruction helpful.
Was this instruction helpful to you?
Thank you for voting!
Door Closing Cam Kit Failed
Removed all of the food from the door by lifting the shelves out. Unbolted the top door hinge, and lifted the door off. Replaced the cam and placed the door back on, re-bolted the top hinge and placed all of the food and shelving back into the door. The door closes and seals when it is shut.
Parts Used:
-
Digger from Marysville, WA
-
Difficulty Level:Easy
-
Total Repair Time:15 - 30 mins
-
Tools:Screw drivers, Socket set
2 of 2 people
found this instruction helpful.
Was this instruction helpful to you?
Thank you for voting!
Machine Leaking Water
I did some tests and determined that the tub-to-pump drain hose had a leak in it.I then looked on the web to find disassembly instructions. I have a stacked washer dryer combination in a very confined space. The repair involved disconnecting both the washer and dryer from the water, gas, electric and venting systems first, then unstacking the dryer from the washer (not so easy, it required a helper). The machine was then pulled out so I could get at the parts necessary to remove the outside components and sheet metal. Then, I disassembled the top, front and access panel in the back. The disassembly went very well. I got access to the drain hose assembly and removed it fairly easily. I ordered a replacement drain hose assembly and found that installing the large port of the assembly was very difficult. (The two other ports were easy.) After thinking about it, I tilted the machine back a bit so I could try it from the bottom. That worked fine.I then reassembled and tested the machine. No leaks. Good luck with yours!
Parts Used:
-
Frank from BERKELEY HTS, NJ
-
Difficulty Level:Difficult
-
Total Repair Time:30 - 60 mins
-
Tools:Nutdriver, Pliers, Screw drivers, Socket set, Wrench (Adjustable), Wrench set
2 of 2 people
found this instruction helpful.
Was this instruction helpful to you?
Thank you for voting!