


ZSC2201J4SS General Electric Microwave - Overview
Sections of the ZSC2201J4SS
[Viewing 7 of 7]


Keep searches simple, eg. "belt" or "pump".

Microwave Fuse
PartSelect #: PS1481237
Manufacturer #: WB27X10928
This ceramic microwave fuse is just over an inch in length. It is white in the center, and metal on both ends. This is a 20-amp fuse, and is used to power your microwave. If the touch pad on the micro...
$21.31
In Stock

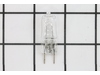
HALOGEN LAMP
PartSelect #: PS16216934
Manufacturer #: WB02X35488
We know your home runs smoothly when all your appliances are in top shape. That's why we've got the Milwaukee Switch Assembly just for you. This essential part helps efficiently power on and off your ...
$26.92
In Stock

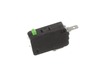
Primary Door Interlock Switch
PartSelect #: PS237015
Manufacturer #: WB24X10047
This interlock switch is located in the door latch.
$52.82
In Stock

Monitor Interlock Switch
PartSelect #: PS11766871
Manufacturer #: WB24X25397
This switch monitor interlock is a critical safety component designed to ensure proper communication between the microwave door latch and the control board. When functioning correctly, it confirms tha...
$38.54
In Stock

TRAY GLASS
PartSelect #: PS16873477
Manufacturer #: WB27X43590
This tray rotates in your microwave ensuring more even temperatures.
$111.14
In Stock

THERMOSTAT
PartSelect #: PS3491479
Manufacturer #: WB20X10048
Introducing the GE Microwave Thermostat - a vital safety component for your microwave. Crafted with precision, this thermostat is specifically designed to prevent overheating scenarios which can cause...
$22.43
In Stock


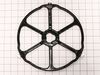
Roller Guide
PartSelect #: PS2353388
Manufacturer #: WB06X10775
If your microwave’s turntable isn’t rotating smoothly, the roller guide may be the issue. Positioned beneath the glass tray, this component helps ensure even spinning during operation. Designed for se...
$108.00
In Stock

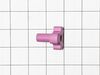
Turntable Shaft
PartSelect #: PS2353335
Manufacturer #: WB02X11360
This GE Turntable Shaft, also known as a Shaft Turntable, is an essential component for your microwave. Manufactured by trusted brand, GE, it is designed with precision to ensure your microwave's turn...
$51.74
In Stock


MICA COVER
PartSelect #: PS2369910
Manufacturer #: WB06X10828
Enhance the functionality of your GE appliance with this authentic MICA COVER. Designed with distinguished features, this part is essential for ensuring the optimum performance of your appliance. Made...
$22.36
In Stock

Light Lens Cover
PartSelect #: PS247332
Manufacturer #: WB36X10129
This range ceramic light lens covers and protects the interior light bulb, allowing clear illumination of the cooking area while shielding the bulb from heat and debris. Made from durable, heat-resist...
$126.82
In Stock
Questions And Answers for ZSC2201J4SS
We're sorry, but our Q&A experts are temporarily unavailable.
Please check back later if you still haven't found the answer you need.
Common Symptoms of the ZSC2201J4SS
[Viewing 5 of 5]Won’t turn on
Fixed by
these parts
these parts


Show All
No heat
Fixed by
these parts
these parts

Show All
Touchpad does not respond
Fixed by
these parts
these parts

Show All
Doesn’t shut off
Fixed by
these parts
these parts
Show All
Tray won’t turn
Fixed by
these parts
these parts
Show All


Keep searches simple. Use keywords, e.g. "leaking", "pump", "broken" or "fit".
Microwave completely stopped working
Turned out the issue was easily solved by replacing a single, inexpensive fuse.
First off, UNPLUG THE MICROWAVE.
The fuse is located under the plastic grill at the top of the microwave. It's held on by two screws. Once you've removed the screws and taken off the plastic grill, you go to the right side of the mic ... Read more rowave and remove another screw that holds a small metal grill in place. Removing the small metal grill is probably the toughest part of this repair. You kind of have to rock it back and forth a bit to get it to release. Once that's off, you can get to the fuse. I removed the burnt out one with a pair of needle nose pliers. I also put a small piece of cardboard under the fuse when I did this so I didn't accidentally drop it into the innards of the microwave. I did the same thing when I replaced the new fuse. I then plugged the appliance back in and made sure it worked. Once that was confirmed, I replaced both grills.
Read less
Parts Used:
-
Kim from Cliffside Park, NJ
-
Difficulty Level:Really Easy
-
Total Repair Time:15 - 30 mins
-
Tools:Screw drivers
964 of 1257 people
found this instruction helpful.
Was this instruction helpful to you?
Thank you for voting!
I diagnosed the problem incorrectly: based on a previous repair.
-
Ralph from Brandon, FL
-
Difficulty Level:Easy
-
Total Repair Time:Less than 15 mins
-
Tools:Pliers, Screw drivers
66 of 139 people
found this instruction helpful.
Was this instruction helpful to you?
Thank you for voting!
Microwave would turn on and count down, but not heating and not rotate turntable. Pressing door up would occasionally start heat.
First I disconnected the power and opened the door. Then I removed the top screws holding the top vent louvers, then removed the screw at the top of the touch pad. The touch pad removes by sliding up slightly then tilting top out. I unscrewed two screws holding the door latch assembly. Press the tab to remove and replace switch. Reco
... Read more
nnect wires, reseat latch mount by placing top bracket tab in place first, allign and secure with screws. Reseat touch pad by placing bottom tabs in first, tilt forward and press up to seat top tabs, secure with top screw. Secure vent louver screws, plug in and watch your microwave work again.
Read less
Parts Used:
-
Michael from Ridgefield, CT
-
Difficulty Level:Really Easy
-
Total Repair Time:Less than 15 mins
-
Tools:Screw drivers
40 of 67 people
found this instruction helpful.
Was this instruction helpful to you?
Thank you for voting!