


ZSC2001CSS General Electric Microwave - Overview
Models starting with ZSC2001CSS
Click on the best match to narrow your results.
Keep searches simple, eg. "belt" or "pump".

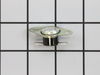
Microwave Fuse
PartSelect #: PS1481237
Manufacturer #: WB27X10928
This ceramic microwave fuse is just over an inch in length. It is white in the center, and metal on both ends. This is a 20-amp fuse, and is used to power your microwave. If the touch pad on the micro...
$21.81
In Stock

Primary Door Interlock Switch
PartSelect #: PS237015
Manufacturer #: WB24X10047
This interlock switch is located in the door latch.
$54.07
In Stock

Light Bulb
PartSelect #: PS1481517
Manufacturer #: WB36X10328
Sold individually. Appliance may take 2.
$29.47
In Stock

Turntable Guide with Rollers
PartSelect #: PS228014
Manufacturer #: WB06X10304
This roller guide sits underneath the glass turntable tray.
No Longer Available

Monitor Interlock Switch
PartSelect #: PS11766871
Manufacturer #: WB24X25397
This switch monitor interlock is a critical safety component designed to ensure proper communication between the microwave door latch and the control board. When functioning correctly, it confirms tha...
$39.45
In Stock

Oven Cavity Thermal Cut Out
PartSelect #: PS1993849
Manufacturer #: WB27X10985
Also known as a Sensor or Fuse. This part will trip once the inside of the cavity overheats and exceeds the recommended temperature.
No Longer Available

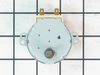
Turntable
PartSelect #: PS227932
Manufacturer #: WB06X10219
Also known as rotating ring assembly.
No Longer Available

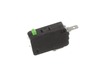
THERMOSTAT
PartSelect #: PS3491479
Manufacturer #: WB20X10048
Introducing the GE Microwave Thermostat - a vital safety component for your microwave. Crafted with precision, this thermostat is specifically designed to prevent overheating scenarios which can cause...
$22.96
In Stock


Non-Stick Metal Tray/Pan
PartSelect #: PS5573506
Manufacturer #: WB49X10240
Introducing the GE Advantium Metal Tray, an essential part of your microwave. This non-stick metal tray serves a vital role in your cooking process, revolving in the center of your microwave, thereby ...
$132.23
On Order

Cooking Tray
PartSelect #: PS7783326
Manufacturer #: WB49X10246
NOTE: This is a manufacturer substitution. Part may differ in appearance and size but is a functional equivalent to prior part.This tray rotates in your microwave ensuring more even temperatures.
No Longer Available

Common Symptoms of models starting with ZSC2001CSS
[Viewing 5 of 5]Won’t turn on
Fixed by
these parts
these parts


Show All
No heat
Fixed by
these parts
these parts

Show All
Tray won’t turn
Fixed by
these parts
these parts


Show All
Touchpad does not respond
Fixed by
these parts
these parts
Show All
Doesn’t shut off
Fixed by
these parts
these parts
Show All


Keep searches simple. Use keywords, e.g. "leaking", "pump", "broken" or "fit".
Microwave completely stopped working
Turned out the issue was easily solved by replacing a single, inexpensive fuse.
First off, UNPLUG THE MICROWAVE.
The fuse is located under the plastic grill at the top of the microwave. It's held on by two screws. Once you've removed the screws and taken off the plastic grill, you go to the right side of the mic ... Read more rowave and remove another screw that holds a small metal grill in place. Removing the small metal grill is probably the toughest part of this repair. You kind of have to rock it back and forth a bit to get it to release. Once that's off, you can get to the fuse. I removed the burnt out one with a pair of needle nose pliers. I also put a small piece of cardboard under the fuse when I did this so I didn't accidentally drop it into the innards of the microwave. I did the same thing when I replaced the new fuse. I then plugged the appliance back in and made sure it worked. Once that was confirmed, I replaced both grills.
Read less
Parts Used:
-
Kim from Cliffside Park, NJ
-
Difficulty Level:Really Easy
-
Total Repair Time:15 - 30 mins
-
Tools:Screw drivers
964 of 1257 people
found this instruction helpful.
Was this instruction helpful to you?
Thank you for voting!
Some smuck put a metal object in company microwave
found fuse blown and heat damage to TCO sensor.
Parts Used:
-
Jacob from Brewster, NY
-
Difficulty Level:Really Easy
-
Total Repair Time:Less than 15 mins
-
Tools:Screw drivers
73 of 133 people
found this instruction helpful.
Was this instruction helpful to you?
Thank you for voting!
Microwave dead--no LEDs lit on front panel
Removed microwave from enclosure and removed cover, hoping it was as simple as a blown fuse. Found extremely helpful diagnostic sheet thoughtfully provided by manufacturer in an envelope affixed to top of cavity. Fuse was fine, but tracing the power feed into the machine revealed that the oven cavity thermostat was open--no continuity acr
... Read more
oss it, and the diagnostic sheet indicated that it was non-resettable. Verified the issue by temporarily by-passing the blown thermostat to ascertain that the front panel display got power. It took longer to get the screws for the cover and enclosure back on than it did to replace the thermostat, once I received the replacement part. Microwave works just fine now, thanks!
Read less
Parts Used:
-
Steve from Redmond, WA
-
Difficulty Level:Easy
-
Total Repair Time:15 - 30 mins
-
Tools:Screw drivers
37 of 45 people
found this instruction helpful.
Was this instruction helpful to you?
Thank you for voting!