Your coupon for will be reflected when you check out!
✖
Your coupon for
✖
Hello!
You're visiting the PartSelect site in U.S.
Would you like to shop on the Canadian site?
Stay on this site
Go to Canadian site
✖
Model Number Locations
1Select Category Type
Select Category Type
2Select Product Type
Select Product Type
3Select {MODEL} Type
Select {MODEL} Type
Sample Model Number Tags
Model numbers can be made up of numbers (1005400, for example) or a combination of letters and numbers (LAT1000AAE). The model number will most likely appear on either a paper sticker or a metal plate. Your appliance's model number tag may look similar to the sample model number tags shown here (model number highlighted in yellow):
Model has been saved to My Models. If you're not signed in, your lists are available on this device and will expire within 30 days.
Model has been saved to My Models.
This ceramic microwave fuse is just over an inch in length. It is white in the center, and metal on both ends. This is a 20-amp fuse, and is used to power your microwave. If the touch pad on the micro...
This part is the replacement high-voltage diode for your microwave. It is approximately 3 inches long and is sold individually. The high voltage diode is an electrical current control device inside yo...
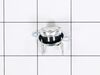
Introducing the GE Microwave Thermostat - a vital safety component for your microwave. Crafted with precision, this thermostat is specifically designed to prevent overheating scenarios which can cause...
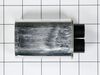
This capacitor delivers the electrical boost required for motors to start and operate efficiently. Proper capacitance reduces strain on motor components and helps prevent startup failures or inconsist...
Meet the GE Canopy Mica, a sturdy waveguide cover designed for your microwave. Made with high-quality materials, this essential part safeguards the waveguide channel from any debris, food splatters, a...
This GE Thermostat Thermal Cut-off is a crucial safety component for microwaves. Specifically designed to prevent overheating, it functions as a protective measure by shutting down the appliance if te...
Need an oven rack replacement? Let us help you get your oven back to performing at its best! This genuine OEM Oven Rack from the reputable Whirlpool brand is specifically designed for certain Whirlpoo...
Upgrade your GE oven with this high-quality oven rack. Crafted for longevity and efficiency, this oven rack is perfect for baking, roasting, and broiling. It offers optimal heat circulation leading to...
Looking to restore your refrigerator's functionality? Look no further! The GE Crisper Drawer Cover Frame is just what you need. This robust frame does a crucial job in your fridge?it acts as a strong ...
Turned out the issue was easily solved by replacing a single, inexpensive fuse.
First off, UNPLUG THE MICROWAVE.
The fuse is located under the plastic grill at the top of the microwave. It's held on by two screws. Once you've removed the screws and taken off the plastic grill, you go to the right side of the mic
... Read morerowave and remove another screw that holds a small metal grill in place. Removing the small metal grill is probably the toughest part of this repair. You kind of have to rock it back and forth a bit to get it to release. Once that's off, you can get to the fuse. I removed the burnt out one with a pair of needle nose pliers. I also put a small piece of cardboard under the fuse when I did this so I didn't accidentally drop it into the innards of the microwave. I did the same thing when I replaced the new fuse. I then plugged the appliance back in and made sure it worked. Once that was confirmed, I replaced both grills.
1. turned off electricity -- unplugged the unit 2. removed 3 screws on top of top vent, removed vent screen then I located the little white cylindrical fuse and popped it out with a table knife. Then I popped in the new fuse. Replaced the vent screen and screws
... Read more -- plugged in the appliance and it is working again.