Your coupon for will be reflected when you check out!
✖
Your coupon for
✖
Hello!
You're visiting the PartSelect site in U.S.
Would you like to shop on the Canadian site?
Stay on this site
Go to Canadian site
✖
Model Number Locations
1Select Category Type
Select Category Type
2Select Product Type
Select Product Type
3Select {MODEL} Type
Select {MODEL} Type
Sample Model Number Tags
Model numbers can be made up of numbers (1005400, for example) or a combination of letters and numbers (LAT1000AAE). The model number will most likely appear on either a paper sticker or a metal plate. Your appliance's model number tag may look similar to the sample model number tags shown here (model number highlighted in yellow):
Model has been saved to My Models. If you're not signed in, your lists are available on this device and will expire within 30 days.
Model has been saved to My Models.
The interior light of your refrigerator is controlled by a switch that is activated when the door is opened and closed. If your refrigerator light will not turn on, there could be an issue with the sw...
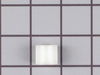
This is a quarter tubing nut and is sold individually. The tubing nut works in conjunction with your refrigerator/freezer and is made entirely of plastic. The function of this part is to connect the l...
This part should be installed by an appliance repair person as it could be dangerous. This part may be used to help prevent your evaporator fan from becoming blocked with ice. This part also insulat...
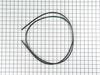
Upgrade your refrigerator with this GE Condenser Fan Motor Housing. This high-quality product is designed to house and protect the condenser fan motor in your refrigerator. Before installing, remember...
I applied some tips learned by reading other reviews. So before I started I grabbed my trusty vise grip pliers and a small screw driver. I locked onto the switch actuator, the part that the refrigerator door pushes in, with the vise grips and pulled on it just hard enough to get the screw driver inserted in the right side to push in the c
... Read moreatch clip so the switch could be pulled out further each time the catch clip was depressed to the next detent. Then I used the screw driver on the left site to encourage the switch past the detents on the left and very quickly the switch was out of the mount. The wires from the refrigerator pulled out with the old switch. I unplugged the old switch from the wires and plugged in the new switch and shoved the new switch back into the mount, wiggled it a couple of times to make sure it was secure and the job was done. Once I applied the vise gripes at first, the whole job took less than a minute.
First I removed the ice maker. Second I removed the back panel and overhead panel above ice maker. Third I pulled down the drip trough it had a styrofoam base under it. The trough heater had to be unplugged to remove the trough as well as the drain hose. Forth I seperated the styrofoam from the trough and peeled off the old heater whi
... Read morech had burn marks on the foil. Fifth I applied the new heater plugged it in and attached the drain hose to the trough. Last I reassembled the unit. Refridgerator works great now and it only cost $45.00 for the heater. The GE repair service quoted over $950.00 and did not list the trough heater as the problem so I would be spending more and would have required several repair visits.
Poped out with screwdriver the old swithch and unplugged the two wires. Plugged in the wires to the new swithch and pushed it back in the hole where the old switch was before.