Your coupon for will be reflected when you check out!
✖
Your coupon for
✖
Hello!
You're visiting the PartSelect site in U.S.
Would you like to shop on the Canadian site?
Stay on this site
Go to Canadian site
✖
Model Number Locations
1Select Category Type
Select Category Type
2Select Product Type
Select Product Type
3Select {MODEL} Type
Select {MODEL} Type
Sample Model Number Tags
Model numbers can be made up of numbers (1005400, for example) or a combination of letters and numbers (LAT1000AAE). The model number will most likely appear on either a paper sticker or a metal plate. Your appliance's model number tag may look similar to the sample model number tags shown here (model number highlighted in yellow):
Model has been saved to My Models. If you're not signed in, your lists are available on this device and will expire within 30 days.
Model has been saved to My Models.
This inner door glass is a heat resistant part that fits into a stove, oven, wall oven, cooktop, or range as the inner glass panel of the appliance door. The glass panel allows you to see the items be...
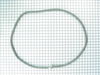
This genuine OEM microwave turntable tray is a circular plate made of glass and has a diameter of approximately 16 inches. It rotates food in your microwave oven, so that your food cooks evenly. It is...
This oven rack is chrome in color and is approximately 24.76 inches wide by 15.78 inches deep. If your old oven rack is damaged, you should consider replacing it. Many of our customers have determined...
This is a multi-use and multi-appliance screw. It can be used on a microwave, refrigerator, range/oven, air conditioner, dehumidifier, washer, or dryer. The measurements of this screw are 8 x 1/2 inch...
This halogen light bulb is a type of lamp that uses a halogen gas mixture for better lighting quality and longevity. It is an authentic OEM replacement bulb designed for use in ovens and ranges. It is...
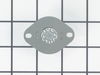
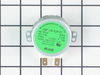
The temperature sensor measures the temperature inside the oven. If your oven is too hot, not heating evenly, is not heating enough when baking, or simply will not start, you could have a faulty tempe...
An oven thermostat is a switch that opens and closes in response to the temperature it senses. It is typically found in the control panel, where a liquid-filled temperature-sensing bulb senses and mai...
This touch-up paint can be used on a wide variety of household appliances. It is most often used on washers, dryer, refrigerators, dishwashers, ranges, freezers, trash compactors, or microwaves. It is...
Ask our experts a question about this model and we'll get back to you as soon as possible!
1 question answered by our experts.
Sort by:
< Prev
1
Next >
Search filter:
Clear Filter
Your search term must have 3 or more characters.
Keep searches simple. Use keywords, e.g. "leaking", "pump", "broken" or "fit".
Sorry, we couldn't find any existing answers that matched.Try using some different or simpler keywords, or submit your new question by using the "Ask a Question" button above!
Elizabeth
January 21, 2023
I was looking for the measurements for the cabinet to house this unit. There doesn't seem to be anything in the manual. Help please ??
For model number YKEMC307KB01
Hello Elizabeth, Thank you for your inquiry. We have researched the model number that you have provided and show that there are two sets of cutout dimensions available from the manufacturer. It shows a 42 7/16 height and a 23 inch depth with a width of either 27 inches or 30 inches depending on the cabinet you have. We hope this helps.
Was this helpful?
Thank you for voting!
< Prev
1
Next >
✖
Ask a Question
Ask our experts a question on this model and we'll respond as soon as we can.
Easily removed the door from the oven by releasing clips attached to the door hinge -- very nicely engineered. Removed about 6 philips head screws to allow the door assembly to be taken apart for access to the glass. Lifted out the broken glass, cleaned the inside of the door, installed the new glass, reassembled the door (a two minute
... Read more project), and reattached the door to the oven. Cleaning the inside of the door took longer than the actual repair!
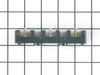
This built-in oven was slid out of it's space and set on a box. I removed the back cover with nut driver and located the safety overload device. removed nuts and used pliers to remove wires and replace them. The power must be off to do this repair.Replaced the cover and slid back into place. This could be a lot more difficult if your pow
... Read moreer cord or gas line is not long enough to make it out of your wall space. Or of your oven is attached well to the frame.
My microwave began suddenly making a loud harsh humming noise while cooking food. I did not let it go on long enough to know if it cooked the food or not. I did some Internet research and learned that it was likely the Magnetron. The test for this was to run the microwave for at least a minute on the lowest power setting and see if the no
... Read moreise cycled on and off. It did, so I (actually, my wife) ordered the part from partselect.com using the model number. I was successful in replacing the part, and we are back to microwave popcorn and quick defrost for a price that was less than a service call, however, it was time consuming, required a large work area, and access to 5 out of 6 sides of the unit. So proceed at your own discretion
Caution:
The first thing in every set of repair instructions was to discharge (short-circuit) the capacitor, as it may store large (as in lethal) amounts of electricity even when it is not connected to a power source. I had never done this, but found these instructions:
“Discharging your microwave's capacitor is absolutely essential in preventing injury to your microwave, your tools, and yourself. A capacitor stores a large amount of electricity even when your microwave is unplugged, and it must be discharged before beginning any repair. A capacitor is discharged by creating a short circuit between each of the two capacitor terminals, and between each terminal and the chassis. The chassis is the metal mounting (bare metal surface) of the capacitor. Read these directions thoroughly before you proceed. With your microwave unit unplugged, touch the blade of a well insulated screwdriver to one terminal. Gently slide the screwdriver forward until it reaches the other terminal, holding it there for a few seconds. Be aware that this often results in a loud and startling 'POP'. Repeat this procedure in order to create a short circuit between each capacitor terminal and the chassis (bare metal mounting plate surface). This same method can be applied to a capacitor having three, and not two, terminals.” I had not run my microwave in over a week, and then while my part was shipping, left my microwave 'unplugged' for more than two days, and my capacitor apparently discharged itself, although I did go through the above procedure carefully and completely - just in case. Step-By-Step: 1. You must remove your microwave from the cabinets - it is impossible to repair otherwise. This is best accomplished with 2 strong people - my wife and I made it work, but wished for another guy. a. While supporting the microwave, remove the two screws coming down through the cabinet above. b. Lift the rear of the microwave as much as possible, then tilt the front down - there is a clip high on the left side, as well as the hinge/clips on the bottom. c. If you do not lift it off the wall all at once, you may have to lift the rear even farther to remove it from the hinge/clips on the bottom. Important Note: Always beware of the microwave door, if it is bent or broken and cannot retain a seal, the microwave not function as a safety feature to keep from releasing microwaves. 2. Remove the vent cover on the top/front of the microwave - be careful, it's plastic. 3. Remove the vent cover and light panel on the bottom of the microwave - this is several screws and some simple wire clips. 4. Remove the "shell" (top and sides) of the microwave - this is several more screws on the back. Make sure to remove the plate that is holding the cord in place on the top. 5. Remove the interface panel by the screws on the top (which had been hidden by the vent cover) - the wires can remain attached, just slide it aside. 6. Remove the metal cover on the right side at the rear; this will expose the Magnetron and the Capacitor. Remember to immediately test and discharge the capacitor!
7. After you discharge the capacitor, remove the other cover plate and the support bracket - in case you haven't noticed, this is a time and space consuming operation.


")


