Your coupon for will be reflected when you check out!
✖
Your coupon for
✖
Hello!
You're visiting the PartSelect site in U.S.
Would you like to shop on the Canadian site?
Stay on this site
Go to Canadian site
✖
Model Number Locations
1Select Category Type
Select Category Type
2Select Product Type
Select Product Type
3Select {MODEL} Type
Select {MODEL} Type
Sample Model Number Tags
Model numbers can be made up of numbers (1005400, for example) or a combination of letters and numbers (LAT1000AAE). The model number will most likely appear on either a paper sticker or a metal plate. Your appliance's model number tag may look similar to the sample model number tags shown here (model number highlighted in yellow):
Model has been saved to My Models. If you're not signed in, your lists are available on this device and will expire within 30 days.
Model has been saved to My Models.
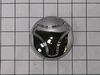
This part is known as a pulsator cap or washplate cap, and is designed for your LG washer. It fits over the washplate mounting bolt and prevents clothes from getting caught on the washplate during a w...
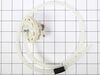
This drain hose is a genuine OEM replacement part supplied by LG for use in their washing machines. It is a light gray pipe with a diameter of 1.25 inches. The drain hose is connected to the drain pum...
Introducing the customized screw designed exclusively for LG washers. Manufactured with safety and efficiency in mind, installation is straightforward when you adhere to correct safety regulations. Sh...
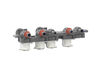
This water-level pressure switch in your wash monitors and regulates the water levels throughout the fill, wash, and rinse cycles. You will usually find it inside the control panel or near the tub. It...
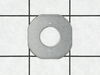
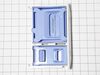
This part is the replacement fabric softener cap for your washer. It is also known as the washer dispenser drawer insert. It is made of blue plastic and is approximately 4 1/4 inches by 2 1/4 inches. ...
This part is the replacement switch assembly for your top-load washer. It contains the switch mechanism and the connecting wire that hooks the door latch to the electrical system of the washer. The li...
Meet your newest kitchen lifesaver, the Frigidaire Burner Grate. This original and genuine OEM part is tailored to perfectly fit your Frigidaire, Electrolux, White Westinghouse, and Tappan appliances....
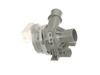
This inlet valve assembly in your washer controls the flow of hot and cold water into the machine, opening and closing as needed during the wash cycle to ensure the drum fills with water at the correc...
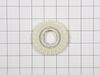
Have you been struggling with a broken or faulty handle on your trash compactor? Our genuine OEM White Container Handle, straight from the trusted manufacturer, Whirlpool, could be the perfect fix you...
This drain pump assembly is responsible for removing water from your washer during the drain cycle. It is typically at the bottom of the washing machine and connected to the drain hose. If it is damag...
raised the front of washer by hand (literally) and placed two 2x4 blocks under front lip for support. reached up inside washer cabinet and unscrewed the broken leg piece upwards into the cabinet. this was the only way I could get the broken piece out without some specialized tool to reach it from the underside. replacement with the new
... Read more leg was a breeze.
Very close to the installation video online at Parts Select. Removed the back panel, unclipped the hose from the inner fitting and replaced with the rear hose. Why it didn;t leak on the inside is interesting as there was no clip on the at the inner fitting. The one difference from the existing install video online was that I didn't
... Read more have to tip the washer over ~75 degs before replacing. I instead found that I could put to cinder blocks under the back edge to replace the drain hose. This made the job quicker without having to worry about having a box for it to rest on (with any risk of falling to the floor).