Your coupon for will be reflected when you check out!
✖
Your coupon for
✖
Hello!
You're visiting the PartSelect site in U.S.
Would you like to shop on the Canadian site?
Stay on this site
Go to Canadian site
✖
Model Number Locations
1Select Category Type
Select Category Type
2Select Product Type
Select Product Type
3Select {MODEL} Type
Select {MODEL} Type
Sample Model Number Tags
Model numbers can be made up of numbers (1005400, for example) or a combination of letters and numbers (LAT1000AAE). The model number will most likely appear on either a paper sticker or a metal plate. Your appliance's model number tag may look similar to the sample model number tags shown here (model number highlighted in yellow):
Model has been saved to My Models. If you're not signed in, your lists are available on this device and will expire within 30 days.
Model has been saved to My Models.
This touch-up paint can be used on a wide variety of household appliances. It is most often used on washers, dryer, refrigerators, dishwashers, ranges, freezers, trash compactors, or microwaves. It is...
This microwave door interlock switch is a critical safety component designed to prevent the appliance from operating when the door is open. It functions by detecting the door’s position—open or closed...
Appliance spray paint is a great way to cover up any chips and scratches that have appeared on your appliances. Instead of replacing the part entirely, this is an easy fix. This is also a great way to...
This part is the replacement halogen light bulb for your range. The bulb is 10 watts and 12 volts. The halogen lamp lights up the inside of the oven you can see the cooktop more effectively in darknes...
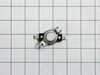
This roller is located underneath the glass turntable. With the help of the motor, this roller helps to rotate the glass tray. This part takes the place of the coupling.
This is a 25W 125-130V incandescent light bulb designed for use and compatible within various makes and models of microwaves, ranges, oven/microwave combos, and wall ovens. If you notice the lightbulb...
This genuine OEM Whirlpool Glass Turntable offers enhanced cooking convenience in your microwave. Crafted from durable glass, the tray measures just over 14 inches in diameter, providing ample space f...
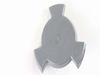
Introducing the Whirlpool Microwave Inlet Cover, a genuine OEM part specifically designed for certain Whirlpool brand models. This vital replacement part serves to shield your microwave's waveguide ch...
This oven light lens cover is a durable, heat-resistant component designed to shield the interior light bulb from heat, debris, and everyday wear while still allowing bright, clear illumination inside...
$20.37
In Stock
Order now and your part arrives by May 16
Questions And Answers for WOC54EC0HS03
Ask our experts a question about this model and we'll get back to you as soon as possible!
2 questions answered by our experts.
Sort by:
< Prev
1
Next >
Search filter:
Clear Filter
Your search term must have 3 or more characters.
Keep searches simple. Use keywords, e.g. "leaking", "pump", "broken" or "fit".
Sorry, we couldn't find any existing answers that matched.Try using some different or simpler keywords, or submit your new question by using the "Ask a Question" button above!
Andy
April 8, 2023
Hi I see you have the bulb for my microwave however not sure how to remove it so that I can buy the bulb replacement for it. I have tried twisting or pulling the cover but it won’t move
For model number WOC54EC0HS03
Hello Andy, thank you for your inquiry. To replace the light bulb in the microwave, follow the following steps:
1. Disconnect the power.
2. Open the oven door.
3. Turn the glass bulb cover in the back of the oven anticlockwise to remove it.
4. Turn the bulb anticlockwise to remove it from the socket.
5. Replace the bulb and then the bulb cover by turning clockwise.
6. Reconnect power.
Glad to be of help!
Did this question help you?
Thank you for voting!
Debera
November 28, 2025
I am looking for oven racks for my gas wall oven. Model number listed above. I can’t find any on this site. Do you know how I can find some replacements for my oven?
For model number WOC54EC0HS03
Hi Debera, thank you for reaching out. The oven rack for your model is part number PS12349435. You can order it on our site. We hope that helps!
This product comes in a bottle with a brush like Liquid Paper. It goes on incredibly easy. A second coat might be needed. I wanted to prevent rust from setting in so I covered the scratches and dings. The paint is a little brighter since my washer is 10 years old but it still looks great.
I used a Google search to show how to access the area behind the front panel. There was a folded paper copy with a schematic and wiring diagram in that space.Then I used a multi-meter to determine which of the THREE micro-switches was causing the problem. I called your help line and ordered a replacement switch. The switch was delayed
... Read morein transit so your agent credited me with the cost of shipping.
When the part arrived, it had three terminals instead of two as shown in the on-line picture but that did not cause any difficulty in using it. It took about 20 minutes to remove and replace the old switch.
All seems to be working well now.
Finding which of the THREE switches was the problem was the most difficult part of the repair. All three "clicked" but the defective one did not click as easily. It needed to be depressed more than the door latch can would provide. Old age?
IMPORTANT: DO NOT TOUCH THE REPLACEMENT LAMP WITHOUT WEARING CLEAN GLOVES. FILM OR FINGER PRINTS ON THE LAMP GLASS WILL CAUSE PREMATURE FAILURE OF THE LAMP.
Remove the 4 screws on right and left mounting rails that hold the unit to the kitchen cabinet. Remove the oven door Remove the chrome oven vent strip below the
... Read moreoven door. This allows a pry point beneath the combo microwave oven assembly to lift up the unit while pulling it out. (Assembly weighs 250 pounds) Pull the unit out from the cabinet housing about 2-3 inches to reveal the right and left sides and the 4 screws holding the the control panel. Remove the 4 control panel screws and pull off the face of the control panel Remove the 2 harness connectors and the ground wire holding the control panel to the unit. Unclip the circuit board above the lamp connector and slide it back out of the way. The lamp is now accessible. Remove the lamp spring holding the lamp to the cabinet. Remove the old lamp Install the new lamp using clean gloves Reassemble in reverse order.


 Diagram and Parts List for Whirlpool Microwave Oven Combo")