Your coupon for will be reflected when you check out!
✖
Your coupon for
✖
Hello!
You're visiting the PartSelect site in U.S.
Would you like to shop on the Canadian site?
Stay on this site
Go to Canadian site
✖
Model Number Locations
1Select Category Type
Select Category Type
2Select Product Type
Select Product Type
3Select {MODEL} Type
Select {MODEL} Type
Sample Model Number Tags
Model numbers can be made up of numbers (1005400, for example) or a combination of letters and numbers (LAT1000AAE). The model number will most likely appear on either a paper sticker or a metal plate. Your appliance's model number tag may look similar to the sample model number tags shown here (model number highlighted in yellow):
Model has been saved to My Models. If you're not signed in, your lists are available on this device and will expire within 30 days.
Model has been saved to My Models.
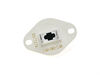
The Dryer Thermal Fuse (Thermal Cutoff, Temperature Fuse) is a 2 by ½ inch, white, plastic safety mechanism that stops the flow of electricity to the motor circuit when a dryer overheats. If the fuse ...
When the igniter reaches a high enough temperature, these coils (Coil Valve, Dryer Gas Valve Coil Kit, Dryer Valve Coil Kit, Gas Valve Solenoid) work together to open the gas valve and allow the gas t...
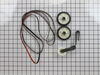
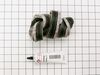
The drum support roller kit (Dryer Repair Kit) allows the dryer to tumble properly by supporting the drum cylinder. The idler pulley provides the tension required for a multi-ribbed belt. The belt att...
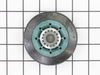
This drum support roller is sold individually. Most dryers require two. The tri-rings are included. This is a drum support roller for a dryer. It is a genuine replacement part. This part is sold separ...
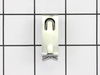
This replacement door catch is for your dryer door. If the catch is broken and the door will not stay shut, the dryer may not turn on. Use a putty knife to pop out the existing door catch by the locki...
If your dryer will not heat, takes too long to dry, or does not provide enough heat, you might want to replace your igniter kit. This silicone carbide igniter with ceramic holder kit includes the 3-in...
This dryer thermistor is a genuine replacement component designed to monitor and regulate internal temperature in Whirlpool dryers. Mounted on the blower housing, it plays a critical role in controlli...
If you notice that your dryer is noisy or will not tumble, you may need to replace the tri ring. This part is triangular, and is less than an inch in size. Tri rings can be found both on the idler pul...
If your gas dryer is not heating up or igniting, then replacing the flame sensor, located in the burner assembly, could solve it. This part senses heat from the igniter to monitor if it is hot enough ...
If your washer shakes or vibrates loudly when it reaches its max speed, check that the leveling legs are even. To ensure that the washer is firmly on the ground using all four legs, adjust the legs so...
This 10-watt clear incandescent light bulb is designed to provide reliable interior illumination for household appliances such as dryers and refrigerators. Measuring approximately 2 inches in length, ...
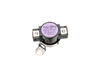
This OEM high-limit thermostat kit includes the thermal cut-off fuse and the high-limit thermostat. The purpose of this part is to cut-off power to the dryer when it overheats. Common indications that...
First I unplugged the dryer, then removed the back panel, this exposed most all of the wiring and I could see the heater coils. Not knowing what the problem was I started looking at the coils and could not see any broken parts. So then checked the thermal fuse for continuity I removed the two wires from it with a small pair of
... Read moreneedle nose pliers, it was held in place by two screws, once they were removed the fuse came out easily, I checked continuity with a volt meter placing the meter on X1 Ohms and could not get a reading. I replaced with a new one and put it all back together the way I took it apart. Then I plugged it in and it worked first time, I now have warm dry clothes.
Cleaning the lint out of the whole machine took quite a bit of time--it was everywhere. Underneath the lint trap was a collection that ultimately ruined the thermal fuse where it restricted the air flow considerably.
Ascertaining the problem was the most time consuming part.
The actual repair was quite simple and did
... Read moren't take but 15-20 minutes.
Repair was very easy. We are in the internet age so I use it all the time to get info on how to repair any thing in the house including cars. This time it was my dryer. I typed up 'Kitchen Aid dryer has not heat'and pressed searched and PartSelect came up. Typed in the model number and looked up the comments on No Heat. They had pretty co
... Read moreol site that shows videos on how to repair this things too. Came to conlclusion that the THERMAL FUSE was the main problem. Ordered it and as well as the Igniter assy just to make sure and as well as save on the shipping just in case. Ordered on Sunday night and the shipped the next day. It arrived on Tuesday. Unfortunately had a little problem on the shipment. Called PartSelect and they are so awesome they shipped me new parts asap at no extra charge. Awesome Awesome! Parts came in Thursday and first installed the Thermal Fuse and BAAAM! problem solved. Did not need the igniter assembly. Now I have an extra part in storage. To replace the Thermal fuse. 1. Disconnect Dryer from power outlet. Remove the bolts on the back panel with a 1/4" socket. I used power drill because it is much faster. 2. Locate the Thermal Fuse. Disconnect wires and remove the bolt. Slide it up and pull. Install the new one and reconnect the wires. Replace the panel and plug the dryer.
That solved my problem. It should solve yours too. The whole process was less than five minutes.


 Diagram and Parts List for Whirlpool Dryer")