Your coupon for will be reflected when you check out!
✖
Your coupon for
✖
Hello!
You're visiting the PartSelect site in U.S.
Would you like to shop on the Canadian site?
Stay on this site
Go to Canadian site
✖
Model Number Locations
1Select Category Type
Select Category Type
2Select Product Type
Select Product Type
3Select {MODEL} Type
Select {MODEL} Type
Sample Model Number Tags
Model numbers can be made up of numbers (1005400, for example) or a combination of letters and numbers (LAT1000AAE). The model number will most likely appear on either a paper sticker or a metal plate. Your appliance's model number tag may look similar to the sample model number tags shown here (model number highlighted in yellow):
Model has been saved to My Models. If you're not signed in, your lists are available on this device and will expire within 30 days.
Model has been saved to My Models.
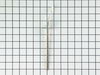
This oven temperature sensor, for ranges, works together with the oven control board to measure and regulate the oven temperature. The sensor detects the temperature in the oven cavity. If the followi...
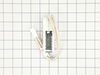
This is an oven igniter for various ranges. This part is designed to ignite the gas from your oven and provide the heat output inside it. If your oven is having issues turning on or heating up properl...
This oven rack is an OEM part designed specifically for ovens. It provides an accessible storage system for oven racks and baking sheets when not in use. This rack measures 15.5 x 25in.
This oven door gasket is designed to form a secure seal around the perimeter of the oven door, helping to maintain consistent internal temperatures during cooking. Made from heat-resistant materials, ...
Appliance spray paint is a great way to cover up any chips and scratches that have appeared on your appliances. Instead of replacing the part entirely, this is an easy fix. This is also a great way to...
This insulation is also known as oven wrap insulation, and is used in conjunction with your range. Its purpose is to be installed in between the oven and the cabinets that surround it. This will help ...
$50.56
In Stock
Order now and your part arrives by Jul 12
Questions And Answers for WFG320M0BB1
Ask our experts a question about this model and we'll get back to you as soon as possible!
2 questions answered by our experts.
Sort by:
< Prev
1
Next >
Search filter:
Clear Filter
Your search term must have 3 or more characters.
Keep searches simple. Use keywords, e.g. "leaking", "pump", "broken" or "fit".
Sorry, we couldn't find any existing answers that matched.Try using some different or simpler keywords, or submit your new question by using the "Ask a Question" button above!
Richard
February 3, 2024
My control panel for the oven does not light up and I can not operate my oven. the stove top function works. the stove/oven is natural gas.
For model number WFG320M0BB1
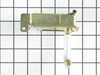
Hi Richard, thank you for getting in touch. Based on our understanding, the issue is most probably with the oven control board, part number PS12347446. It monitors the temperature and controls the oven heat. You may need to replace it to fix the issue. We hope this solves your problem!
this oven trips the gfci breaker on wall....but the stovetop works fine . what would cause this ?
For model number WFG320M0BB1
Hi Ken, thank you for reaching out. Damaged wiring in your stove can cause short-circuiting, which will definitely cause the circuit breaker to trip. We would recommend checking the wiring of the oven and wiring to the ignition circuit. We hope this helps.
Did this question help you?
Thank you for voting!
< Prev
1
Next >
✖
Ask a Question
Ask our experts a question on this model and we'll respond as soon as we can.
I numbered every part. ex: 1 L., for first part removed left side. I used a magic marker to circle the holes and wrote the number of screws used on the part, set the srews in a separete place, so that I new where these screws went to. The cleanup was pretty time consuming, but I was able to keep my stove, when every repairman I called to
... Read more fix my stove told me I was better off buying a new stove. ($600.00 stove 2 years old)Please Note: The insulation blanket needed for the entire stove is two pieces, the sides and top are one part # and the bottom and back, are another part #. I did not know this. I just purchased the top and sides. I got lucky, the back and bottom were still in good shape. So I guess I should have read the description of the part more carefully to see what it covers, before I ordered it. It took two people two hours to do the work, it was really nice to have an extra set of eyes, to remember what direction pieces of metal from the stove went. I would do it all over in a heart beat instead of buying a new stove.
Opened up the back of the stove. Unpluged the sensor. Replaced the sensor. Replace the back of the stove.
The sensor that has been replaced is not what is expected. After reading all of the instructions for adjusting the temperatures, the only temp that stays steady is when we first turn on the oven to 350 degrees. That stays s
... Read moreteady but when I turn it to 400 it slowly goes up to 425 degrees.
Google the error code that the range was displaying and found others with the same symptoms. Then found several people that had fixed the problem by replacing the oven sensor. I then ordered the sensor and replaced it, which fixed the problem.


 Diagram and Parts List for Whirlpool Range")


 – Part Number: W11126814")