Your coupon for will be reflected when you check out!
✖
Your coupon for
✖
Hello!
You're visiting the PartSelect site in U.S.
Would you like to shop on the Canadian site?
Stay on this site
Go to Canadian site
✖
Model Number Locations
1Select Category Type
Select Category Type
2Select Product Type
Select Product Type
3Select {MODEL} Type
Select {MODEL} Type
Sample Model Number Tags
Model numbers can be made up of numbers (1005400, for example) or a combination of letters and numbers (LAT1000AAE). The model number will most likely appear on either a paper sticker or a metal plate. Your appliance's model number tag may look similar to the sample model number tags shown here (model number highlighted in yellow):
Model has been saved to My Models. If you're not signed in, your lists are available on this device and will expire within 30 days.
Model has been saved to My Models.
This part is used for the shaft on the rear of the tub and is sold individually. The head bolt is part of the spider arm assembly, and they are generally changed at the same time. If you are replacing...
This is an outer seal clamp for the washer door boot of your Samsung washing machine. This clamp tightly seals the boot of the drum within the door of the washer to prevent leaks. This clamp is made o...
Looking to brighten up your cooking area? This GE Light Bulb adds the perfect amount of light under your range hood, ensuring you can see clearly as you whip up your favorite dishes. When it's functio...
Shipping bolts are installed through the back of the washing machine, and hold the wash tub and basket in place while your washer is being transported. The tub suspension holds the tub correctly in pl...
Explore the sturdiness and functionality of the Samsung Washer Door Glass. Fitting perfectly with a set of Samsung Washer models, it is a high-quality door glass, designed with an eye for detail by Sa...
This manufacturer-approved screw is for refrigerators, including Kenmore refrigerator model. Avoid cross-threading refrigerator screw during installation.
This selector knob, also called the control knob, is used to choose different settings and cycles on your dryer. This knob is silver in color and is found on the control panel. If it becomes damaged, ...
$72.04
In Stock
Order now and your part arrives by Jun 29
Questions And Answers for WF361BVBEWR
Ask our experts a question about this model and we'll get back to you as soon as possible!
1 question answered by our experts.
Sort by:
< Prev
1
Next >
Search filter:
Clear Filter
Your search term must have 3 or more characters.
Keep searches simple. Use keywords, e.g. "leaking", "pump", "broken" or "fit".
Sorry, we couldn't find any existing answers that matched.Try using some different or simpler keywords, or submit your new question by using the "Ask a Question" button above!
Marina
December 17, 2019
How many shipping bolts are on this model?
For model number WF361BVBEWR
Hello Marina, thank you for your inquiry. On Samsung front load washers, there is usually 4 shipping bolts. I hope this information helps!
Did this question help you?
Thank you for voting!
< Prev
1
Next >
✖
Ask a Question
Ask our experts a question on this model and we'll respond as soon as we can.
The new hose arrived without a plug, so I found a golf tee that fit securely. I put a few drops of dish soap on the machine end and it slid on with a little resistance. I ran a few light cycles, and the leak has stopped. Thank you
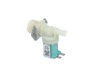
Found a repair video of a Samsung washer that looks like mine (9 years old). Removed two screws from the back of the washer, slid the top a few inches toward the front and lifted it off. Disconnected the two double electrical connections, the two rubber tubes from the solenoids, the cold water hose from the back and removed the two scre
... Read morews holding the valve in place. Installed the new valve by reversing those steps, slid the top back into place and secured it with the two screws and viola (as Kelly Bundy would say)! The washer now functions normally. I'm waiting for my next water bill to arrive to see whether the sudden increase in usage decreases to its normal amount. We have three adults and four small children in the household so the washer is constantly in use.
Took off the front part of boot on the door, continued to take out the front and top off to washer Faisal. Removed weights and boot connected to the drum. Installed new boot and leeks was gone.


 – Part Number: DC97-16931B")