Your coupon for will be reflected when you check out!
✖
Your coupon for
✖
Hello!
You're visiting the PartSelect site in U.S.
Would you like to shop on the Canadian site?
Stay on this site
Go to Canadian site
✖
Model Number Locations
1Select Category Type
Select Category Type
2Select Product Type
Select Product Type
3Select {MODEL} Type
Select {MODEL} Type
Sample Model Number Tags
Model numbers can be made up of numbers (1005400, for example) or a combination of letters and numbers (LAT1000AAE). The model number will most likely appear on either a paper sticker or a metal plate. Your appliance's model number tag may look similar to the sample model number tags shown here (model number highlighted in yellow):
Model has been saved to My Models. If you're not signed in, your lists are available on this device and will expire within 30 days.
Model has been saved to My Models.
This OEM gray Dishwasher Lower Dishrack Wheel Assembly is a plastic kit that allows the rack to slide in and out of the dishwasher easily. If it breaks or becomes damaged. sliding will feel difficult....
This authentic Dishwasher Upper Rack Adjuster Kit with white wheels is a kit made up of primarily plastic and metal components, which will require a screwdriver to install. This kit comes with all the...
The rack track stop on your dishwasher is designed to stop the dish rack at the appropriate place when opening and closing the rack. If your dishwasher is not cleaning your dishes properly, the rack s...
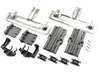
This part is a door balance link kit, also sometimes known as door cable or door spring cable kit, that helps support the door as it opens and closes by connecting to the dishwasher door hinges. The k...
The mounting bracket is sold individually, without screws. This part secures the upper side of the dishwasher to the underside of the counter or cabinet to prevent the dishwasher from moving, shaking,...
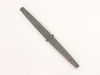
The tine pivot clip, also known as the tine row pivot, is used in dishwashers and is located in the upper dishrack. At around 3 inches in length, the clip is used to keep the tine row in place in the ...
Also known as rack adjuster. Sold individually.
This is an original part from KitchenAid, Kenmore, Whirlpool, Jenn-Air, and Maytag for use with Dishwashers. The dishrack adjuster arm positioner clip...
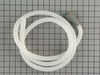
Prevent leaks and maintain optimal cleaning performance with this durable dishwasher door seal. It creates a secure barrier to keep water contained during wash cycles, ensuring reliable operation. Rep...
Designed to support flexible loading, this dishrack adjuster helps raise or lower the top rack in your dishwasher. A damaged or missing clip can cause the rack to become unstable or difficult to adjus...
This is a lower spray arm for a dishwasher. The lower spray arm allows water to be spread evenly throughout the dishwasher tub with the proper force so dishes come out clean. This spray arm is gray in...
This dishwasher filter is a genuine OEM component designed to work with the water pump, preventing debris from entering and potentially damaging the pump system. Made with a gray plastic top and botto...
$48.45
In Stock
Order now and your part arrives by Jun 6
Questions And Answers for WDT750SAHW0
Ask our experts a question about this model and we'll get back to you as soon as possible!
6 questions answered by our experts.
Sort by:
< Prev
1
2
Next >
Search filter:
Clear Filter
Your search term must have 3 or more characters.
Keep searches simple. Use keywords, e.g. "leaking", "pump", "broken" or "fit".
Sorry, we couldn't find any existing answers that matched.Try using some different or simpler keywords, or submit your new question by using the "Ask a Question" button above!
Rick
January 30, 2020
How do I remove and reassemble the wheel assembly for the top rack. I got the parts yesterday (now metal instead of plastic). This isn't the guides or rail, it is the assembly that supports the basket and moves up and down. Do you have instructions?
For model number WDT750SAHW0
Hi Rick,
Thank you for your question. Remove the older adjusters by inserting a screwdriver into the clips on the adjuster cover and prying them off very carefully. Next, detach the front and rear adjuster support straps from the tines by depressing them, and remove them from the rack adjuster. Note the location of the old adjuster-which should be four tines in, and pry off the stop clips to detach the old adjuster. You should then be able to push the adjuster upwards. The two clips at the back need to be depressed in order to get the piece that holds the adjuster on, then you can pop the inside clip out and take the adjuster off. Align the new adjuster on the rack, and replace the clips to hold the adjuster on. Replace the front and rear support straps above the wheels. Position the adjuster housing by aligning the locking lever in the adjuster slot, then snap the cover on to secure. If you find that this information does not help, there is a video on our website that you may reference on how to install it. You will find the video under part number PS10065979. We hope this helps. Thank you and have a great day.
1 person found this helpful.
Did this question help you?
Thank you for voting!
Pamela
March 27, 2024
I wish to replace the front panel of my Whirlpool white dishwasher with a stainless steel panel. The model number is WDT750SAHW but it is not in your system so I used the closest model number, above. I purchased it from Lowe's on 10/24/2017. Can you give me info on the panel that will fit? I love the dishwasher and do not want to replace it. Thank you.
For model number WDT750SAHW0
Hi Pamela, thank you for the question. The stainless steel panel compatible with your model is part number PS12114009. We hope that helps!
Leaks at bottom of door. Replaced black rubber door seal, plastic door botton seal and lower spayer.
For model number WDT750SAHW0
Hi Doug, thank you for contacting us. Ensure that the dishwasher has been properly levelled and the gaskets have been installed correctly. If the issue persists, check the pump filter, part number PS11759673. You may need to replace it to fix the issue. We hope this solves your problem!
I have a broken piece on my top rack...it holds up the rack and part of the rack as far as i can tell. do i need to replace the entire rack?
For model number WDT750SAHW0
Hello Darlene, thank you for your question. We have researched the model you have provided, and we would suggest the Upper Rack Adjuster Kit - White Wheels, Left and Right Sides, part number PS10065979. We hope this helps!
Where can I get a drain pump for this model dishw dishwasher?
For model number WDT750SAHW0
Hello Bruce, thank you for getting in touch. We have researched your model and found that the drain pump you are looking for is part number PS11738151. The drain pump removes the water from the dishwasher tub during the drain phase of the dishwashing cycle. Please reach out to customer service if you need help placing an order, anyone will be happy to assist you. We hope that helps.
Pulled dishwasher from under counter, attached link to spring, hooked spring back into frame/chassis, threaded link through pulleys, attached other end of link onto door, reinstalled dishwasher under counter. All's well. Note-I purchased an extra link anticipating that the other one will fail. They're cheap enough.
1. Open the dishwasher and remove the two plastic grommets about halfway down on either side of the opening. Then remove the two screws under the grommets.
2. Remove the kick plate under the door. May have to lower unit by turning the feet using the adjustable wrench.
3. Make sure you have enough slack in the water i
... Read morenput line and electrical wiring that you can pull the dishwasher out about 12 inches or more.
4. There is a spring and nylon rope link on both sides of the unit. Probably just one link is broken, but the replacement comes with two, so you can replace both or save one as a spare. Look at the good side and it should be pretty self explanatory how it attaches. I found it easiest to first thread the link around the lower pulley, then attach the link to the spring, then spring to the rear support, then the link to the door.
This was the second time I had this problem so I knew the symptoms and remedy. The tools needed were two nut drivers a ¼” and 5/16” along with a flat pry bar and Phillips screw driver. I started by removing the lower front panel by removing the two ¼” screws on either side. The lower panel will lift up and then can be removed by pullin
... Read moreg on the bottom. There is a flat sheet metal piece behind the front panel with insulation that can be removed very easily along with the front panel. When the front panel is removed it exposes the front legs that may need to be dropped to let you lift the dishwasher over the tile (if you have ceramic tiles). The next step would be to remove any ties to the counter top if it is attached. Mine were attached by the two straps on either side with Phillips screws. After the top is free, lower the front legs by lifting the dishwasher with the flat pry bar and threading the legs up into their holders. With the legs lifted the dishwasher can be pulled out to expose the tension springs located along the sides at the very bottom. Chances are the ropes are broken off the plastic holders that fit over the door hooks. Remove the plastic guides by removing the 5/16” nut from the middle of the lower roller. Remember to note which hole the screw is coming from this also sets the tension for how fast or slowly the door drops. Placing the nut closer to the front will drop the door slowly and toward the back will drop the door more quickly. I placed mine in the middle hole. When the plastic guides are removed attach the nylon pope to the spring and attach to the back of the dishwasher. There is a hole located on a flat piece of sheet metal the spring will attach to at the back of the dishwasher (if it is broken). Check the other side if it is still in tact. With the spring in place weave the rope around the plastic guides then pull the springs to help get the plastic end over the door hook located at the bottom of the door. Repeat this operation for the other side (kit has a both sides covered) and reinstall dishwasher in cabinet. Steps 1) Remove front panel (1/4” nut) 2) Release Dishwasher from Cabinet 3) Lower front legs 4) Pull Dishwasher out from under Cabinet 5) Remove Rope Guide (5/16” nut) 6) Install new Rope Guide (Supplied in Kit) 7) Attach new rope to Spring and attach spring to dishwasher 8) Weave rope through rope guide 9) With door closed pull spring to relieve tension so rope can be attached to door 10) Repeat for other side (Kit has both sides)


 Diagram and Parts List for Whirlpool Dishwasher")