Your coupon for will be reflected when you check out!
✖
Your coupon for
✖
Hello!
You're visiting the PartSelect site in U.S.
Would you like to shop on the Canadian site?
Stay on this site
Go to Canadian site
✖
Model Number Locations
1Select Category Type
Select Category Type
2Select Product Type
Select Product Type
3Select {MODEL} Type
Select {MODEL} Type
Sample Model Number Tags
Model numbers can be made up of numbers (1005400, for example) or a combination of letters and numbers (LAT1000AAE). The model number will most likely appear on either a paper sticker or a metal plate. Your appliance's model number tag may look similar to the sample model number tags shown here (model number highlighted in yellow):
Model has been saved to My Models. If you're not signed in, your lists are available on this device and will expire within 30 days.
Model has been saved to My Models.
The tub dampening straps support the wash tub and reduce vibration by keeping the tub at the center of the cabinet. If your washer shakes and moves, or is making a loud banging noise during the wash c...
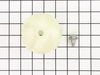
The agitator coupler connects the agitator to the agitator shaft. Common symptoms of a damaged coupler include: a grinding sound during the wash cycle, the washer refusing to agitate or spin, or the w...
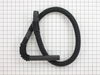
The drain hose is black in color and made of flexible material. This is a part for your top-load washer. The hose measures 57 inches long. This part moves the water out of the washer and into the drai...
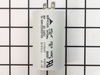
This pump helps expel water from the washing machine and is activated after the spin speed is maintained for a specific period of time. If you notice that your washing machine will not drain, there is...
The main tub seal is located between the transmission and the outer tub. Its the primary water seal in the outer tub for the transmission-shaft. If your washer is leaking during the fill cycle, or at ...
This is a tub bearing and it is meant to work in conjunction with your washing machine. The purpose of this part is to aid in keeping the inner tub of your washing machine spinning smoothly during a w...
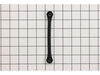
This split ring is supplied by the original equipment manufacturer, and it is designed to secure the tub bearing in washing machines. It is a circular metal ring, with an outer diameter of 2 inches. T...
This tub bearing goes in your washing machine. You will find it on the bottom of the outer tub, where the transmission goes through the tub. If you hear metal on metal when the washer is spinning, you...
This part is a replacement socket rod support for your washer. The socket rod support is found at the top of the washer frame in the front part of the washer. It supports the suspension rod, so the ro...
This part is the replacement inner tub base hub for your washer. It is made of metal and is approximately 15 inches in diameter. The inner tub base hub fits between the wash tub and the spin basket, a...
Ask our experts a question about this model and we'll get back to you as soon as possible!
1 question answered by our experts.
Sort by:
< Prev
1
Next >
Search filter:
Clear Filter
Your search term must have 3 or more characters.
Keep searches simple. Use keywords, e.g. "leaking", "pump", "broken" or "fit".
Sorry, we couldn't find any existing answers that matched.Try using some different or simpler keywords, or submit your new question by using the "Ask a Question" button above!
Frank
July 25, 2023
The washer goes through all of the cycles, fills with water, but does not agitate. It pumps the water out and then goes through the rinse cycle and spins before shutting off. I have replaced the capacitor, and the coupling.
For model number VBXR1090DBWW
Hi Frank, thank you for the great question. We recommend checking the lid switch, part number PS5135698. Remove the switch, test it, and replace it if needed. If the lid switch is faulty, the washer may halt during certain cycles. We hope this information is useful!
first remove the front washer cover by finding the two pressure clips that hold it to the top lid. gently push the putty knife into the clips one at a time. this will raise and separate them from the front panel. the panel will tilt forward and u can now remove it from the bottom clips by sliding it up and out. to open the top cover u rem
... Read moreove the two 1/4 in screws on the sides of the front panel and lift the top. make sure to secure it in place or unplug the single electrical connection at the rear and remove the whole top from the clips, its really simple and the most convenient mehtod. to remove the straps u can now get to all four without much interference. there are two size screw heads so make sure u have a nut driver or small socket set. after changing the straps i went to change the agitator coupling. the agitator pulled directly up without a problem. just put your two hands under and pull straight up with one good jolt. the plastic coupler has one bolt in the middle that came out easily with a small socket set. my problem arose when the plastic coupler would not come off the metal shaft. after a short time of pulling and prying i finally decided to cut it off. using a small hacksaw and taking my time i put two cuts into the coupler. they were on opposite sides and where vertical, running along the steel shaft. i could now split it in two and it came off very easily and quickly. now when putting on the new one make sure the splines line up. push as far down as u can then use the center bolt to seat the gear all the way down. the agitator also has to be lined up just right. it also has splines on the interior that allow it to line up with the coupler and merely push down until it reseats itself in place. replace the top of the washer and then the front panel. don't forget to rebolt the top panel to the frame. push the front panel in until it snaps into place. full replacement time was about 40 minutes and actually not bad with the right tools.
I placed both hands under the agitator 180 degrees apart, gave a quick jerk, and seperated the agitator from the coupling. With the agitator removed, use a socket and ratchet to remove the bolt holding the coupling to the spline. Remove the old coupling and slide the new one over the spline. Lightly tap on the coupling if necessary. I
... Read morensert the bolt with the ratchet and slide the agitator back over the coupling and you are done.
Aside from getting the wet clothes and most of the water out,the toughest part of the job for me was to figure out how to get inside the machine. I nearly wrecked the thing trying to lift the top panel. After some frustration I removed the star-type screws on back of the control panel and found, tucked away neatly, the documentation/parts
... Read more list complete with instructions on how to remove the FRONT panel. Once I got inside it was easy to locate the pump. I ran the drain cycle for a moment to see if the pump turned at all. The original had an exposed fan so it was easy to see that indeed the motor was not turning. I inspected all the hose and electrical connections to make sure I had the tools I'd need and the savvy to replace the part(s) if I could locate them. I'm not much of a web-head, so I was a little surprised when I typed G.E. appliances and the search took me to partselect.com where I was pretty much coached through the procedure before I even ordered the part. The box arrived ahead of schedule (yay) and when I looked at the pump it didn't look much like the one I was replacing. But then I realized it was the same thing just ten years more advanced. I used a small pair of vise grips to pinch and lock the pipe clamps open. I know there is a plier made for this, but... Anyways, after loosening the clamps and sliding them away from the pump I pulled the hoses off and let the last of the rinse water still in them run down my shirt sleeve to my elbow. (optional, not recommended) Thus refreshed I then rummaged through my socket set and found what I needed to remove the 2 sheet metal mounting screws and disconnected the 2 power leads. I removed the faulty pump and proudly showed it to my wife. Unimpressed, she asked how much longer. I quickly reversed the procedure to install the new unit and confidently piled in a load of laundry. The cycle completed just fine and has done so since. I will and have recommmended partselect.com to friends and will use it again for sure.