


TR518ITVW Amana Refrigerator - Overview
Models starting with TR518ITVW
Click on the best match to narrow your results.
- TR518ITVW (P1180808W W) Amana Refrigerator
- TR518ITVW (P1180806W W) Amana Refrigerator
- TR518ITVW (P1180802W) Amana Refrigerator
- TR518ITVW-P1180802W Amana Refrigerator (Amana Refrigerator Model TR518ITVW-P1180802W (TR518ITVWP1180802W, TR518ITVW P1180802W) Parts)
- TR518ITVW-P1180806WW Amana Refrigerator (TOP-MOUNT REFRIGERATOR)
- TR518ITVW-P1180808WW Amana Refrigerator (TOP-MOUNT REFRIGERATOR)
Keep searches simple, eg. "belt" or "pump".

Refrigerator Door Switch
PartSelect #: PS12728638
Manufacturer #: W11384469
Door switch turns the light off when you close the door.
$30.53
In Stock

Screw
PartSelect #: PS12349731
Manufacturer #: W11233072
This is a multi-use and multi-appliance screw. It can be used on a microwave, refrigerator, range/oven, air conditioner, dehumidifier, washer, or dryer. The measurements of this screw are 8 x 1/2 inch...
$21.45
In Stock

Dryer Screw
PartSelect #: PS11746840
Manufacturer #: WP90767
This screw is sold individually.
$7.47
In Stock

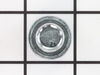
Refrigerator Water Fill Cup & Bearing
PartSelect #: PS11743318
Manufacturer #: WP628356
This refrigerator ice maker fill cup dispenses the water into the ice cube mold during the fill cycle. Replacing the water fill cup is a possible solution if you notice that the ice maker is leaking, ...
$35.80
In Stock

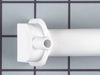
Door Handle
PartSelect #: PS1995755
Manufacturer #: 10253510Q
If the hinges are on the left side of your refrigerator, then this white handle becomes the freezer door handle. Made mostly of plastic, this handle has a strip of metal up one side for decoration.
No Longer Available

Crisper Drawer Cover Support Post
PartSelect #: PS1564421
Manufacturer #: 10461901
This part helps support the crisper drawer lid.
$31.58
In Stock

Dishwasher Screw
PartSelect #: PS11753384
Manufacturer #: WPW10348409
Sold individually.
$7.47
On Order

Ice Maker Shutoff Arm
PartSelect #: PS11743571
Manufacturer #: WP67004028
The icemaker shut off arm, used in a refrigerator, gives the icemaker a signal to stop making ice once the bin has a reached a certain limit. This helps monitor ice production. If your icemaker is not...
$55.29
In Stock

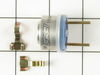
Cycling thermostat
PartSelect #: PS11743313
Manufacturer #: WP627985
The ice maker thermostat, also known as the cycling thermostat, controls and regulates the ice maker ejection cycle by monitoring the temperature inside the freezer to determine when to release the ic...
$60.51
In Stock

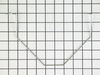
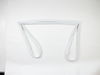
Refrigerator Door Gasket
PartSelect #: PS11738521
Manufacturer #: WP12550109Q
This fresh food door gasket is white and made of rubber. It measures approximately twenty-eight and a half inches wide by forty inches long.
$160.25
In Stock

Ice Bucket
PartSelect #: PS11743447
Manufacturer #: WP67001255
The ice bucket in your freezer catches and holds the ice when it is released by the icemaker. If your ice bucket is cracked or damaged, you may need to replace it to prevent a potential leak. This par...
$104.20
In Stock

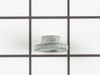
Refrigerator Compression Nut
PartSelect #: PS11743305
Manufacturer #: WP627018
The compression nut is used as a connection between the water supply line and other components in your refrigerator such as your ice maker and your water dispenser. Tools required for this repair incl...
$11.77
In Stock
Common Symptoms of models starting with TR518ITVW
[Viewing 11 of 11]Light not working
Fixed by
these parts
these parts

Show All
Leaking
Fixed by
these parts
these parts

Show All
Ice maker not making ice
Fixed by
these parts
these parts

Show All
Door Sweating
Fixed by
these parts
these parts

Show All
Ice maker won’t dispense ice
Fixed by
these parts
these parts

Show All
Noisy
Fixed by
these parts
these parts


Show All
Ice maker dispenses too much ice
Fixed by
these parts
these parts
Show All
Door won’t open or close
Fixed by
these parts
these parts

Show All
Fridge runs too long
Fixed by
these parts
these parts
Show All
Door latch failure
Fixed by
these parts
these parts

Show All
Fridge too warm
Fixed by
these parts
these parts
Show All


Keep searches simple. Use keywords, e.g. "leaking", "pump", "broken" or "fit".
The Bearing Cup Assembly was broken and ice would jamb against it during the ice making cycle.
I removed the ice maker from the refrigerator, by removing one screw on the underside bracket and loosening the two screws at the top side, then lifting the ice maker off the loosened screws. I then unplugged the electrical harness that supplies power from the refrigerator to the ice maker. I then disassembled the ice maker by removing
... Read more
the front cover which is snapped in place, then removing two recessed screws at the front. I removed the broken part, I then reassembled the ice maker with the new part. I replaced the two recessed screws at the front and snapped on the cover. Then I reinstalled the ice maker in the refrigator by plugging in the harness, slipping the ice maker over the loosened screws in the refrigerator and replacing the screw that was removed from the underside bracket. Tightening all the screws completed the project.
Read less
Parts Used:

-
David from Chester, CA
-
Difficulty Level:Really Easy
-
Total Repair Time:Less than 15 mins
-
Tools:Nutdriver, Screw drivers
108 of 138 people
found this instruction helpful.
Was this instruction helpful to you?
Thank you for voting!
Lights inside refrigerator not working
I used a flat-head screwdriver to pop out the old light rocker switch. Then, I unplugged the wires, plugged them into the new light rocker switch, and then popped the new switch into the hole. That's it! Lights began working again.
Parts Used:
-
Clint from Rayville, MO
-
Difficulty Level:Really Easy
-
Total Repair Time:Less than 15 mins
-
Tools:Screw drivers
135 of 247 people
found this instruction helpful.
Was this instruction helpful to you?
Thank you for voting!
No ice in ice trey
The easiest thing to do was pull the ice make off. After taking the 3 screws out of the wall of the freezer, take a screwdriver (flathead) and push on the tab for the electrical plug and wiggle the cord out. Then you can take 3 screws out for the main cover and another 2 screws on the next cover. There's the part, pop it out and replace h
... Read more
olding pins and start the process of putting back together the opposite way you took it apart.
Read less
Parts Used:
-
Wayne from Leesburg, FL
-
Difficulty Level:Really Easy
-
Total Repair Time:15 - 30 mins
-
Tools:Screw drivers, Socket set
79 of 104 people
found this instruction helpful.
Was this instruction helpful to you?
Thank you for voting!