Your coupon for will be reflected when you check out!
✖
Your coupon for
✖
Hello!
You're visiting the PartSelect site in U.S.
Would you like to shop on the Canadian site?
Stay on this site
Go to Canadian site
✖
Model Number Locations
1Select Category Type
Select Category Type
2Select Product Type
Select Product Type
3Select {MODEL} Type
Select {MODEL} Type
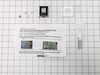
Sample Model Number Tags
Model numbers can be made up of numbers (1005400, for example) or a combination of letters and numbers (LAT1000AAE). The model number will most likely appear on either a paper sticker or a metal plate. Your appliance's model number tag may look similar to the sample model number tags shown here (model number highlighted in yellow):
TPX24PRBABB General Electric Refrigerator - Overview
Save your modelModel Saved!
Save your model for later to make things easier.
Model has been saved to My Models. If you're not signed in, your lists are available on this device and will expire within 30 days.
Model has been saved to My Models.
This “Dispenser Door Assembly” (Door Recess Assembly, Ice Door Assembly, Dispenser Door, Refrigerator Dispenser Ice Chute Door Kit, Dispenser Door Flap, Ice Chute Door, Flapper) keeps the room air fro...
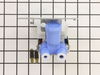
This valve comes with 1/4" compression inlet.
NOTE: This part comes with new quick connections. To install - cut retaining nuts off of existing plastic water lines and gently push them into new valv...
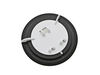
This evaporator fan motor grommet, or condenser fan grommet is built for refrigerators. It provides a cushion between the fan motor and the motor mounting bracket. It is made or round, black plastic a...
This 40-Watt light bulb is sold individually.
It is specially designed to withstand extreme temperatures, so this bulb is compatible with a variety of appliance types including refrigerators, ranges,...
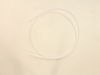
This part is the replacement water line for your refrigerator. It is a long plastic tube, which is 5/16 of an inch in diameter. If your refrigerator is leaking, or will not dispense water or ice, you ...
This in-refrigerator dispenser water reservoir tank comes with tubing. This tank stores water until the water actuator is activated and water is requested.
This is a quarter tubing nut and is sold individually. The tubing nut works in conjunction with your refrigerator/freezer and is made entirely of plastic. The function of this part is to connect the l...
$15.00
Special Order
Questions And Answers for TPX24PRBABB
Be the first to ask our experts a question about this model!
✖
Ask a Question
Ask our experts a question on this model and we'll respond as soon as we can.
1. Turn off water supply, and electrical ( unplug it) to fridge. 2. Remove water line to valve. Watch for water to pour out of the line. Have a towel handy. 3. Remove the cardboard cover on the bottom of the fridge. 4. Remove the screws that hold the valve in place. 5. Remove the valve, be careful the waterlines ar
... Read moree still attached. 6. Place a towel under valve to catch any water that leaks out from water lines. 7. Remove electrical lines, make sure to mark which went where. One is for the ice, and one is for the water. Make sure the power is off, there is 120 volts present at those connections. - now my waterlines attached using a compression type fitting. The new valve I got used just a push in type of attachment. But, easy enough I just removed the pieces for the compression and the waterlines pushed right in and worked fine. - the mounting harness for the valve was alittle different but the parts I need were in the right location and she fit in fine. 8. Attach water lines. They are different sizes so you can't get those mixed up. 9. Attach electrical lines. - the new valve came with adaptors for my electrical connection. Just snapped them on and kept on going. 10. turn on watersupply for fridge. Plug it back in. 11. Test for leaks, and proper operation. ie. When you push the water does the water valve open? 12. Unplug fridge 13. Now is a good time to clean out any dust or dirt that has accumallated in under around your fridge. 14. reassemble, valve, then cover. move fridge back into place. 15. Plug fridge back in. 16. Take a clean glass. 17. Fill with water from the front. 18. Take full glass of water and go watch tv. You've earned it, and saved yourself probably $100.00 in labor costs. Good Job.
First of all, the larger white plastic tubes in this thing are 5/16" OD, which no plumbing store seems to stock. At the lower left rear end there are 2 tubes, one for water and one for ice, that are doomed to fail being in proximity of a heat source - they essentially get cooked to the point of becoming brittle and cracking. The smaller
... Read more tube and union can be easily found, but do yourself a favor if the larger one cracks and order the plastic tube and water tube union here, and just cut off the brittle part and amend the old tube using the union.
Ordered parts from another vendor - got wrong parts (1/4 in parts instead of 5/16 in parts). With your parts, I just cut out the bad portion of the tubing, and replaced it using the 2 union connectors. Thanks.