


TM18D Amana Refrigerator - Overview
Models starting with TM18D
Click on the best match to narrow your results.
- TM18D (P7350030W) Amana Refrigerator
- TM18D (P7466001W) Amana Refrigerator
- TM18D-A (P7466001W A) Amana Refrigerator
- TM18D-A-P74660-1WA Amana Refrigerator (REFRIGERATOR)
- TM18D-C (P7466001W C) Amana Refrigerator
- TM18D-C-P74660-1WC Amana Refrigerator (REFRIGERATOR)
- TM18D-G (P7466001W G) Amana Refrigerator
- TM18D-G-P74660-1WG Amana Refrigerator (REFRIGERATOR)
- TM18D-L (P7466001W L) Amana Refrigerator
- TM18D-L-P74660-1WL Amana Refrigerator (REFRIGERATOR)
- TM18D-P73500-30W Amana Refrigerator (REFRIGERATOR MODEL STOR-MOR SERIES)
- TM18D-P74660-1W Amana Refrigerator (REFRIGERATOR)
Keep searches simple, eg. "belt" or "pump".

Refrigerator Door Switch
PartSelect #: PS12728638
Manufacturer #: W11384469
Door switch turns the light off when you close the door.
$30.53
In Stock

Light Bulb - 120V 25W
PartSelect #: PS11747806
Manufacturer #: WPA3073101
This light bulb is a 120 volt, 25 watt incandescent appliance light bulb with a small base screw-in that fits in a variety of appliances such as microwaves, refrigerators, freezers, cooktops, or stove...
$5.69
In Stock

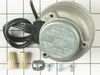
Refrigerator Condenser Fan Motor Kit
PartSelect #: PS395284
Manufacturer #: 833697
This condenser fan motor kit is designed for use with refrigerators. This fan draws air through the condenser coils and over the compressor. It does this with the goal of cooling the warm refrigerant ...
$65.73
In Stock

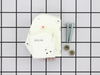
Screw
PartSelect #: PS12349731
Manufacturer #: W11233072
This is a multi-use and multi-appliance screw. It can be used on a microwave, refrigerator, range/oven, air conditioner, dehumidifier, washer, or dryer. The measurements of this screw are 8 x 1/2 inch...
$21.45
In Stock

Dryer Screw
PartSelect #: PS11746840
Manufacturer #: WP90767
This screw is sold individually.
$7.47
In Stock

Defrost Timer Kit - 120V 60Hz
PartSelect #: PS2167006
Manufacturer #: R0131577
The timer will shut off the cooling system of the refrigerator and the defrost heater will turn on.
$54.24
In Stock

Refrigerator Tray
PartSelect #: PS11745970
Manufacturer #: WP841180A
This fourteen cube ice cube tray is eleven inches long. It is all white in color and is made entirely of plastic.
$40.65
In Stock


Refrigerator Screw
PartSelect #: PS11747542
Manufacturer #: WP98165
This screw is a little under an inch long and is made of metal. It is used with a refrigerator's ice maker assembly. Sold individually.
$7.47
In Stock

Screw
PartSelect #: PS1845599
Manufacturer #: 67006425
This screw is sold individually
$7.47
In Stock

Refrigerator Button Plug
PartSelect #: PS11743445
Manufacturer #: WP67001130
Sold individually. White in color.
$9.62
In Stock

Refrigerator Screw
PartSelect #: PS11742751
Manufacturer #: WP489464
Sold individually.
$9.62
In Stock
Common Symptoms of models starting with TM18D
[Viewing 12 of 12]Light not working
Fixed by
these parts
these parts

Show All
Fridge too warm
Fixed by
these parts
these parts
Show All
Freezer section too warm
Fixed by
these parts
these parts
Show All
Noisy
Fixed by
these parts
these parts
Show All
Fridge runs too long
Fixed by
these parts
these parts
Show All
Freezer not defrosting
Fixed by
these parts
these parts
Show All
Fridge and Freezer are too warm
Fixed by
these parts
these parts
Show All
Will Not Start
Fixed by
these parts
these parts
Show All
Too warm
Fixed by
these parts
these parts
Show All
Frost buildup
Fixed by
these parts
these parts
Show All
Freezer too cold
Fixed by
these parts
these parts
Show All
Leaking
Fixed by
these parts
these parts
Show All


Keep searches simple. Use keywords, e.g. "leaking", "pump", "broken" or "fit".
Sometimes the condenser fan would start causing the refrigerator to overheat.
Unplug the appliance.
Removed the screws holding the back panel.
Removed the fan blade.
removed 3 screws holding the condenser fan.
Remove the 3 metal brackets attached to the fan.
(First note which studs the brackets are attached to. Attach the 3 metal brackets to the new fan. (New screws were supplied)
Cut ... Read more and strip the wire about two inches from the fan.
Cut and strip the new wire. I cut the new wire in half (about 6 inches.) Connect the two wires, twist and used 2 wire nuts. Tie wrap the wire to the wire harness. Mount the new fan (three screws)
Screw the back panel back on.
Mount the new
Read less
Parts Used:
-
Tom from Franklin, WI
-
Difficulty Level:A Bit Difficult
-
Total Repair Time:15 - 30 mins
-
Tools:Nutdriver, Pliers
183 of 219 people
found this instruction helpful.
Was this instruction helpful to you?
Thank you for voting!
Fridge and freezer didn't cool enough
I diagnosed the problem via the internet. Diagrams helped a lot. Coils were frozen over. Thawed them out overnight. Manually advanced timer and the defrost heater was operable. The defrost timer wasn't "turning" on it's own. I turned the fridge back on while I awaited the part. It worked fine for the time I had to wait. (over two
... Read more
weeks since I had delayed ordering the part) New timer arrived as promised. Undid 4 hex head (1/4") screws. Unplugged 4 prong connection. Plugged in new timer and replaced the 4 screws. Frigde works great.
Read less
Parts Used:
-
Peter from Eden, UT
-
Difficulty Level:Really Easy
-
Total Repair Time:Less than 15 mins
-
Tools:Socket set
106 of 117 people
found this instruction helpful.
Was this instruction helpful to you?
Thank you for voting!
Lights inside refrigerator not working
I used a flat-head screwdriver to pop out the old light rocker switch. Then, I unplugged the wires, plugged them into the new light rocker switch, and then popped the new switch into the hole. That's it! Lights began working again.
Parts Used:
-
Clint from Rayville, MO
-
Difficulty Level:Really Easy
-
Total Repair Time:Less than 15 mins
-
Tools:Screw drivers
136 of 248 people
found this instruction helpful.
Was this instruction helpful to you?
Thank you for voting!