


T1227AGPPH LG Washer - Overview
Models starting with T1227AGPPH
Click on the best match to narrow your results.
Keep searches simple, eg. "belt" or "pump".

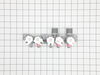
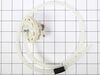
Washer Water Inlet Valve
PartSelect #: PS12374721
Manufacturer #: AJU75152601
This is an authentic LG water inlet valve for a top-load washer. It is designed to control the flow of water into the washer. If your washer is filling slowly, making loud noises, overflowing, or stop...
$138.79
On Order

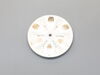
Pulsator Assembly
PartSelect #: PS12588963
Manufacturer #: AGZ72909711
This is a pulsator assembly, also known as an agitator, for your washing machine. This pulsator sits at the bottom of your washer and is what is used as the main driving force to wash your clothes. Th...
$161.46
In Stock

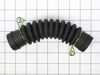
Tub-to-Pump Hose
PartSelect #: PS3617213
Manufacturer #: AEM73213001
This is a drain hose assembly for top-load models of LG washing machines. This hose specifically is used to allow water to drain from the tub to the drain pump of the washer. This hose is made of plas...
$42.12
In Stock

Washer Hinge
PartSelect #: PS7795475
Manufacturer #: MEF62462103
Upgrade your LG washing machine with this genuine top lid hinge. Specially designed to support the hinge and help cushion the lid when opening and closing, this high-quality component ensures the long...
$15.00
In Stock

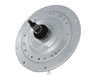
HOUSING ASSEMBLY,CLUTCH COUPLING
PartSelect #: PS12580053
Manufacturer #: AEN73651402
This clutch housing assembly with mode shifter, or washer drive shaft and shifter assembly, is made for your washer. It connects the appliance wash plate to the motor so the washer can shift the drive...
$288.30
In Stock

Washer drain Hose Assembly
PartSelect #: PS8749199
Manufacturer #: AEM73732901
This drain hose is a genuine OEM replacement part supplied by LG for use in their washing machines. It is a light gray pipe with a diameter of 1.25 inches. The drain hose is connected to the drain pum...
$47.40
In Stock

Washer Switch Assembly sensor
PartSelect #: PS3529177
Manufacturer #: 6501EA1001R
This water-level pressure switch in your wash monitors and regulates the water levels throughout the fill, wash, and rinse cycles. You will usually find it inside the control panel or near the tub. It...
$65.73
In Stock


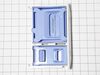
Dispenser Drawer Assembly
PartSelect #: PS3530587
Manufacturer #: AAZ72925601
Have you been struggling with a broken or faulty handle on your trash compactor? Our genuine OEM White Container Handle, straight from the trusted manufacturer, Whirlpool, could be the perfect fix you...
$107.37
In Stock

SUSPENSION ASSEMBLY
PartSelect #: PS17293038
Manufacturer #: AJK72909320
This suspension assembly helps stabilize the washer drum during spin cycles, reducing vibration and noise for smooth operation. Built for strength and reliability, it restores balance when the origina...
$125.62
In Stock


Common Symptoms of models starting with T1227AGPPH
[Viewing 9 of 9]Leaking
Fixed by
these parts
these parts

Show All
Will not agitate
Fixed by
these parts
these parts
Show All
Water Filling Issues
Fixed by
these parts
these parts
Show All
Lid or door won’t close
Fixed by
these parts
these parts

Show All
No hot or cold water
Fixed by
these parts
these parts
Show All
Will Not Start
Fixed by
these parts
these parts
Show All
Draining Issues
Fixed by
these parts
these parts
Show All
Spinning Issues
Fixed by
these parts
these parts
Show All
Does not dispense fabric softener or detergent
Fixed by
these parts
these parts
Show All
Keep searches simple. Use keywords, e.g. "leaking", "pump", "broken" or "fit".
The right side hinge that holds the washer top door broke and needed to be replaced.
Popped out the plastic "doors" that cover the metal actuators. Removed the metal actuators on both right and left sides of the door then unscrewed (3 screws each actuator) them from door frame. Slid the actuators out to enable the door to be removed. Unscrewed 2 screws on the top front of the washer which enabled me to angle the top of
... Read more
the washer to expose the screws that hold the plastic hinges. Unscrewed the hinges (2 screws each) and replaced both of the hinges (I figured I'd do both of them now so I don't have to do it again for another 15 years). Put everything back together and all works like new.
Read less
Parts Used:
-
John from SAN JOSE, CA
-
Difficulty Level:Very Easy
-
Total Repair Time:15 - 30 mins
-
Tools:Screw drivers
14 of 16 people
found this instruction helpful.
Was this instruction helpful to you?
Thank you for voting!
Water continued leaking into washer after the end of cycle through the water inlet valve.
-
Flora from MIAMI, FL
-
Difficulty Level:Very Easy
-
Total Repair Time:30 - 60 mins
-
Tools:Screw drivers, Wrench (Adjustable)
14 of 19 people
found this instruction helpful.
Was this instruction helpful to you?
Thank you for voting!
Water overflow in washer basin
I diagnosed by running a full wash. I watched it and when the water should have stopped it kept running. I unplugged the washer from the power and the water kept running. This told me the inlet valve was the issue and not an electronic issue. I stopped the water by closing the water valve manually. Replacing the inlet valve was very easy
... Read more
. Hardest part is moving the washer out of the laundry room. The videos online show very simple steps. Maybe 8 screws to remove and a couple of hoses and five electronic connectors. Take a photo of connectors before removing them to ensure you reconnect properly.
Read less
Parts Used:
-
Ed from LAKE WORTH, FL
-
Difficulty Level:Really Easy
-
Total Repair Time:30 - 60 mins
-
Tools:Pliers, Screw drivers
11 of 15 people
found this instruction helpful.
Was this instruction helpful to you?
Thank you for voting!