Your coupon for will be reflected when you check out!
✖
Your coupon for
✖
Hello!
You're visiting the PartSelect site in U.S.
Would you like to shop on the Canadian site?
Stay on this site
Go to Canadian site
✖
Model Number Locations
1Select Category Type
Select Category Type
2Select Product Type
Select Product Type
3Select {MODEL} Type
Select {MODEL} Type
Sample Model Number Tags
Model numbers can be made up of numbers (1005400, for example) or a combination of letters and numbers (LAT1000AAE). The model number will most likely appear on either a paper sticker or a metal plate. Your appliance's model number tag may look similar to the sample model number tags shown here (model number highlighted in yellow):
Model has been saved to My Models. If you're not signed in, your lists are available on this device and will expire within 30 days.
Model has been saved to My Models.
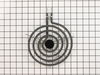
If the burner element on your range will not heat up, or is damaged, it may need to be replaced. This part is 8 inches in diameter, and should not be confused with the smaller 6-inch model. The part i...
This part is sold individually. This is a part for your stove top. The surface element is what your cookware sits on. The element supplies heat at varying temperatures. This may need to be replaced if...
This is a burner switch kit, also known as the surface element control switch repair kit, for ranges. This burner switch kit sends voltage to the surface element coil and it controls the stove top sur...
Most of the job is simple fastener mechanics. Use a nut driver or Phillips screwdriver. Remove rear panel.
Pull out control knob. If it is stuck, wrap a small rag around the back of it and pull the rag steadily.
Carefully match marked terminals on the replacement switch with those on original. Switch terminals
... Read moremay not be in the same location. Replace wires one for one, one at a time.
Carefully select the correct knob filler for the switch post. Several are supplied. Proceed with logic and measure the shaft length and the filler length and type to match.
First of all I removed the top panel then removed the switch. I then took pictures of the switch & drew a sketch with all the info. Then I went to your web site, matched up the switch & ordered. When the switch arrived I went thru the above replacing the bad switch.
First I unplugged the stove, and removed the upper-back panel. Then I pulled off the control knob. Then I removed the two screws holding the switch to the stove. Then one-by-one I removed the wires from the old switch and connected them to the corresponding tabs on the new switch. Then, using the knob adapter supplied with the new swi
... Read moretch, I figured out how much of the knob shaft I had to remove from the new switch to position the knob the correct distance from the face of the stove. Then I tested the switch with a voltmeter as instructed, and then I hooked up the last wire. Partselect.com is an awsome website!!! I was able to review comments form other do-it-yourselfers that had similar problems. Then I looked up the Partselect schematic drawings of my stove and was easily able to find and order the part I needed. The part arrived at my house within a couple of days and I had the stove fixed in no time.