Your coupon for will be reflected when you check out!
✖
Your coupon for
✖
Hello!
You're visiting the PartSelect site in U.S.
Would you like to shop on the Canadian site?
Stay on this site
Go to Canadian site
✖
Model Number Locations
1Select Category Type
Select Category Type
2Select Product Type
Select Product Type
3Select {MODEL} Type
Select {MODEL} Type
Sample Model Number Tags
Model numbers can be made up of numbers (1005400, for example) or a combination of letters and numbers (LAT1000AAE). The model number will most likely appear on either a paper sticker or a metal plate. Your appliance's model number tag may look similar to the sample model number tags shown here (model number highlighted in yellow):
Model has been saved to My Models. If you're not signed in, your lists are available on this device and will expire within 30 days.
Model has been saved to My Models.
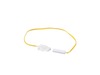
The Samsung Defrost Sensor (DA32-10105R) is a genuine part designed specifically for Samsung refrigerators. This sensor, sometimes referred to as a defrost thermostat or defrost temperature sensor, is...
This manufacturer-approved screw is for refrigerators, including Kenmore refrigerator model. Avoid cross-threading refrigerator screw during installation.
I performed the repair to my own refrigerator, after watching multiple YouTube videos. I installed a secondary heater for the defrost coils and replaced the defrost sensor. The defrost sensor was actually bad. Today, 1/27/2024 I rechecked the fix from last week. All seems to be good so far.
If I get any build up of any ice on t
... Read morehe bottom tray of the recessed panel where the drain port is located. I suspect I will also need a new Defrost Heater as well. For now the refrigerator is operating as expected. There is a small amount of ice build up as of today.
Also, I had recently replaced the drain tubes, added a longer heater element part to fit the drain hole, and cleaned the fins in the back of the refrigerator. Thank you.
A couple of blogs said the freezer defrost sensor should be replaced, so I ordered one. Did not fix it. I did, however find a service manual online and one of the blog sites and it showed me how to remove the inside duct work. I discovered the fan the recirculates the air across the evaporator coil was not working. Ordered a new fan mo
... Read moretor and installed it, fridge works perfectly now.
Took off the plastic panel in the interior. As usual, the evaporator was completely iced up. Took most of the time to de-ice it with a heat gun. Tested the components and the temperature sensor was bad which is on the top end of the evaporator fins. The ohms test wasn't any different whether hot or cold. I keep a spare sensor on hand beca
... Read moreuse this is the third time one of the sensors have failed. The proper readings are available by doing some internet searching. Its been two weeks since I worked on it and everything is working fine.