Your coupon for will be reflected when you check out!
✖
Your coupon for
✖
Hello!
You're visiting the PartSelect site in U.S.
Would you like to shop on the Canadian site?
Stay on this site
Go to Canadian site
✖
Model Number Locations
1Select Category Type
Select Category Type
2Select Product Type
Select Product Type
3Select {MODEL} Type
Select {MODEL} Type
Sample Model Number Tags
Model numbers can be made up of numbers (1005400, for example) or a combination of letters and numbers (LAT1000AAE). The model number will most likely appear on either a paper sticker or a metal plate. Your appliance's model number tag may look similar to the sample model number tags shown here (model number highlighted in yellow):
Model has been saved to My Models. If you're not signed in, your lists are available on this device and will expire within 30 days.
Model has been saved to My Models.
This is a multi-use and multi-appliance screw. It can be used on a microwave, refrigerator, range/oven, air conditioner, dehumidifier, washer, or dryer. The measurements of this screw are 8 x 1/2 inch...
This part is for oven ranges, it connects individual wires and protects the device from electrical surges, voltages, and current. With this part, the house power is connected to the range wire harness...
This part is a replacement halogen lamp for your oven. The bulb is 25 watts and 120 volts. If your light bulb is burned out, this is the part that replaces it. Be sure to turn off power to your range ...
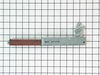
This part is the replacement hinge bracket for your microwave. It is made of metal and is approximately 8 inches long and 1 inch wide. The hinge bracket can also be known as the door hinge receiver or...
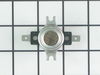
Looking to restore your oven's performance? We've got the right part to help you out. It's the Oven Sensor Assembly produced by the renowned brand, General Electric (GE). This isn't just an ordinary c...
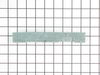
This oven door gasket is a custom-fit, high-temperature-resistant seal designed to create a tight barrier between the oven door and cavity. By preventing heat from escaping, it helps maintain consiste...
DOOR HINGE: Lifted the door out of place and layed it on the floor. Removed the six screws (three on top and three on bottom) from the door to remove the front panel exposing the hinges. Removed three screws from each hinge to remove them. Reversed the process to complete. HINGE BRACKET: Would recommend replacing these with hinges. After
... Read moreremoving the screws that hold the oven in I pulled the oven out about four inches. Brackets are now easily removed and replaced, two screws each. Slide the oven back resecure and your done. DOOR GASKET: Just pulled it out and snapped in the new.
Remove the oven door. Remove 3 self tappers on rear wall of oven to take off a round access panel. Pull out a pre-cut rectangle of insulation. Next I removed the 2 screws holding the sensor in place. Pulling the sensor out a bit told me I was "touching" the correct wires in the SMALL rectangular opening. The wires are not visable and 2 h
... Read moreands do not fit in this small opening.I looked at the NEW sensor to see the release on the sensor plug. Slip the angled needle nose into the opening and grasp the plug/release side. The plug pulled apart easily. The sensor wire pulls out with a little bit of twisting to fit it out the hole. The new plug pushes in and has to be worked down to where you can reach it. The same angled plier works to re-attach it. It takes longer to read this than to do the job. Best of luck, Al


.gif "SUPPLEMENTAL INFORMATION Diagram and Parts List for Maytag Wall Oven")

 Diagram and Parts List for Maytag Wall Oven")