Your coupon for will be reflected when you check out!
✖
Your coupon for
✖
Hello!
You're visiting the PartSelect site in U.S.
Would you like to shop on the Canadian site?
Stay on this site
Go to Canadian site
✖
Model Number Locations
1Select Category Type
Select Category Type
2Select Product Type
Select Product Type
3Select {MODEL} Type
Select {MODEL} Type
Sample Model Number Tags
Model numbers can be made up of numbers (1005400, for example) or a combination of letters and numbers (LAT1000AAE). The model number will most likely appear on either a paper sticker or a metal plate. Your appliance's model number tag may look similar to the sample model number tags shown here (model number highlighted in yellow):
Model has been saved to My Models. If you're not signed in, your lists are available on this device and will expire within 30 days.
Model has been saved to My Models.
This ice bin assembly is designed to collect and store ice produced by the refrigerator’s ice maker, ensuring it is readily available for dispensing. Constructed from durable white plastic, it measure...
This a genuine OEM temperature sensor, designed for use with refrigerators, and is an individual part. This temperature sensor is responsible for detecting and adjusting the temperature in your refrig...
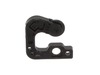
This Samsung auto-close lever assembly is an OEM replacement part made for use in Samsung refrigerators. It is a black lever mechanism, measuring approximately 2 inches by 2 inches. When the fridge do...
This is a power cord made for Samsung refrigerators. If your current power cord is damaged, broken, or no longer supplying power to your fridge, you can disconnect it from the wall outlet, strip it fr...
This is a temperature sensor designed for use within Samsung refrigerators. Temperature sensors are used to accurately detect the internal temperature of your fridge and communicate with the control b...
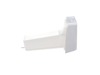
This genuine OEM door hinge bushing or grommet is installed inside the door panel of your refrigerator. It creates a smooth surface for the door hinge pin to pivot in, preventing door misalignment and...
This is a Y-clip assembly designed for use with various Samsung refrigerators. This Y-clip is installed in the freezer compartment of the refrigerator and is intended to fix any issues if the ice make...
This roller wheel axle pin (part number DA61-01920A) is for refrigerators. Roller wheel axle pin DA61-01920A attaches the roller wheel to the roller wheel bracket. Wear work gloves to protect your han...
$9.62
In Stock
Order now and your part arrives by Apr 10
Questions And Answers for RF28K9580SR
Be the first to ask our experts a question about this model!
✖
Ask a Question
Ask our experts a question on this model and we'll respond as soon as we can.
This is the Samsung French door refrigerator style that so many people have complained about freezing up and not cooling the top section. I first changed out the defrost thermostat and this did not correct the problem. I done a quick resistance check on the temp sensor that's mounted on the evaporator itself. The resistance would change w
... Read morehen holding an ice cube on the sensor so I just assumed it was ok. PLEASE TAKE NOTE: When performing a resistance check on this sensor, make sure your readings match the Samsung temp/resistance chart in their literature. My sensor was way off calibration and was causing the freeze up. Its working as designed now and DW is happy again. Learn from my mistake.
After watching a few you tube videos on the Samsung ice maker removal, this repair was not that bad. The key to this repair is PATIENCE! Unplug your fridge, have a steamer and Phillips & straight screw driver handy. Remove ice bucket, place rags or paper towels in bottom half of ice maker. Fire up your steamer and melt ALL ice befor
... Read moree proceeding! Once all ice is gone, remove one screw to the left on cover for the wiring, remove plastic wire cover , remove screw just below ice maker itself, push locking tab in to release plastic lower tray attached to bottom of ice maker. Once you do this it exposes the refrigerant line (u shaped) under ice maker. If you can still see ice once that plastic cover drops down, yep... more steaming , if you try chip away any remaining ice damage will result to that refrigerant line then it’s game over. Fridge needs to be replaced! Once fully clear of ice , carefully pry that refrigerant line down a bit so it is released from the bottom of ice maker. Do not bend it down too far only enough so it will clear when pulling ice maker out. Un clip yellow electrical connector to ice maker and gently pull the ice maker towards you and down to fully remove. As you are pulling it out be sure refrigerant line does not get hung up. Once removed you may find more ice build up on top of auger assembly. All ice/ frost needs to be gone. Follow u shaped refrigerant line back towards the styrofoam, push one clip on each tube towards the back with the tab facing down! The plastic rectangle trim piece slides off fairly easy. This web page gives detailed pictures on what to expect, as there could be other issues in that ice compartment that need addressed! https://edmondappliancerepairokc.com/samsung-french-door-ice-maker-frosting-up/ Hope this helps, it sure made a difference in mine. The ice maker has been producing ice like never before!
OPENED THE LEFT SIDE REFRIGERATOR DOOR WHERE THE DEFECTIVE MECHANISM WAS. GOT UP ON THE FIRST STEP OF THE STEP STOOL,REMOVED THE PHILLIPS HEAD RETAINING SCREW FROM THE BROKEN PART.PUT THE NEW CLOSING MECHANISM IN PLACE AND RE-INSTALLED THE PHILLIPS HEAD SCREW. STEPPED DOWN FROM THE STEP STOOL AND SHUT THE REFRIGERATOR DOOR.