Your coupon for will be reflected when you check out!
✖
Your coupon for
✖
Hello!
You're visiting the PartSelect site in U.S.
Would you like to shop on the Canadian site?
Stay on this site
Go to Canadian site
✖
Model Number Locations
1Select Category Type
Select Category Type
2Select Product Type
Select Product Type
3Select {MODEL} Type
Select {MODEL} Type
Sample Model Number Tags
Model numbers can be made up of numbers (1005400, for example) or a combination of letters and numbers (LAT1000AAE). The model number will most likely appear on either a paper sticker or a metal plate. Your appliance's model number tag may look similar to the sample model number tags shown here (model number highlighted in yellow):
Model has been saved to My Models. If you're not signed in, your lists are available on this device and will expire within 30 days.
Model has been saved to My Models.
The bake element is located on the bottom of the oven. If your oven will not heat properly it may be due to a faulty or damaged baking element. If you can see that the element has been separated or bl...
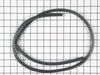
This burner drip bowl, also referred to as a drip pan or burner pan, is a genuine OEM replacement part that is designed to fit ranges. The bowl is located beneath the burner where it catches food part...
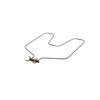
The 8-inch surface element switch is also known as an infinite heat switch, and is a part for your range. It controls the large surface element. It will turn the element on and off, and allow you to c...
This 40-Watt light bulb is sold individually.
It is specially designed to withstand extreme temperatures, so this bulb is compatible with a variety of appliance types including refrigerators, ranges,...
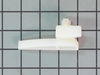
This is a replacement drawer support for your oven. The drawer support provides stability to the drawer unit as it opens and closes. If your oven drawer is hanging or will not slide in or out efficien...
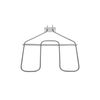
This broil element is designed for wall ovens and plays a critical role in achieving high-temperature cooking during broil cycles. Positioned at the top of the oven cavity, it delivers intense, direct...
This metal oven rack provides a stable and durable surface for baking, roasting, and broiling inside your oven. Designed to fit select gas range and oven models, it promotes even heat circulation and ...
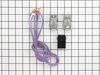
This part is the replacement light socket for your oven. The oven light socket provides power to the light, and at the same time holds the light bulb in place.
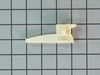
Ensure the stability of your GE range with this leveling leg. An essential accessory for your appliance, it helps maintain balance and provides support. With its adjustable design, you have the abilit...
$17.28
In Stock
Order now and your part arrives by Jul 3
Questions And Answers for RBS330DR1WW
Ask our experts a question about this model and we'll get back to you as soon as possible!
1 question answered by our experts.
Sort by:
< Prev
1
Next >
Search filter:
Clear Filter
Your search term must have 3 or more characters.
Keep searches simple. Use keywords, e.g. "leaking", "pump", "broken" or "fit".
Sorry, we couldn't find any existing answers that matched.Try using some different or simpler keywords, or submit your new question by using the "Ask a Question" button above!
Chuck
November 5, 2024
my front right burner is not working. What do i need to fix it?
For model number RBS330DR1WW
Hi Chuck,
Thank you for your question. If the front right burner is not working, the issue may be with either the element or the burner switch. You will need to test them for continuity with a multimeter to see which one is causing the issue. Before removing and testing the parts, unplug the range from the electrical oven. To test the element, touch each of the terminals one at a time with one probe while holding the other probe to the outside surface of the element. If either terminal shows continuity, it is defective. To test the entire element for continuity, place each of the probes on the terminals, one on each. The exact reading you should receive varies between models, refer to your owner’s manual to determine what yours should be, but if any element has a reading outside of 19 to 115 ohms, it is defective. If you do not receive the correct readings from the tests above or find damage on your element, you will need a replacement surface burner element. When checking the burner switch, Inspect the wires near the switch for any signs of burning, or overheated wires and terminals. If no issues are found, remove the switch in order to test it for continuity. Using a multimeter on the Rx1 setting, test for continuity by touching the L1 and H1 terminals with the probes. Once you have completed that test, touch the probes to the L2 & H2 terminals. If your test results indicate that there is no continuity between one or both sets of terminals, you need a replacement infinite switch. We hope this helps!
First I slid the stove out and unpluged it, then removed two screws,slid out element, disconected two wires, slid new element in to place, pluged two wires in ,put into place and installed two screws, pluged stove back in, and turned on to try. Works perfect.
1)Turn off power to stove 2)remove 2 bolts holding heating element 3)pull element out of the back of the oven about 8" so that the wire connects is visable 4)pull wire clips off of heating element and remove element from the oven 5)put wire clips on the new heating element 6)push new heating element back into the
... Read moreholes in the back of the oven 7)screw botls back into the oven holding the heating element in place 8)Turn power back on
unplugged unit pulled it away from wall took off the backplates traced wire to plug replaced with part ordered very smooth operation. the most impressive thing to me was i ordered part on computer and it was at my door in 30 hours awesome.