Your coupon for will be reflected when you check out!
✖
Your coupon for
✖
Hello!
You're visiting the PartSelect site in U.S.
Would you like to shop on the Canadian site?
Stay on this site
Go to Canadian site
✖
Model Number Locations
1Select Category Type
Select Category Type
2Select Product Type
Select Product Type
3Select {MODEL} Type
Select {MODEL} Type
Sample Model Number Tags
Model numbers can be made up of numbers (1005400, for example) or a combination of letters and numbers (LAT1000AAE). The model number will most likely appear on either a paper sticker or a metal plate. Your appliance's model number tag may look similar to the sample model number tags shown here (model number highlighted in yellow):
Model has been saved to My Models. If you're not signed in, your lists are available on this device and will expire within 30 days.
Model has been saved to My Models.
This 40-Watt light bulb is sold individually.
It is specially designed to withstand extreme temperatures, so this bulb is compatible with a variety of appliance types including refrigerators, ranges,...
This part is the replacement light socket for your oven. The oven light socket provides power to the light, and at the same time holds the light bulb in place.
This light bulb lens covers the interior light bulb in an oven, range, or stove. No tools are necessary to replace this part. Simply slide off the wire bracket to remove the existing light bulb lens. ...
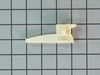
Ensure the stability of your GE range with this leveling leg. An essential accessory for your appliance, it helps maintain balance and provides support. With its adjustable design, you have the abilit...
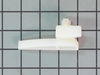
Introducing the Genuine Replacement Drawer Glide specifically designed for General Electric Range/stove/ovens. This is a crucial element that supports your broil or storage drawer, effortlessly allowi...
This right-side drawer glider allows smooth and stable drawer movement. Designed for durability and precise alignment, it supports effortless opening and closing.
We understand how difficult it can be when your washer isn't performing like it used to. That's why we want to introduce you to this genuine Whirlpool CNTRL-ELEC appliance part. This isn't just a part...
This spacer is located between the handle and the outside door panel. They are sold individually, and are usually recommended to be purchased in pairs.
This part is the replacement spring for the radiant element in your range. It is black in color, curved in shape, and is approximately 1 inch by 1/2 an inch. The radiant element spring is found beneat...
$16.05
In Stock
Order now and your part arrives by Jun 11
Questions And Answers for QAS740RM1SS
Ask our experts a question about this model and we'll get back to you as soon as possible!
1 question answered by our experts.
Sort by:
< Prev
1
Next >
Search filter:
Clear Filter
Your search term must have 3 or more characters.
Keep searches simple. Use keywords, e.g. "leaking", "pump", "broken" or "fit".
Sorry, we couldn't find any existing answers that matched.Try using some different or simpler keywords, or submit your new question by using the "Ask a Question" button above!
Joy
January 30, 2025
The broiler element suddenly doesn't work. Is there a broler element replacement part for this medel electric range?
For model number QAS740RM1SS
Helo Joy, thank you for your inquiry. The broil element for your model is part number PS12726092. Glad to be of assistance!
Unplugged the appliance for safety. Removed two 1/4" screws that held the assembly in place. Carefully removed the wire guard that retains the glass shield. Unscrewed old light bulb and replaced with new part. Reversed the steps after cleaning glass cover.
I had to call for a appointment for repair with GE Appliance because I thought then it . .was something electrical. The technician came out & checked everything out, turned out it was not electrical, The technician went out to his truck got a light bulb from his truck, put it in & it worked. It cost me $121.00 for trip charge from GE appl
... Read moreiance for a light bulb that worked, your light bulbs were defective twice. Very disappointed with your products, cost me alot of money for a good light bulb thru GE appliance
1) Turn off power at circuit breaker panel 2) Slide out Range from wall 3) Unplug Range 4) Remove back panel and unplug electrical connections to socket 5) From front of oven, remove glass cover over old oven light bulb and remove flange that holds socket and bulb 6) Remove old socket from mounting flange and disc
... Read moreard. 7) Place new socket into mounting flange 8) Screw mounting flange and new socket into the oven from front. Reattach electrical connections from back. 9) Screw in new light bulb from front 10) Replace existing glass cover over new light bulb and snap wire holder in place 11) Replace back panel 11) Plug in range 12) Slide range back to original position 13) Turn on power Works like a charm! Thanks for having the parts after 30 years!