Your coupon for will be reflected when you check out!
✖
Your coupon for
✖
Hello!
You're visiting the PartSelect site in U.S.
Would you like to shop on the Canadian site?
Stay on this site
Go to Canadian site
✖
Model Number Locations
1Select Category Type
Select Category Type
2Select Product Type
Select Product Type
3Select {MODEL} Type
Select {MODEL} Type
Sample Model Number Tags
Model numbers can be made up of numbers (1005400, for example) or a combination of letters and numbers (LAT1000AAE). The model number will most likely appear on either a paper sticker or a metal plate. Your appliance's model number tag may look similar to the sample model number tags shown here (model number highlighted in yellow):
Model has been saved to My Models. If you're not signed in, your lists are available on this device and will expire within 30 days.
Model has been saved to My Models.
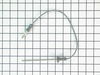
The temperature sensor, also known as the oven temperature sensor assembly is usually found in the back of the oven. The function of the oven temperature sensor assembly is to measure the temperature ...
This 40-Watt light bulb is sold individually.
It is specially designed to withstand extreme temperatures, so this bulb is compatible with a variety of appliance types including refrigerators, ranges,...
The function of the oven sensor is to detect the temperature within the oven cavity. If you notice that the oven is too hot or too cold, or it is not heating evenly, you may need to replace the oven s...
This 8-inch radiant stovetop element is a genuine replacement part designed to deliver consistent heat to cookware during stovetop use. It fits select electric ranges and cooktops and is engineered to...
This part is the replacement oven bulb lens cover. It is made of glass and is approximately 3 inches in diameter. The lens cover is rigid and protects the oven light bulb from being damaged. The main ...
The GE Oven Door Window Pack Assembly is a genuine OEM part that fits select GE ranges and ovens. It includes a heat-resistant inner glass panel, frame, and seals, providing insulation and clear visib...
This part provides a way of connecting individual electrical wires and offers protection of the device from electrical surges (voltages and/or currents).
This surface element is for ranges. Surface elements supply the heat to a cooking area on top of the range. Unplug the range or shut off the house circuit breaker for the range before installing this ...
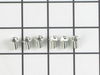
This part is a replacement screw for your oven. It is made of black metal and is sold individually. This screw is approximately 1/4 inch in diameter and about 1/2 inch in length. It is designed to con...
Ask our experts a question about this model and we'll get back to you as soon as possible!
2 questions answered by our experts.
Sort by:
< Prev
1
Next >
Search filter:
Clear Filter
Your search term must have 3 or more characters.
Keep searches simple. Use keywords, e.g. "leaking", "pump", "broken" or "fit".
Sorry, we couldn't find any existing answers that matched.Try using some different or simpler keywords, or submit your new question by using the "Ask a Question" button above!
Becky
July 29, 2021
I need to clean the inside of my oven door but my manual doesn’t tell me how. What type screwdriver do I use? A Philips won’t work. Where can I get one?
For model number PS950SF1SS
Hello Becky, Thank you for the question. The Screw for the inside Door Panel uses a Torx Screw driver or Bit. We hope this helps!
Hello Harold, thank you for getting in touch. According to our research, the control board, part number PS8767155, is compatible with your model number. We hope this helps.
Removed six 1/4" hex nuts on rear of oven. Then through front/inside removed a single 1/4" hex nut to actually remove sensor. Unplug sensor connector, remove. Reversed steps, push oven back in place and plugged in. Tested oven function.
I had to remove the oven from the wall because the sensor plug connction is behind the unit. Two screws hold the sensor inside the oven and then I disconnected the lead and pulled the sensor out from the front. I installed the new sensor, tightened the two screws holding it in and connected the lead. Then reinstalled the oven into the wal
... Read morel. Overall, a very easy repair once you get the oven out.
The existing terminal block on my Ge oven/Range had melted due to a loose wire causing sparking and starting the plastic casing of the terminal block on fire and melting it, Part select made the part easy to find and had it at my house in 2 days. All I had to do was remove six screws to take the back sheet metal cover off of the oven. U
... Read morenscrew the terminal connections remove two mounting screws that held the terminal on to the oven body. This was a little trickier than it should have been because the melted plastic had reformed making it very hard to access the mounting screws. i then mounted the new piece and plugged the oven in, it took 15 minutes and was very easy. definitely saved me at-least a $100 for the service call i would have made if finding the part wasn't so convenient